
Ultrafast Spectroscopy - femtosecond spectroscopy
Diffractionlimitspot size
Diffraction is an optical effect which limits the total resolution of your photography — no matter how many megapixels your camera may have. It happens because light begins to disperse or "diffract" when passing through a small opening (such as your camera's aperture). This effect is normally negligible, since smaller apertures often improve sharpness by minimizing lens aberrations. However, for sufficiently small apertures, this strategy becomes counterproductive — at which point your camera is said to have become diffraction limited. Knowing this limit can help maximize detail, and avoid an unnecessarily long exposure or high ISO speed.
Even when a camera system is near or just past its diffraction limit, other factors such as focus accuracy, motion blur and imperfect lenses are likely to be more significant. Diffraction therefore limits total sharpness only when using a sturdy tripod, mirror lock-up and a very high quality lens.
This calculator shows a camera as being diffraction limited when the diameter of the airy disk exceeds what is typically resolvable in an 8x10 inch print viewed from one foot. Click "show advanced" to change the criteria for reaching this limit. The "set circle of confusion based on pixels" checkbox indicates when diffraction is likely to become visible on a computer at 100% scale. For a further explanation of each input setting, also see the depth of field calculator.
Abbe diffractionlimitderivation
Airy Diameter: 21.3 µm Camera Canon EOS 1Ds Canon EOS 1Ds Mk II Canon EOS 1Ds Mk III, 5D Mk II Canon EOS 1D Canon EOS 1D Mk II Canon EOS 1D Mk III Canon EOS 1D Mk IV Canon EOS 1D X Canon EOS 5D Canon EOS 5D Mk III Canon EOS 7D,60D,550D,600D,650D,1D C Canon EOS 50D, 500D Canon EOS 40D, 400D, 1000D Canon EOS 30D, 20D, 350D Canon EOS 1100D Canon PowerShot G1 X Canon PowerShot G11, G12, S95 Canon PowerShot G9, S100 Canon PowerShot G6 Nikon D3, D3S / D700 Nikon D40, D50, D70 Nikon D4 Nikon D60, D80, D3000 Nikon D3X Nikon D2X, D90, D300, D5000 Nikon D800 Nikon D5100, D7000 Sony SLT-A65, SLT-A77, NEX-7 Sony DSC-RX100 Pixel Diameter: 6.9 µm
Since the divergent rays now travel different distances, some move out of phase and begin to interfere with each other — adding in some places and partially or completely canceling out in others. This interference produces a diffraction pattern with peak intensities where the amplitude of the light waves add, and less light where they subtract. If one were to measure the intensity of light reaching each position on a line, the measurements would appear as bands similar to those shown below.
The form below calculates the size of the airy disk and assesses whether the camera has become diffraction limited. Click on "show advanced" to define a custom circle of confusion (CoC), or to see the influence of pixel size.
In practice, the diffraction limit doesn't necessarily bring about an abrupt change; there is actually a gradual transition between when diffraction is and is not visible. Furthermore, this limit is only a best-case scenario when using an otherwise perfect lens; real-world results may vary.
Diffractionlimittelescope
Note: above airy disk will appear narrower than its specified diameter (since this is defined by where it reaches its first minimum instead of by the visible inner bright region).
Diffractionlimitof microscope
As a result of the sensor's anti-aliasing filter (and the Rayleigh criterion above), an airy disk can have a diameter of about 2-3 pixels before diffraction limits resolution (assuming an otherwise perfect lens). However, diffraction will likely have a visual impact prior to reaching this diameter.
Now that we’ve explored the different types of ND filters let’s dive into how to use them to their maximum potential.Controlling ExposureThe primary use of ND filters is to control exposure. For instance, if you’re shooting a waterfall or a flowing stream, you may want to use a slower shutter speed to capture the water’s motion. However, doing so without an ND filter would result in overexposed images. By using an ND filter, you can reduce the amount of light entering the lens, allowing for a slower shutter speed.Creating Motion Blur and Capture a Sense of TimeND filters are useful in creating motion blur in your images. By using a slow shutter speed, you can capture the movement of clouds, water, or any other subject that moves, resulting in a visually appealing image.Balancing ExposureND filters are perfect for balancing exposure when shooting a scene with a significant difference in brightness between the foreground and the sky. By using a graduated ND filter or GND, you can position the denser part of the filter over the brighter area, achieving a balanced exposure.Shooting Wide Aperture in Bright LightShooting wide aperture in bright light can be challenging, as it can result in overexposed images. Using an ND filter, you can reduce the amount of light entering the lens, allowing for a wider aperture and a shallower depth of field.
Diffractionlimitformula
Light rays passing through a small aperture will begin to diverge and interfere with one another. This becomes more significant as the size of the aperture decreases relative to the wavelength of light passing through, but occurs to some extent for any aperture or concentrated light source.
For additional reading on this topic, also see the addendum: Digital Camera Diffraction, Part 2: Resolution, Color & Micro-Contrast
The size of the airy disk is primarily useful in the context of pixel size. The following interactive tool shows a single airy disk compared to pixel size for several camera models:
Technical Note: Independence of Focal Length Since the physical size of an aperture is larger for telephoto lenses (f/4 has a 50 mm diameter at 200 mm, but only a 25 mm diameter at 100 mm), why doesn't the airy disk become smaller? This is because longer focal lengths also cause light to travel farther before hitting the camera sensor -- thus increasing the distance over which the airy disk can continue to diverge. The competing effects of larger aperture and longer focal length therefore cancel, leaving only the f-number as being important (which describes focal length relative to aperture size).
For an ideal circular aperture, the 2-D diffraction pattern is called an "airy disk," after its discoverer George Airy. The width of the airy disk is used to define the theoretical maximum resolution for an optical system (defined as the diameter of the first dark circle).
Are smaller pixels somehow worse? Not necessarily. Just because the diffraction limit has been reached (with large pixels) does not necessarily mean an image is any worse than if smaller pixels had been used (and the limit was surpassed); both scenarios still have the same total resolution (even though the smaller pixels produce a larger file). However, the camera with the smaller pixels will render the photo with fewer artifacts (such as color moiré and aliasing). Smaller pixels also give more creative flexibility, since these can yield a higher resolution if using a larger aperture is possible (such as when the depth of field can be shallow). On the other hand, when other factors such as noise and dynamic range are considered, the "small vs. large" pixels debate becomes more complicated...
Diffractionlimitresolution
Since the size of the airy disk also depends on the wavelength of light, each of the three primary colors will reach its diffraction limit at a different aperture. The calculation above assumes light in the middle of the visible spectrum (~550 nm). Typical digital SLR cameras can capture light with a wavelength of anywhere from 450 to 680 nm, so at best the airy disk would have a diameter of 80% the size shown above (for pure blue light).
Some diffraction is often ok if you are willing to sacrifice sharpness at the focal plane in exchange for sharpness outside the depth of field. Alternatively, very small apertures may be required to achieve sufficiently long exposures, such as to induce motion blur with flowing water. In other words, diffraction is just something to be aware of when choosing your exposure settings, similar to how one would balance other trade-offs such as noise (ISO) vs shutter speed.
Although the above diagrams help give a feel for the concept of diffraction, only real-world photography can show its visual impact. The following series of images were taken on the Canon EOS 20D, which typically exhibits softening from diffraction beyond about f/11. Move your mouse over each f-number to see how these impact fine detail:
Neutral density filters are an essential tool in every photographer and videographer’s toolkit. By understanding the different types of ND filters and how to use them, you can unlock their full potential and enhance your photography and videography skills. Remember to experiment with different densities and filter types to achieve the desired effect in your images. With a little practice, you’ll be able to master the art of using ND filters and take your photography and videography to the next level.
Diffractionlimitcalculator
As two examples, the Canon EOS 20D begins to show diffraction at around f/11, whereas the Canon PowerShot G6 begins to show its effects at only about f/5.6. On the other hand, the Canon G6 does not require apertures as small as the 20D in order to achieve the same depth of field (due to its much smaller sensor size).
Note: CF = "crop factor" (commonly referred to as the focal length multiplier); assumes square pixels, 4:3 aspect ratio for compact digital and 3:2 for SLR. *Calculator assumes that your camera sensor uses the typical bayer array.
Diffractionlimitastronomy
Camera Type Digital SLR with CF of 1.6X Digital SLR with CF of 1.5X Digital SLR with CF of 1.3X Digital SLR with 4/3" sensor 35 mm (full frame) Digital compact with 1/3" sensor Digital compact with 1/2.3" sensor Digital compact with 1/2" sensor Digital compact with 1/1.8" sensor Digital compact with 2/3" sensor Digital compact with a 1" sensor APS 6x4.5 cm 6x6 cm 6x7 cm 5x4 inch 10x8 inch
Smoothing or softening of waterBy using an ND filter, you can achieve longer shutter speeds, which in turn creates a blur effect on moving water. This effect is commonly used in landscape photography, particularly when capturing waterfalls or streams. The result is a smooth, flowing image that creates a sense of movement and tranquility.Emphasizing water flowSimilarly, ND filters can also be used to emphasize the flow of water in an image. By choosing the appropriate filter strength, you can create a balance between the blur effect and the detail of the water. This technique is particularly useful in capturing the energy and power of ocean waves.Smoothing or softening of cloudsND filters can also be used to create a dreamy effect on clouds. By using a long exposure, the clouds will appear to move across the sky, creating a sense of movement and dynamism. This technique is particularly useful in landscape photography, where a dramatic sky can add depth and dimension to an image.Emphasizing movement in an imageND filters can also be used to emphasize movement in an image. By using a long exposure, you can create a blur effect on moving subjects, such as people, cars, or animals. This technique can add a sense of energy and motion to an image, making it more dynamic and interesting.Creating cloud movementIn addition to creating a blur effect on clouds, ND filters can also be used to create a sense of movement and direction in the clouds. By using a filter with a longer exposure time, you can create streaks of cloud movement that add a sense of drama and tension to an image.Removing moving objectsLastly, ND filters can be used to remove moving objects from an image. By using a long exposure, anything that moves within the frame will be blurred or disappear entirely. This technique is particularly useful in busy scenes, such as cityscapes or tourist attractions, where you want to remove distracting elements from the image.
This should not lead you to think that "larger apertures are better," even though very small apertures create a soft image; most lenses are also quite soft when used wide open (at the largest aperture available). Camera systems typically have an optimal aperture in between the largest and smallest settings; with most lenses, optimal sharpness is often close to the diffraction limit, but with some lenses this may even occur prior to the diffraction limit. These calculations only show when diffraction becomes significant, not necessarily the location of optimum sharpness (see camera lens quality: MTF, resolution & contrast for more on this).

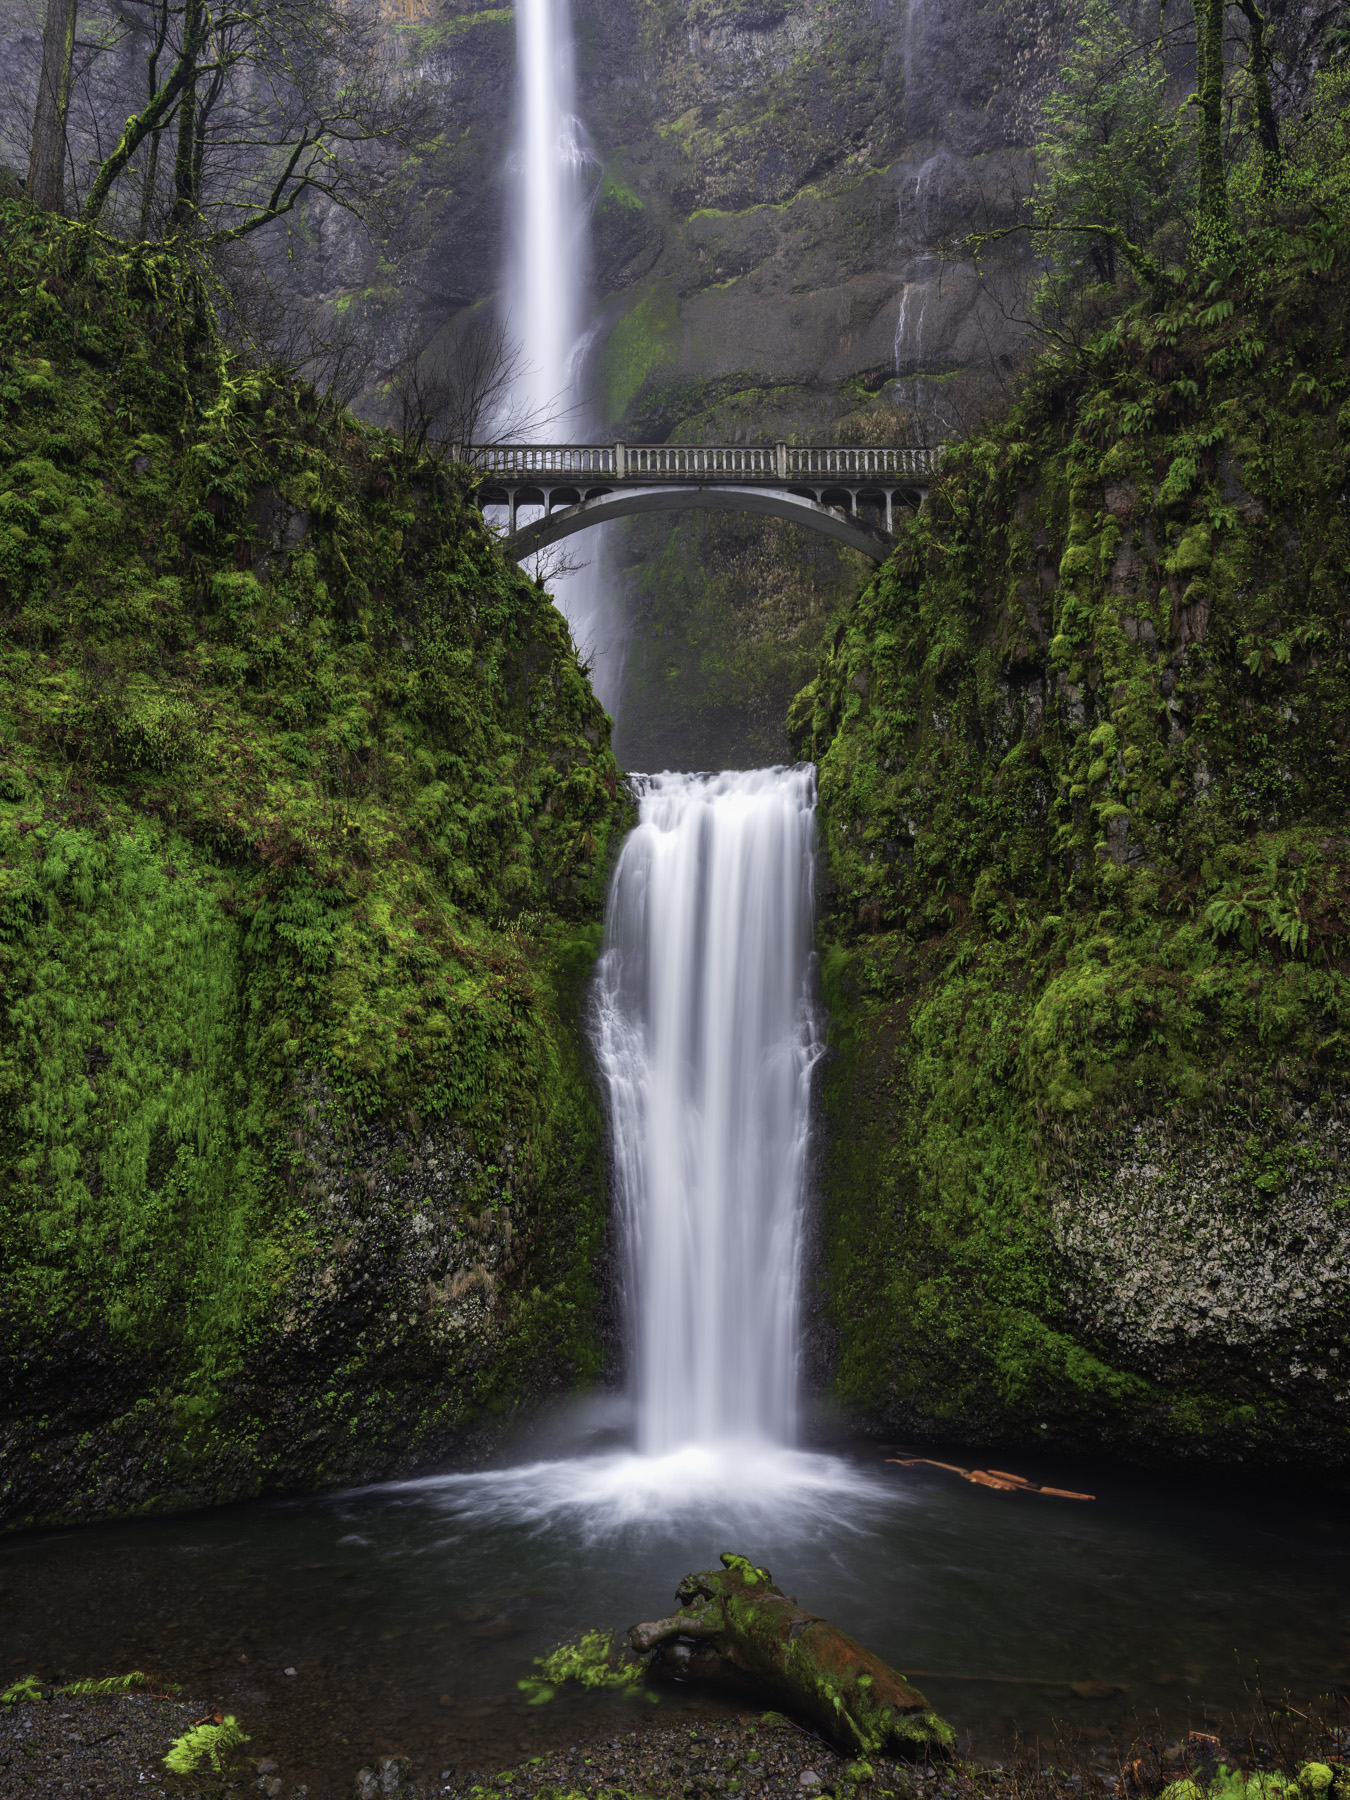
A neutral density filter or ND Filter is a camera accessory that reduces the amount of light entering the camera lens, allowing for a longer exposure time. The filter’s primary function is to balance the exposure of a scene by reducing the brightness of the brightest elements without affecting color or contrast. ND filters come in different levels of density, which determine the amount of light that passes through the filter.ND Filters enable you to capture sharper images and photograph at larger apertures allowing you to control diffraction. For example, if the subject is a waterfall during the day and the target shutter speed is 2 seconds to smooth out the flowing water, without an ND the aperture will be small ie f/22 and this will cause a reduction in sharpness due to diffraction. With an ND Filter, it will allow you to reduce the aperture ie f/10 to get a sharper image.
Camera Canon EOS 1Ds Canon EOS 1Ds Mk II Canon EOS 1Ds Mk III, 5D Mk II Canon EOS 1D Canon EOS 1D Mk II Canon EOS 1D Mk III Canon EOS 1D Mk IV Canon EOS 1D X Canon EOS 5D Canon EOS 5D Mk III Canon EOS 7D,60D,550D,600D,650D,1D C Canon EOS 50D, 500D Canon EOS 40D, 400D, 1000D Canon EOS 30D, 20D, 350D Canon EOS 1100D Canon PowerShot G1 X Canon PowerShot G11, G12, S95 Canon PowerShot G9, S100 Canon PowerShot G6 Nikon D3, D3S / D700 Nikon D40, D50, D70 Nikon D4 Nikon D60, D80, D3000 Nikon D3X Nikon D2X, D90, D300, D5000 Nikon D800 Nikon D5100, D7000 Sony SLT-A65, SLT-A77, NEX-7 Sony DSC-RX100
Note how most of the lines in the fabric are still resolved at f/11, but have slightly lower small-scale contrast or acutance (particularly where the fabric lines are very close). This is because the airy disks are only partially overlapping, similar to the effect on adjacent rows of alternating black and white airy disks (as shown on the right). By f/22, almost all fine lines have been smoothed out because the airy disks are larger than this detail.
Another complication is that sensors utilizing a Bayer array allocate twice the fraction of pixels to green as red or blue light, and then interpolate these colors to produce the final full color image. This means that as the diffraction limit is approached, the first signs will be a loss of resolution in green and pixel-level luminosity. Blue light requires the smallest apertures (highest f-stop) in order to reduce its resolution due to diffraction.
Diffraction thus sets a fundamental resolution limit that is independent of the number of megapixels, or the size of the film format. It depends only on the f-number of your lens, and on the wavelength of light being imaged. One can think of it as the smallest theoretical "pixel" of detail in photography. Furthermore, the onset of diffraction is gradual; prior to limiting resolution, it can still reduce small-scale contrast by causing airy disks to partially overlap.
When the diameter of the airy disk's central peak becomes large relative to the pixel size in the camera (or maximum tolerable circle of confusion), it begins to have a visual impact on the image. Once two airy disks become any closer than half their width, they are also no longer resolvable (Rayleigh criterion).
There are various types of ND filters, each with its unique characteristics and applications.Solid ND FiltersSolid ND filters are the most common type of ND filters. They are available in different densities, ranging from ND2 (1 Stop) to ND100K(20 Stop), with each density value indicating the number of stops by which the filter reduces light. Solid ND filters are useful in situations where you want to achieve a longer exposure time during the day or when using a wide aperture.Graduated ND Filters Graduated ND filters have a graduated density that varies from one end to the other, with one side being denser than the other. These filters are useful when shooting a scene with a significant difference in brightness between the foreground and the sky. By positioning the denser part of the filter over the brighter area, you can achieve a balanced exposure.Variable ND FiltersVariable ND filters allow you to adjust the density of the filter by rotating the filter ring. These filters are perfect for situations where lighting conditions are continually changing, such as shooting in a forest or near the water.


 Ms.Cici
 8618319014500