
Spectrophotometer Machine For Your Laboratory - laboratory spectrophotometer
This is sort of a pixel peepers’ article: you could go through your entire photography career and never learn about lens aberrations and be just fine. But if you like the idea of understanding the fine details behind lens performance — and how it affects your photos — this article is for you.
Awesome job Ian! You definitely had the answers to a few questions I’ve been pondering on for quite some time now. How you liking that Sony 28mm f2.0? Did you ever get a better working copy? I’ve been using that lens from everything from the night sky to the water photography I do. It’s an amazing piece of glass!
Some lenses, particularly those with floating lens elements (usually zooms and lenses with internal focusing mechanisms), won’t always render aberrations exactly the same at different focus positions. Since we’re photographing a computer screen close to the camera, rather than stars at infinity, it’s possible that some lenses might show different real-world performance when compared directly to my test. That said, in my experience, the aberration shapes tend to stay fairly representative of what you should expect from a lens, even in my tests with lenses that use floating lens elements. I’ll make it a note to always compare the test results with real world results to make sure that there are no pronounced differences.
I’ve been working on an easy method to test all of my future lenses for their aberration performance. I wanted to make the test reasonably easy to understand and provide a good visual representation and success criteria for judging lens aberration performance. The goal of the test is to allow photographers to understand how one lens performs versus another and to help define the threshold of aperture setting (f/number) beyond which the lens performs acceptably.
Since vignetting changes the appearance of the overall brightness of the image, it’s especially detrimental to video production where one shot might need to match in brightness with another shot, and for this reason cinema lenses often categorize their lenses with T-stops instead of F-stops which account for the “Transmittance” of the lens. Lenses set to equal T-stops should produce images with similar brightness. Vignetting is most common at low f/numbers and on wide angle lenses. If you want to eliminate vignetting, stopping the lens to a higher f/number (smaller aperture) will usually reduce the effect.
The concepts explored in this discussion are derived from the science of Geometrical Optics, will lead to an understanding of the magnification process, the properties of real and virtual images, and lens aberrations or defects.
i want to buy a new camera, which of the following would you recommend the most: Nikon D5500, Nikon D5300, Sony Alpha A6000? (I ll use it for astrophotography aswell as for normal photography)
This means that my initial tests here aren’t exactly the best way to run the test for APS-C. Showing an APS-C crop taken from a full frame image isn’t a 100% fair comparison of how a dedicated APS-C system would perform. For the APS-C test, we should re-frame such that the whole screen area occupies the 1/4 upper-right of the APS-C frame, rather than only framing a smaller crop of the frame as I did above (oops!). I think this modifies slightly the way I will need to run this test on systems that have both APS-C and Full frame use of lenses like Canon, Nikon and Sony: I’ll have to make one set of images for full frame and then using the APS-C crop mode of the camera, make another re-framed set of images for the APS-C results such that the whole test image fits in the APS-C frame, just like the full frame test. I think that’s the only “fair” way to keep the comparisons consistent. Thanks for raising the question, this makes it a better test!
In astrophotography, chromatic aberration often shows up as a colored edge on one side of a star. Lens manufacturers often use a combination of different shaped low and high dispersion lens elements to correct for chromatic aberrations. That said, it’s still common for many modern lenses to show purple or green fringed highlights in high contrast areas of the image. In the image above from my Rokinon 12mm f/2 review, you can see very distinct purple edges around one side of all the overexposed highlights and a small amount of green on the opposite side of the highlights — a perfect example of lateral chromatic aberration.
By photographing this image on my computer screen with a lens at various apertures, it’s possible to see and measure the aberration characteristics of the lens at those aperture settings. Every lens is tested by making a photo perpendicular to the screen such that the screen occupies the upper right quadrant of the image. As long as we’re reasonably consistent with framing, the image size of the dots should be roughly the same size relative to the sensor size, regardless of the lens or camera system used, which gives us a good way to compare the aberration shapes of one lens to another and across multiple systems. As an example, I have samples made with a Canon EF 50mm f/1.8 STM lens which can be used on either a full-frame camera or an APS-C camera. Two sets of data are collected: one at each aperture framed with a full frame sensor and another set framed on an APS-C sensor (or via APS-C crop mode). If testing on another sensor size like Micro 4/3″ or 1″ sensors, the test would be performed identically.
Just from my testing of how I like to use my lenses, an aberration level of 0.4% or less is considered “excellent,” less than 1% is “acceptable,” while aberration levels of 1% or higher is considered “poor” performance. It’s kind of a coarse and arbitrary scale, but it gives us a way to compare lenses on pretty much any camera system. APS-C corners, which tend to show lower aberration levels anyway, are always measured relative to the height of the APS-C frame. If the test were performed on even smaller camera systems, like Micro 4/3 or 1″, they would be measured relative to the height of those respective images. For some visual reference, the dimensions of each square crop in the test below is exactly 2mm by 2mm as measured on a full frame camera’s sensor and 1.33mm as measured on an APS-C sensor.
Also on the subject of consistency, another issue that comes to mind is that the viewfinders in some DSLRs don’t cover 100% of the area of the sensor. So, in those cases, I imagine you’d have to use live view. This is probably worth specifying if you write up a readme to go with the test chart.
Microscope objectives are the most important components of an optical microscope because they determine the quality of images that the microscope is capable of producing.
I did use a tripod, which was a great help for consistency. I used Aperture Priority mode, varying the aperture and with ISO set to 100. I found that I actually had to set the exposure compensation to -4 for the black screen background to be dark enough.
The microscope is an instrument designed to make fine details visible. This section discusses the evolution of the microscope from its beginning in the 1600s to modern-day sophisticated microscopes.
[button font_size=”16″ color=”#136e9f” text_color=”#ffffff” url=”https://www.paypal.com/cgi-bin/webscr?cmd=_donations&business=lonelyspeckblog%40gmail.com&item_name=These+tips+help+keep+lonelyspeck.com+running.¤cy_code=USD&source=url” target=”_blank”]Donate[/button]
Most aberrations are prevalent at low f/numbers (wide apertures). Thus, the easiest way for a photographer to try to minimize the presence of aberrations is to stop the lens to a higher f/number.
Hey Outis, your question about the APS-C frame raises some good concerns about shooting across multiple sensor sizes which is making me think about the best way to maintain an even test across any camera system. Here’s what I think:
The mechanical tube length of an optical microscope is defined as the distance from the nosepiece opening, where the objective is mounted, to the top edge of the observation tubes where the eyepieces (oculars) are inserted.
It’s not possible to completely eliminate reflections off of polished glass surfaces so when bright light enters a lens, it can bounce around and produce flare spots on the image. With astrophotography, flare is rarely an issue since it’s not common to see extremely bright light sources in astrophotos. The only instance when flare might occur in an astrophoto is when shooting with the moon in the frame.
Köhler Illumination provides bright, even illumination throughout the viewfield and is the method of choice in all modern microscopy and photomicrography for transmitted as well as reflected light techniques.
[button font_size=”16″ color=”#136e9f” text_color=”#ffffff” icon=”arrow-left” url=”https://www.lonelyspeck.com/astrophotography-101/” target=”_self”]Back to Astrophotography 101[/button]
Brian O. Flynn, John C. Long, Matthew Parry-Hill, Kirill I. Tchourioukanov, and Michael W. Davidson - National High Magnetic Field Laboratory, 1800 East Paul Dirac Dr., The Florida State University, Tallahassee, Florida, 32310.
These tutorials explore various aspects in preparing a microscope for Köhler illumination, and allow students to practice alignment of the microscope without the burden of requiring the presence of a physical instrument.
For most forms of photography, aberrations will tend to soften the image, particularly in the corners of the frame. The sharpest lenses tend to have low levels of aberration. Lens manufacturers usually go to great lengths to design a lens that has as few visible aberrations as possible, usually through the addition of corrective lens elements to their design.
A perfect example of a well-corrected lens is the monstrous Zeiss Otus 55mm f/1.4 (Amazon / B&H). It’s arguably one of the sharpest full frame lenses ever made (dpreview.com) and as a result of its complex lens design, it’s also one of the largest standard primes ever made for a full frame DSLR. So, when Zeiss brags about having 12 elements in 10 groups in the 55mm Otus, they’re talking about how many additional corrective lenses were added to achieve the improved performance. Compare that number to the much cheaper Canon 50mm f/1.8 STM (Amazon / B&H) lens, with only 6 elements in 5 groups, and we can see that it took twice as many pieces of glass for Zeiss to produce their better design. Now more lens elements doesn’t specifically mean that a lens will be better, but it does give us some indication as to how hard a lens designer tried to curb aberrations.
We are a participant in the Amazon Services LLC Associates Program, an affiliate advertising program designed to provide a means for us to earn fees by linking to Amazon.com and affiliated sites. We are also a participant in the B&H Affiliate Program which also allows us to earn fees by linking to bhphotovideo.com.
The presence of aberrations can be particularly distracting in astrophotos. My test makes for a simple standard way to compare the aberration characteristics of lenses, hopefully without being too technical. I think it’s a good standard test that should prove useful for finding lenses with particularly good performance for astrophotography.
I wanted a way to quantitatively compare lens performance so I thought of making a simple scale for measuring the aberration: measuring the width of the aberration — Adobe Photoshop has a simple measurement tool — at its longest point (in pixels) and comparing that dimension as a percentage of the height of the image (4000 pixels in the case of the Sony a7II).
Here’s what the crops from the Canon EF 50mm f/1.8 STM look like when shooting actual stars at full frame. The aberration shapes look very similar to what the test above showed.
In terms of D5500 vs. D5300, they’re basically the same camera but the D5500 has been made smaller, has a touch screen, has slightly better battery life, and no longer has GPS like the D5300.
In astrophotography, our subject tends to be point sources of light (stars) against a highly-contrasting dark background (space) so the presence of lens aberrations can appear to be more prevalent in astrophotos than in other types of photography.
What is a microscopecalled
Chromatic aberrations are imperfections in the way a lens disperses different colors of light, much like the way a prism splits light into a rainbow. Monochromatic aberrations are problems in the way a lens focuses a single color of light.
Microscopeparts and functions
Most lenses are fairly well-corrected for spherical aberration, especially from the common use of aspherical lens elements to help correct for spherical aberration. One case where I have encountered a small amount of spherical aberration is actually on my favorite lens for astrophotography: the Rokinon 24mm f/1.4 (full review), despite its use of aspherical elements. Wide open at f/1.4, the lens shows distinct halos around bright stars in the center of the image. The halos go away when stopping down to about f/1.7 to f/2.0. Overall, a small amount of spherical aberration isn’t as visually detrimental to an astrophoto as some of the other aberrations, because stars tend to still appear round and the added “hazy” look actually accentuates star colors, similar to the look you’d get if you were using a fog filter.
Departures from the conditions of Gaussian optics are known as optical aberrations. Microscope optical trains typically suffer from five common aberrations: spherical, chromatic, curvature of field, comatic, and astigmatic.
Numerical aperture is a measure of the ability to gather light and resolve specimen detail at a fixed object distance. Resolution is the smallest distance between two points on a specimen that can still be labeled as separate entities.
So for example, if an aberration measures at 62 pixels wide, the resulting aberration level is: (62/4000)*100% which is approximately 1.5%.
As far as help with positioning, the first thing to think about is to keep the optical centerline axis of the camera lens perpendicular to the computer screen. I enable grid frame-lines on the camera with live-view so that I can properly align the screen. I think Pentax cameras have this function built in as well. I usually try to have the left most row of dots and bottom most row of dots directly along the centerlines of the image and then adjust the distance of the camera to the computer such that the screen edges just fit along the edges of the image frame. It’s OK if it is a little bit off, as long as the screen is covering approximately one quarter of the area of the image. Small deviations in this manner won’t make a significant difference on the scale.
Types ofmicroscope
SK Singh · 2023 · 5 — We introduce Tricomi–Gauss beam for the first time, which possesses similar characteristics to Tricomi beams but with a finite beam cross-section.
Prismatic Laser is a Psychic-Type move introduced in Generation VII. The user utilizes the power of a prism to shoot very powerful lasers. The move uses so much ...
As an Amazon Associate, this site earns from qualifying purchases. As a B&H Affiliate, this site earns from qualifying purchases.
What is a microscopein science
Now I like to test my lenses by using them for real-world photography, so I originally thought I could just make my tests by shooting the stars with each lens and then showing the results. But this presents a lot of variability, dealing with light pollution, the moon cycle and the changes of the night sky throughout the calendar year. For my aberration test, I instead decided to make a simple test chart for my computer screen (.zip). It’s simply a black image with a square grid of 360 white dots. It can be used on LCD screens with a resolution of at least 1440px by 900px or higher.
Now let’s review the two main types of aberrations, what some of them look like for point light sources (like stars), and some real world examples of each.
Buy DBC Ag Products FA0060 First Arrival Calf Paste 60-GM Tube online at DKHardware.com. Our Pool & Patio category offers a great selection of Vet Supplies ...
What is a microscopein biology
Most low-power objectives are designed to be used "dry" with air as the imaging medium. Higher magnification objectives commonly use liquid immersion media to help correct aberrations and increase numerical aperture.
Lens manufacturers usually apply several extremely thin layers of Magnesium Fluoride or other special materials to the surface of the lens. Each layer of Magnesium Fluoride helps eliminate reflections of a specific wavelength or color of light. Most modern lenses have these “multi-coated” lens elements to try to reduce the occurrence of flare, but it is still possible to find lenses without multi-coated elements.
Microscopes are designed to include a stage where the specimen is placed for observation. Stages are equipped with a device that holds the specimen slide in place and translates the slide back and forth and/or side to side.
by V Pozzobon · 2020 · Cited by 38 — Thus measurements of household aluminum foil reflectivity spectra on both bright and matte sides were undergone. These measurements were done ...
Microscopy using oblique or epi-illumination is utilized for the study of specimens that are opaque, including semiconductors, ceramics, metals, polymers, and many others.
Hey there Stan! I just got my new copy and it’s much better than the first! I performed some aberration tests for the review and posted the initial results on our Facebook page.
HK Raut · 2011 · 1541 — Anti-reflective coatings (ARCs) have evolved into highly effective reflectance and glare reducing components for various optical and opto-electrical ...
For astrophotography, aberrations can be a distracting element of the photo. I usually gauge the quality of a lens for use with astrophotography by its aberration performance at low f/numbers.
Thank for bring up the question! I think I’ll make some revisions to the article to make sure that this is communicated and I think I’ll put together a read-me to bundle with the test image in order to keep things consistent. (Edit: Done with Revisions!)
Coma can occur in either of two directions. When the tails point away from the center of the image, it’s called “external coma” and the opposite is “internal coma.” The Voigtländer 50mm f/1.1 Nokton (Amazon / B&H) is an example of where a lens manufacturer decided that speed was more important than correcting for aberrations. The shows heavy internal coma in the mid field of its frame. It transitions into a combination of internal coma and sagittal astigmatism by the edge of the frame. Most of the severe aberrations on the 50mm f/1.1 Nokton are reduced once stopped to at least f/2.8.
Eyepieces work in combination with microscope objectives to further magnify the intermediate image so that specimen details can be clearly observed. In many instances, eyepieces are designed to eliminate chromatic aberration.
Reading a press release for a recent lens announced by Sigma will give you a taste of the geekery that surrounds the world of optics:
I personally don’t spend a lot of time trying to correct for chromatic aberration in post processing, as it’s usually not detrimental to a photo as a whole. In cases where it’s distracting, Adobe Lightroom and Adobe Camera Raw both have useful and easy to use chromatic aberration correction tools.
Jan 11, 2019 — f is the "focal length" of the virtual camera and cx, cy is the "principal point" in pixels (usually the center of the screen).
Who inventedmicroscope
What is a microscopeused for
I haven’t personally used the modern Petzval Lens but my 40mm Voigtländer (Amazon / B&H) does have a little bit of field curvature that can be seen in the portrait of Diana above. The background lights in the center of the image are more out of focus than the lights at the edges of the image, a good indicator of field curvature.
The most important thing is to try and keep consistent the size of each dot relative to the image height. We want to do this because it would allow us to compare, for example, a 10mm lens on APS-C with a 15mm lens on full frame, such that they are composed in exactly the same manner for the exact same final image framing. Both lenses have the same exactly the same field of view on their respective systems so we should treat them the same.
For focusing, we want to hit critical focus in the center of the image so only focus based on a magnified view of the central image. It can sometimes be helpful to look for the fine grid or moire effect produced by the pixels of the screen.
The image of an object can be magnified when viewed through a simple lens. By combining a number of lenses in the correct manner, a microscope can be produced that will yield very high magnification values.
All of the following aberration types are forms of monochromatic aberration. Again, monochromatic aberrations are problems in the way a lens focuses a single color of light.
Since the sensor of most cameras is flat, this will cause changes in focus across the image. Field Curvature will usually appear as if the edges of the frame are out of focus while the center is in focus and vice-versa. Field curvature is actually a trait that has been used to artistic effect in novelty lenses like the Lomography Petzval Lens (B&H) which is known to produce “swirly bokeh” due to its combination of pronounced vignetting and field curvature. I have found field curvature to be most prevalent on older lens designs. It usually doesn’t occur on more modern lenses.
Field curvature is when the lens doesn’t focus the light onto a perfectly flat plane and instead focuses on an imaginary curved surface.
An aberration is simply an imperfection in the way a lens focuses light. There are a number of different classifications of aberrations, and they affect things like the sharpness, color, focus, magnification, and distortion in your photographs.
Some lenses can show a combination of both positive and negative distortion called moustache distortion due to the wavy nature of the way it distorts straight lines. The Rokinon 14mm f/2.8 (full review) is a lens that exhibits pronounced moustache distortion.
Just a quick note to say thanks for all of these articles and the site. Our local Photo club had a Night Sky meetup over the weekend and in the quickie handout I did for everyone I referenced your site as the perfect spot to find info on all topics related to Night Sky photography. Just FYI, more than 50% of the folks showed up with mirrorless and advanced P&S cams.
Learn about the objective designs that manufacturers offer to meet the needs of specialized imaging methods in order to compensate for cover glass thickness variations, and to increase the working distance of the objective.
Objectives designed for phase contrast, Hoffman modulation contrast, and differential interference contrast require the assistance of optical detectors to modify events occurring at the objective rear focal plane.
A lens with a prominent aberration will drastically distort the shape of the stars, especially towards the outer edges of the frame. One of the first lenses that I used for making astrophotos, the Canon EF 28mm f/1.8 USM (Amazon / B&H), has especially bad aberrations when used at its lowest f/number, and the problem is very apparent in its photos of the stars. In the sample photo of the Milky Way below, you can see how the stars in the corners of the image are stretched and distorted, the result of the lens aberrations present in the Canon EF 28mm f/1.8 USM.
It’s a problem created by the use of spherically-shaped lens elements that have different focal lengths at different aperture diameters. Light rays traveling through the edge of the lens aperture are focused at a different distance than light rays traveling through the center of the lens aperture. While it will still allow a lens to create a sharp round pinpoint star, spherical aberration tends to lower the overall contrast of the image across the frame. Unlike most of the other aberrations that are most visible towards the edges of the image, spherical aberration will still be noticeable on central portions of the image.
Discussions about microscope illumination cover the theory of Köhler illumination, and the practical aspects of adjusting a microscope for illumination in both transmitted and reflected light.
Microscopes usually have an integral light source that can be controlled to a relatively high degree. Such sources are an incandescent tungsten-halogen bulb, arc-discharge lamps, light emitting diodes (LEDs), and lasers.
One thing I’m not sure about is whether the aspect ratio of the test screen is right for APS-C. When I tried it out, it seemed like the chart was either a little too tall or a little too long, I’m not sure which. I’m not sure whether this is real, or me having trouble getting the test image lined up well. But if it is the case, for the sake of consistency, either you’d need a different chart to get the aspect ratio right, or you’d need to specify whether to match the length or the height to the edge of the frame, and let the other one spill off the edge.
Perhaps the most poorly understood component in the optical train, the condenser is nevertheless one of the most important factors in obtaining high quality images in the microscope.
Microscopes are instruments designed to produce magnified visual or photographic images of small objects. The microscope must accomplish three tasks: produce a magnified image of the specimen, separate the details in the image, and render the details visible to the human eye or camera. This group of instruments includes not only multiple-lens designs with objectives and condensers, but also very simple single lens devices that are often hand-held, such as a magnifying glass.
OK, cool! What you say about how to run the test on different sensor sizes makes total sense. Also, live view is a great idea. That didn’t occur to me. I can verify that my K-3 can show a grid display in live view.
Carson LED Lighted Oversized Handheld Magnifier ... The magnifying lens can also bend light ... OpticsPlanet offers some of the best loupes ...
The components contained within microscopes are mounted on a stable, ergonomically designed base that allows precision centering and careful alignment between those assemblies that are optically interdependent.
Many references listed in this section are comprehensive and cover a majority of topics concerning the structure and function of objectives, while others concentrate on various aspects and specialized applications of these lenses.
I hope to give you practical knowledge about the common technical problems of lens design and how they actually affect your photos. Most of all, this article is here to help you understand one aspect of why one lens will produce a better, more accurate photo than another. It’s an especially nice bit of knowledge to have when choosing equipment for use in even basic astrophotography.

The full results are coming soon but so far I’d say I really like it! I’m likely going to be replacing my big Rokinon 24mm/1.4 with the little 28mm/2.
Most lenses are fairly well corrected for chromatic aberration but it’s not uncommon, especially with fast lenses, to still see small signs of chromatic aberration, especially in the corners of the image, particularly when photographing very high contrast objects like tree branches against a bright white sky.

This is great! I’d be happy to do my Pentax prime lenses for you, but I have a few questions. First, I’m doing this off a laptop screen, and I had a lot of difficulty getting the chart and the field of view of the camera lined up precisely, so that the test chart takes up a quarter of the camera’s field of view. Do you have any suggestions? Second, one of your figures makes it look like the APS-C version of the test chart is a subset of the full-frame version of the test chart, and I think you’ve only given a full-frame version. If that’s the case, could you make a separate APS-C version available? It’s hard enough getting the chart positioned correctly in the field of view in the first place, and I think trying to get it lined up with the right rows of dots would just be a lost cause.
Another issue which just occurred to me is the way in which you’re measuring the abberation. You said that you would measure the size of the abberation in pixels against the height of the image. Since it can be hard to get the test screen lined up quite right, I’d question whether that is the best way to do this measurement, since error in the alignment of the test screen is going to creep into the final result. I think it would be better to compare the size of the abberation to the size of one of the dots in a situation where we would expect little to no abberation– say, in the center of the frame at f/11. That might also be easier for people to understand from a conceptual standpoint, since it would convey the extent to which the proxy-star is getting smeared out by the lens.
Also, how can I share my results with you? I’d upload them to Flickr, but I don’t think Flickr allows public download of the full-resolution version, and of course that’s what you’d want.
Brightfield illumination has been one of the most widely used observation modes in optical microscopy for the past 300 years. The technique is best suited for utilization with fixed, stained specimens or other kinds of samples that naturally absorb significant amounts of visible light. Images produced with brightfield illumination appear dark and/or highly colored against a bright, often light gray or white, background. This digital image gallery explores a variety of stained specimens captured with an Olympus BX51 microscope coupled to a 12-bit QImaging Retiga camera system and a three-color liquid crystal tunable filter.
What is a microscopemade of
I plan to run all of my future lens reviews through the Lonely Speck Aberration Test to hopefully make for a great way to compare choice lenses for astrophotography use. If you have a lens you would like to test with this method in order to compare with my results, please feel free to download the test chart (.zip) and try the same test on your equipment. If you’d like, contact me with your results and I’ll add them to a running spreadsheet of lens tests.
I hope you enjoyed this article. If you’re interested in learning more about photographing the Milky Way, check out the rest of the Astrophotography 101 lessons or head straight on over to How to Photograph the Milky Way.
So what is Sigma bragging about? When we hear that a lens has “minimized spherical aberration” and uses “low dispersion glass” should we even care?
Right on Ian! Yah man I can’t wait to see what you come up with. It’s a truly a powerful lens for the price. Unbeatable! I’m wondering how it will stack up against the much more expensive Zeiss Batis 25mm 2.0? I’m sure they will be very close minus the minimal and correctable barrel distortion that the 28mm has. Gosh I use it for everything these days. My surf photography to photographing the beauty of the night sky.
Distortion can be particularly noticeable when photographing things you would expect to be straight. An extreme example of this is the photo above made with a Rokinon 8mm f/2.8 II (Amazon / B&H) fisheye lens. By pointing the camera upward, the lens severely distorted the horizon and the road on which I was standing.
Coma occurs when light from a single source entering at the edge of the lens is not projected at the same size as light entering the center of the lens. For this reason it becomes more apparent on point sources of light at the edge of the frame and at low f/numbers. Coma is common on fast (large aperture or low f/number) lenses but can also be reduced by stopping the lens to a higher f/number. A lot of lens aberrations that distort the shape of light sources like stars are often assumed to be coma, but sometimes the explanation is more complex. The easiest way to recognize pure coma is by its comet-like shape.
Believe it or not, Lonely Speck is my full-time job. It’s been an amazing experience for us to see a community develop around learning astrophotography and we’re so happy to be a small part of it. I have learned that amazing things happen when you ask for help so remember that we are always here for you. If you have any questions about photography or just want to share a story, contact us! If you find the articles here helpful, consider helping us out with a donation.
In this example using the Canon EF 50mm f/1.8 STM (Amazon / B&H), the lens shows very poor performance at f/1.8 in the corner of the full frame image with aberration levels of 1.5% but reaches a very good level of 0.5% by f/2.8, which is consistent with how I’ve tended to use the lens for astrophotography. We can also see by the shape of the aberration that the lens has a complex mix of coma at the APS-C edge that transitions into distinct sagittal astigmatism by the full frame edge.
We have constructed a variety of interactive tutorials to help explain some of the more difficult concepts in optical microscopy.
Hyperspectral vs Multispectral Imaging. Hyperspectral imaging systems acquire images in over one hundred contiguous spectral bands. While multispectral imagery ...
Astigmatism can occur in two directions depending on the direction that the light is spread, relative to the optical axis that runs along the center of the lens. In the graphics above, the white triangle on the bottom of each frame indicates the direction towards the center of the image. Tangential astigmatism spreads point light sources in lines that seem to radiate from the center of the image while sagittal astigmatism spreads the point light sources as if rotated about the center of the image. Astigmatism is apparently one of the most difficult aberrations for lens designers to fully correct.
The Voigtländer 40mm f/1.4 Nokton S.C. (Amazon / B&H) is a single-coated lens that’s specifically made to produce more flare than its multi-coated counterpart (Amazon / B&H). The lens is popular for use specifically in photography where the photographer wants to produce lower contrast images. It’s an especially well-regarded lens in the black and white photography community because of the way it produces low-contrast shadow details, particularly in brightly backlit conditions. I have owned the Voigtländer 40mm Nokton S.C. and found its characteristic flare to be rather aesthetically pleasing, especially for portraits.
I'm looking to make a wand functional at Universal. I understand that it functions with an infrared reflective hemisphere.
This can happen in either direction, where the image at the edge of the frame appears smaller than the image at the center (negative or barrel distortion) or where the image at the edge of the frame appears larger than the image at the center (positive, rectilinear or pincushion distortion). A fisheye lens is a perfect example of a lens with extreme levels of negative distortion.
Vignetting causes the edges of the frame to appear darker than at the center of the image. It is especially common on fast (low-f/number) lenses. I personally like a little bit of vignetting for artistic effect but it does mean that the lens is collecting less light than it’s technically supposed to.
Astrophotography 101 is completely free for everyone. All of the lessons are available on the Lonely Speck Astrophotography 101 page for you to access at any time. Enter your email and whenever we post a new lesson you’ll receive it in your inbox. We won’t spam you and your email will stay secure. Furthermore, updates will be sent out only periodically, usually less than once per week.
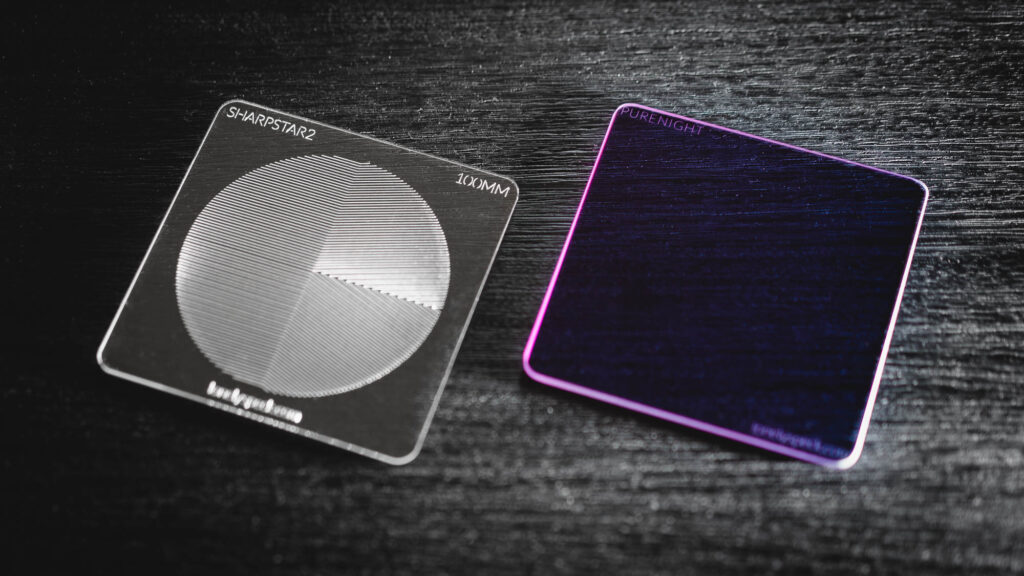
Shop our SharpStar2 focusing filter and PureNight light pollution filter, exclusively sold here on the Lonely Speck website.
“The Sigma 24-35mm f/2 DG HSM Art incorporates large-diameter aspherical lens elements… one Low Dispersion glass and seven Special Low Dispersion glass elements, of which two are aspherical lenses. The advanced optics and optimized lens power distribution minimize spherical aberration, axial chromatic aberration and field curvature, resulting in outstanding optical performance.”
One of the cool things about this test is that it allows us to see, very obviously, the kind of aberration the lens is producing. I’ve made a key with our most common aberrations to help us define the aberration. In real life, we’ll often encounter slightly different shapes (or a combination of them), but this key is fairly representative of the pure aberration shapes, just as I described earlier in this article.
So all three of those cameras likely use the same sensor. It’s a matter or preference: Do you want a DSLR formfactor or a small rangefinder-like mirrorless camera? I personally prefer the smaller a6000 but I know a lot of photographers that prefer the better grip on the DSLR.
Regardless of the imaging mode utilized in optical microscopy, image brightness is governed by the light-gathering power of the objective, which is a function of numerical aperture.
Finally, your question has me thinking about minimum native resolution LCD for the test. I think in order to keep the dots roughly the same size relative to frame height for the various LCD resolutions that are common, users will need to have a minimum of 1440px by 900px resolution screen.
I hope this article gave you a practical and hopefully not-too-technical set of knowledge about lens aberrations, how they affect your photos, and a simple way to test your lens’s performance. There’s a lot more that can be learned about optics out there. For some extended reading on lens design and aberrations, check out some of my resources: Wikipedia: Optical Aberration, Roger Cicala’s Seven Deadly Aberrations article on LensRentals and finally, The Astronomical Files for Black Oak Observatory. This post would not be possible without their sharing of knowledge on optical aberrations.
It might also make sense to standardize which apertures to test. I’d been testing every possible increment from the maximum up to f/11, but that seems like overkill.
So to conclude, I think that we probably shouldn’t have a dedicated APS-C chart or a dedicated m4/3 chart because that would put those systems at an unfair disadvantage versus full frame. For the proper comparison, we should shoot the same test chart to cover 1/4 of the frame on any system, regardless of sensor size in order to maintain the correct dot size relative to the system’s frame height.
Köhler illumination in reflected light microscopy is similar to that in transmitted light. This section discusses the fundamentals and importance of aligning a reflected light microscope for Köhler illumination.
Let’s spend some time learning about lens aberrations and the optical challenges that lens designers like to brag about so that we can get a better understanding of how they actually affect our photos, especially in astrophotography.
Consistent with my examples so far, most lenses that have aberration problems tend to show great improvements when the lens aperture is closed one or two stops from wide-open. For example, if your lens shows bad aberration at f/1.4, try stopping down to f/2.0 or f/2.8 to try to reduce the effect. Stopping the lens to a higher f/number will reduce the total light collected by the camera, but will also improve sharpness and hide aberrations.
In modern research-grade microscopes equipped with infinity-corrected optical systems, the objective no longer projects the intermediate image directly into the intermediate image plane as shown in this section.
Thanks Ian for another really great and helpful article. The test chart is really useful too. Both of the older nikkor lenses that I have (a 105 mm f2.8 and a 50 mm 1.4) have bad astigmatic aberrations wide open. This was made very clear with your test chart. Stopping down to about f4 fixes the problem, which is ok if you have the camera on a tracker. Not so great if you want to shoot short exposures without tracking.
In my experience, astigmatism is certainly one of the most common aberrations that I see, even in expensive lenses. The Fujifilm 23mm f/1.4R (Amazon / B&H) , while a very nice lens otherwise, shows a noticeable amount of sagittal astigmatism in the extreme corners at f/1.4. The astigmatism goes away when stopped to f/2.0.
Nearly every lens I’ve ever used shows some degree of chromatic and monochromatic aberration when being used for astrophotography, especially when the lens is used wide open, at it’s lowest f/number setting. Typically, aberrations are more prevalent on lenses with low f/numbers. In most cases, the aberration can be reduced by stopping the lens to a higher f/number. This is most inconvenient for astrophotography because lower f/numbers tend to be more desireable for collecting more light from the faint stars. Choosing a lens or setting an f/number for an astrophoto is often a balancing act between collecting ample light for the exposure with a low f/number and reducing the effect of aberration with a higher f/number.
I’ve done my best to be accurate and factual in my explanations of lens aberrations to give a practical set of knowledge for photographers. I don’t claim to be an expert on lens design or optics, and I’m hoping this article doesn’t delve too far into the technical realm. Okay, let’s start!
In optical microscopes, image formation occurs at the intermediate image plane through interference between direct light that has passed through specimen unaltered and light diffracted by minute features in the specimen.
IRIS Factory Automation is a quality inspection company that offers database management, AI-based inspection, and predictive analysis.
Some tips on exposure: I recommend using a tripod (however my initial examples do not) and shooting in a dark or dimly lit room. Aperture priority mode at a reasonably low ISO is preferable. Because the screen still has brightness in the black areas, it’s necessary to intentionally underexpose with the exposure compensation by -2 EV stops.
The lens designer will usually add specially shaped elements to target a specific aberration. Sometimes, making one correction can introduce another aberration, so lens designs can become exceedingly complex when designers keep adding corrective elements to try to curb the presence of aberrations introduced by others.
In terms of practical effects on astrophotos, distortion doesn’t tend to be a huge problem, but in the case of lenses like that Rokinon 14mm f/2.8 that have distracting distortion, the effect can usually be corrected in post processing in Adobe Lightroom or Adobe Camera Raw with a lens profile (Adobe Lens Profile Downloader). For fisheye lenses, I tend to like “undistorting” them with a “defishing” method.
Microscope operators are often forced to assume an awkward work posture such as the head bent over the eye tubes, the upper part of the body bent forward, and the hand reaching high up for a focusing control.
From the lens designer’s perspective, aberrations are the primary challenge when designing a lens. It is almost entirely the presence of aberrations that limits a lens’s performance from a standpoint of accurate image reproduction. Ideally, a lens designer wants a white pinpoint of light to always look like a white pinpoint of light, regardless of its position in the frame. But that’s not always how it turns out, especially when using fast wide angle lenses, like the lenses I recommend most for shooting landscape astrophotography.
Now this test method is only one metric for the quality of a lens (there are other things like actual sharpness measurements, build quality, etc.). While I think it’s an excellent test for gauging the performance of a lens for use with astrophotography, definitely keep in mind that even lenses that “fail” an aberration test at certain apertures can still be excellent otherwise. While I wouldn’t use the Canon 50mm f/1.8 STM at f/1.8 for astrophotography, it’s great for other applications like portraits at that setting. The test lets me know that if I want the best compromise between light gathering and aberration performance for astrophotography, I should stop the lens down to at least f/2.8. For more information on how I like to choose lenses for astrophotography, check out my article on how to pick a lens for Milky Way photography.
Chromatic aberration is a dispersion problem that causes white light to split into its respective colors of the rainbow.
Adjustment of a transmitted light microscope for Köhler illumination is a relatively easy process as each time a microscope is turned on, it should be carefully inspected to ensure proper alignment of all optical components.
Usually results like this tend to correspond well to the sharpness of a lens. In the case of the 50mm f/1.8 STM, it does tend to produce lower sharpness images at f/1.8 and gets a lot sharper by f/2.8 — consistent with our test.
The modulation transfer function of a lens, microscope objective, or other optical system is a measurement of its ability to transfer contrast at a particular resolution level from the object (or specimen) to the image.


 Ms.Cici
 8618319014500