
LED Fiber Optic Kits for Cars | XKchrome Smartphone App - optic fiber led
Note: Whenever we use cloth cord, we like to bind the cut edges of the fabric cloth with electrical tape to minimize fraying. A very quick pass with a lighter or can also help to singe the fabric strands together.
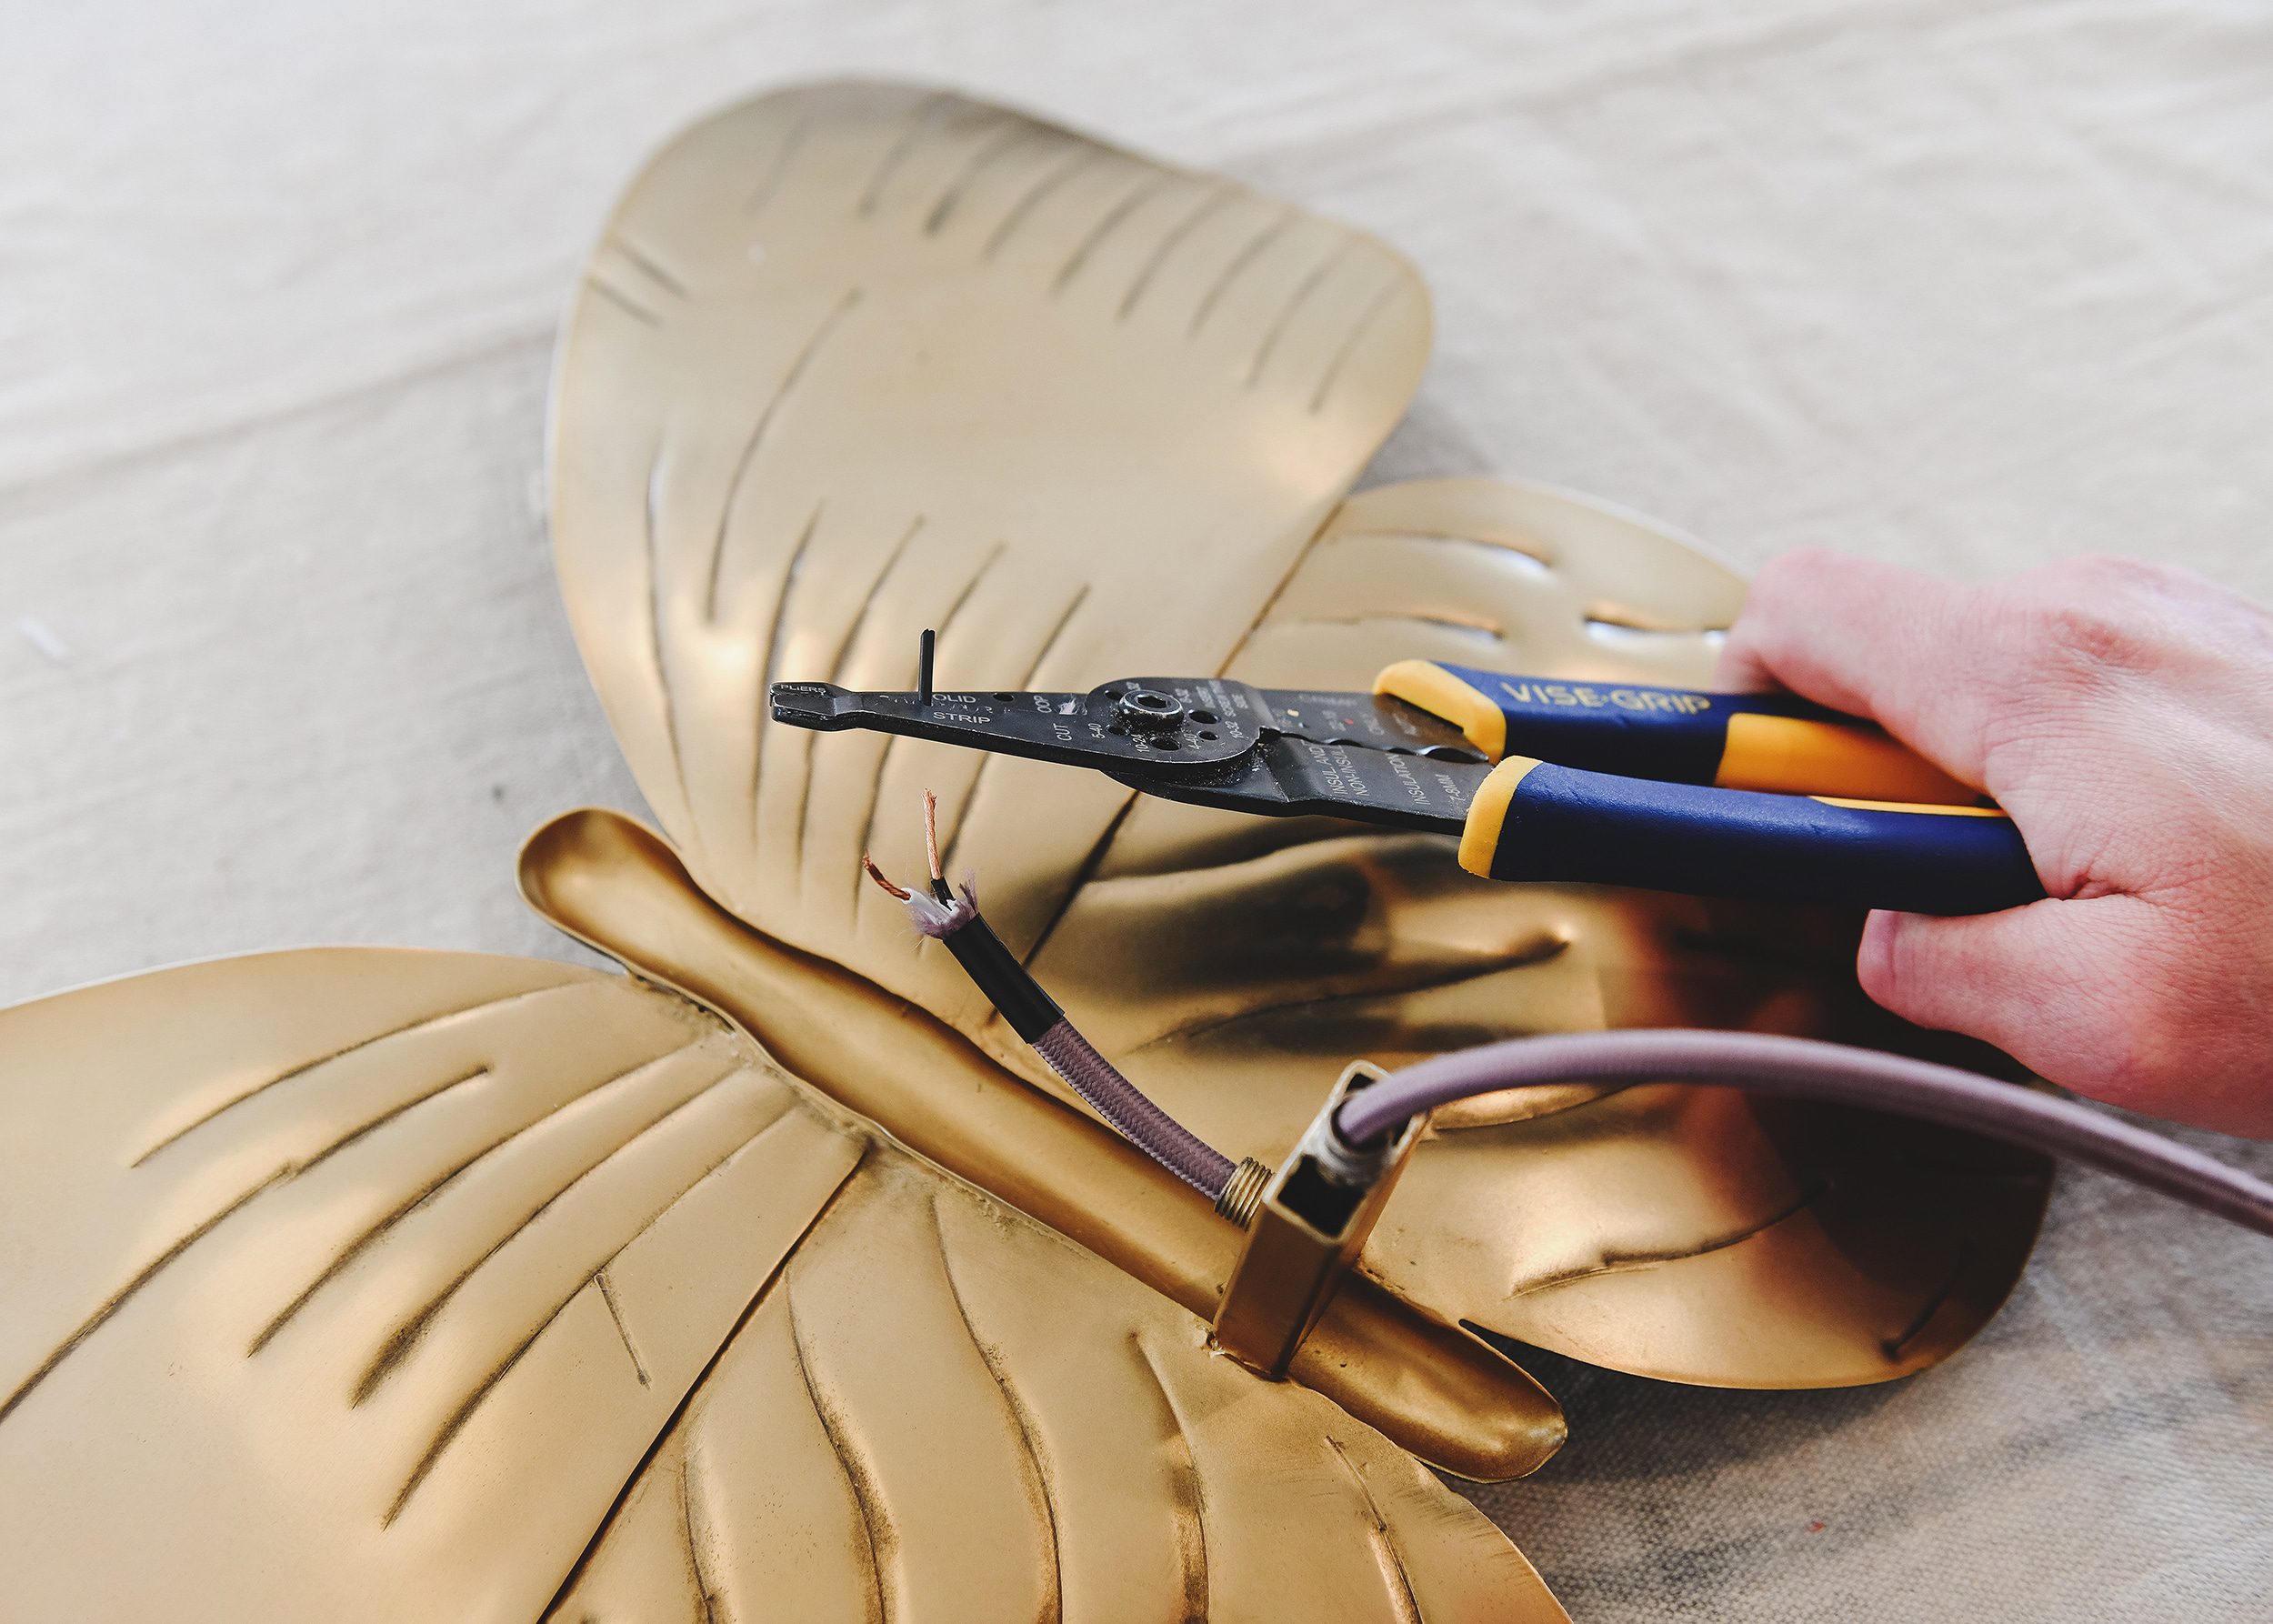
Phew! Now that that’s over with… Let’s strip some wire! The individual black and white wires inside the cord are each 16g, so we used the appropriate stripping slot on our wire strippers. The goal here is to open things up just enough to reach each screw on the bulb socket.
Infrared opticalWindows
Next up, the new cord needs to be threaded through the fixture the same path where it was removed. In most fixtures, this will be as simple as slipping the cord through a straight piece of threaded rod. As we mentioned earlier, this fixture was not so simple. The incredibly tight 90 degree bend without no access required at least three hands and a lot of patience to get the cord through. What normally takes 30 seconds took about 45 minutes. *facepalm*
Our Pen Pals have direct access to first looks, a peek behind-the-scenes, and exclusive interviews showcasing members of the #YBHDIY community. We can’t wait to connect with you!
Cleartran window
WHYYYY do they all come with clear cords now? The wiring inside isn’t clear, I can still see everything YOU’RE NOT FOOLING ANYONE, LAMP PEOPLE. This project is making me want to switch ALL of my lamp cords out for a coordinating (or contrasting??) cloth cord. Her room is turning out so beautifully!ReplyCancel
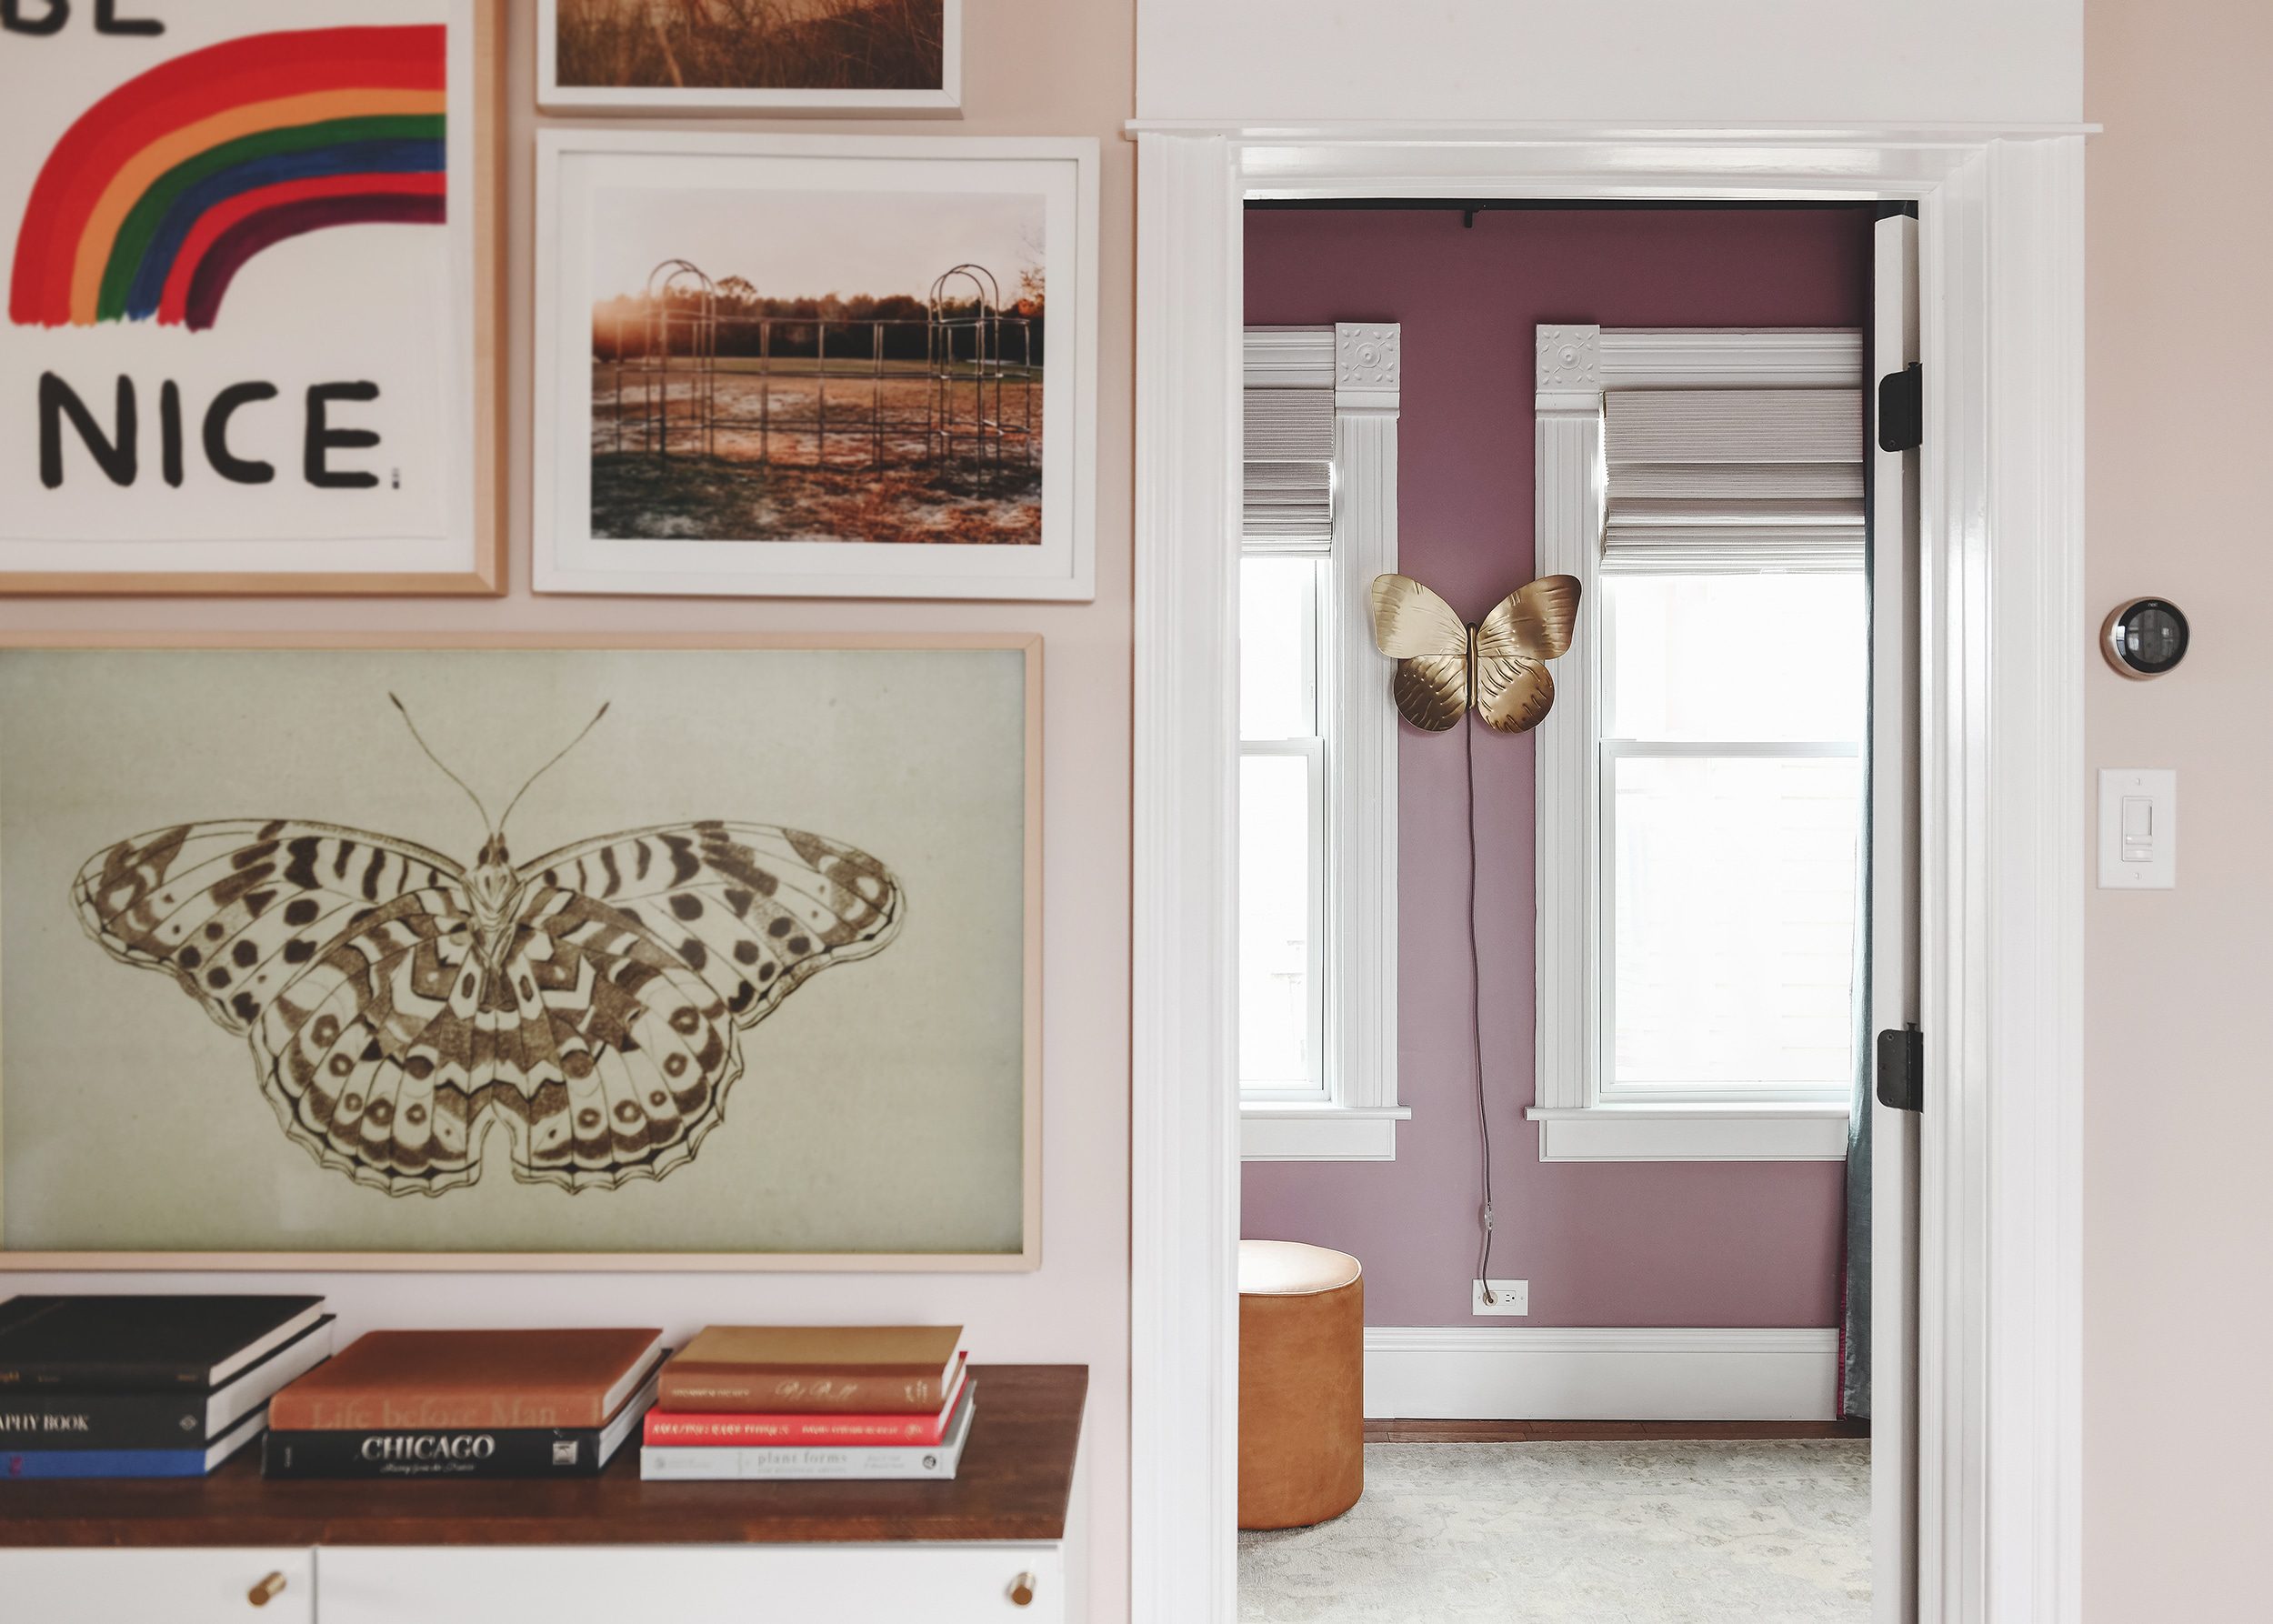
We’re nearing the finish line on our daughter’s bedroom renovation! For now, we’re focusing in on the finer details while we await the arrival of the final piece of furniture. Because details are everything, right? Why, then, did this beautiful solid brass butterfly lamp come with a clear plastic power cord? We’ll never know, but we’re here to replace it with something a bit more fitting!Timing was perfect for us to swap out the standard clear cord for a fancy cloth-covered cord that matches the wall color almost perfectly.
Sapphire window
Note: We love customizing lighting to suit our needs. This particular fixture, however, was an unexpectedly tough one. We absolutely would not recommend this fixture for a first-timer rewiring project. The quality of the fixture is high, but tolerances are tight. There is a very tight 90 degree elbow that makes cord removal and installation very difficult and time consuming. Don’t say we didn’t warn you!

Today we’re talking through the simple steps we took to replace a boring standard clear plastic electrical cord with a colorful cloth cord!
Looking for other lighting customization ideas? Here’s how to add a rotary dimmer to a sconce, how to make a lamp out of almost anything, and here’s a list of our favorite whimsical lighting for everyone.
Germanium window
With the backplate reinstalled and the new plug connected to the other end, we were ready plug it in and light up Lucy’s room with the perfect dim glow!
Hi there, I’m reading this in the UK where we use 3-core cable in most light fixtures. This means one of the conductors is an earth which connects the metal of the fixture to the earth pin of our 3-pin UK plugs. In case of a short the power goes to ground through the earth cable, not through you! Just sayin….ReplyCancel
Note: we purchased supplies for this rewire from our favorite local shop, Hangout Lighting. We’ve also purchased from SnakeHeadVintage in the past with great results!
As we mentioned, what we thought was a simple project took waaaaaay longer than we thought. The tight tolerances and right angle bend really tripped us up, but we got there in the end. Such is life with DIY! Sometimes, projects that should take 15 minutes take a few hours. The opposite has also been true more than once. A little patience goes a long way!
ZnSe window
With the fixture back together, it was ready to be put back up onto the wall! Perfect! We couldn’t be happier with the finished product. The muave cord matches the Valspar Mellow Mauve wall color nearly perfectly!
The next step is to connect the freshly stripped wires to the bulb socket. In our case, the white wire connected to the silver screw and black wire connected to the gold screw.
From here, we proceeded with reassembling the fixture in the reverse order that it was taken apart. This will vary with each light, so the best bet is to take photos of anything unfamiliar prior to taking things apart.
You could certainly give it a shot, but paint on flexible plastic usually doesn’t adhere well or last very long in our experience.ReplyCancel
The first step in the process is to remove everything associated with the power cord and socket. In most cases, that will mean cutting the cord, unscrewing the bulb socket and pulling the extra cord through the threaded rod. At this point, it may be helpful to take a photo of an exploded view of the socket. You can reference it later as you’re putting it back together.
With the wires connected, slip the cardboard sleeve back onto the ceramic socket. This insulates the connections from making contact with anything metal. This step is important! An errant connection could cause a result in a short and cause a dangerous situation.


 Ms.Cici
 8618319014500