
Camera Lighting - camera lights
Midinfrared
Over seven years ago, I stopped making images in color and now only shoot with infrared-converted cameras. I have found that 720nm gives me the broadest range of tonalities for black-and-white, compared to 590nm or 850nm. For me, 590nm is too close to the visible light spectrum, which means my mid-tones would suffer, and 850nm has too much contrast and would require bracketing and blending to capture the full dynamic range.
Humans may not be able to see infrared light, but did you know that snakes in the pit viper family, like rattlesnakes, have sensory “pits”, which are used to image infrared light? This allows the snake to detect warm blooded animals, even in dark burrows! Snakes with 2 sensory pits are even thought to have some depth perception in the infrared! (Thanks to NASA’s Infrared Processing and Analysis Center for help with the text in this section.)
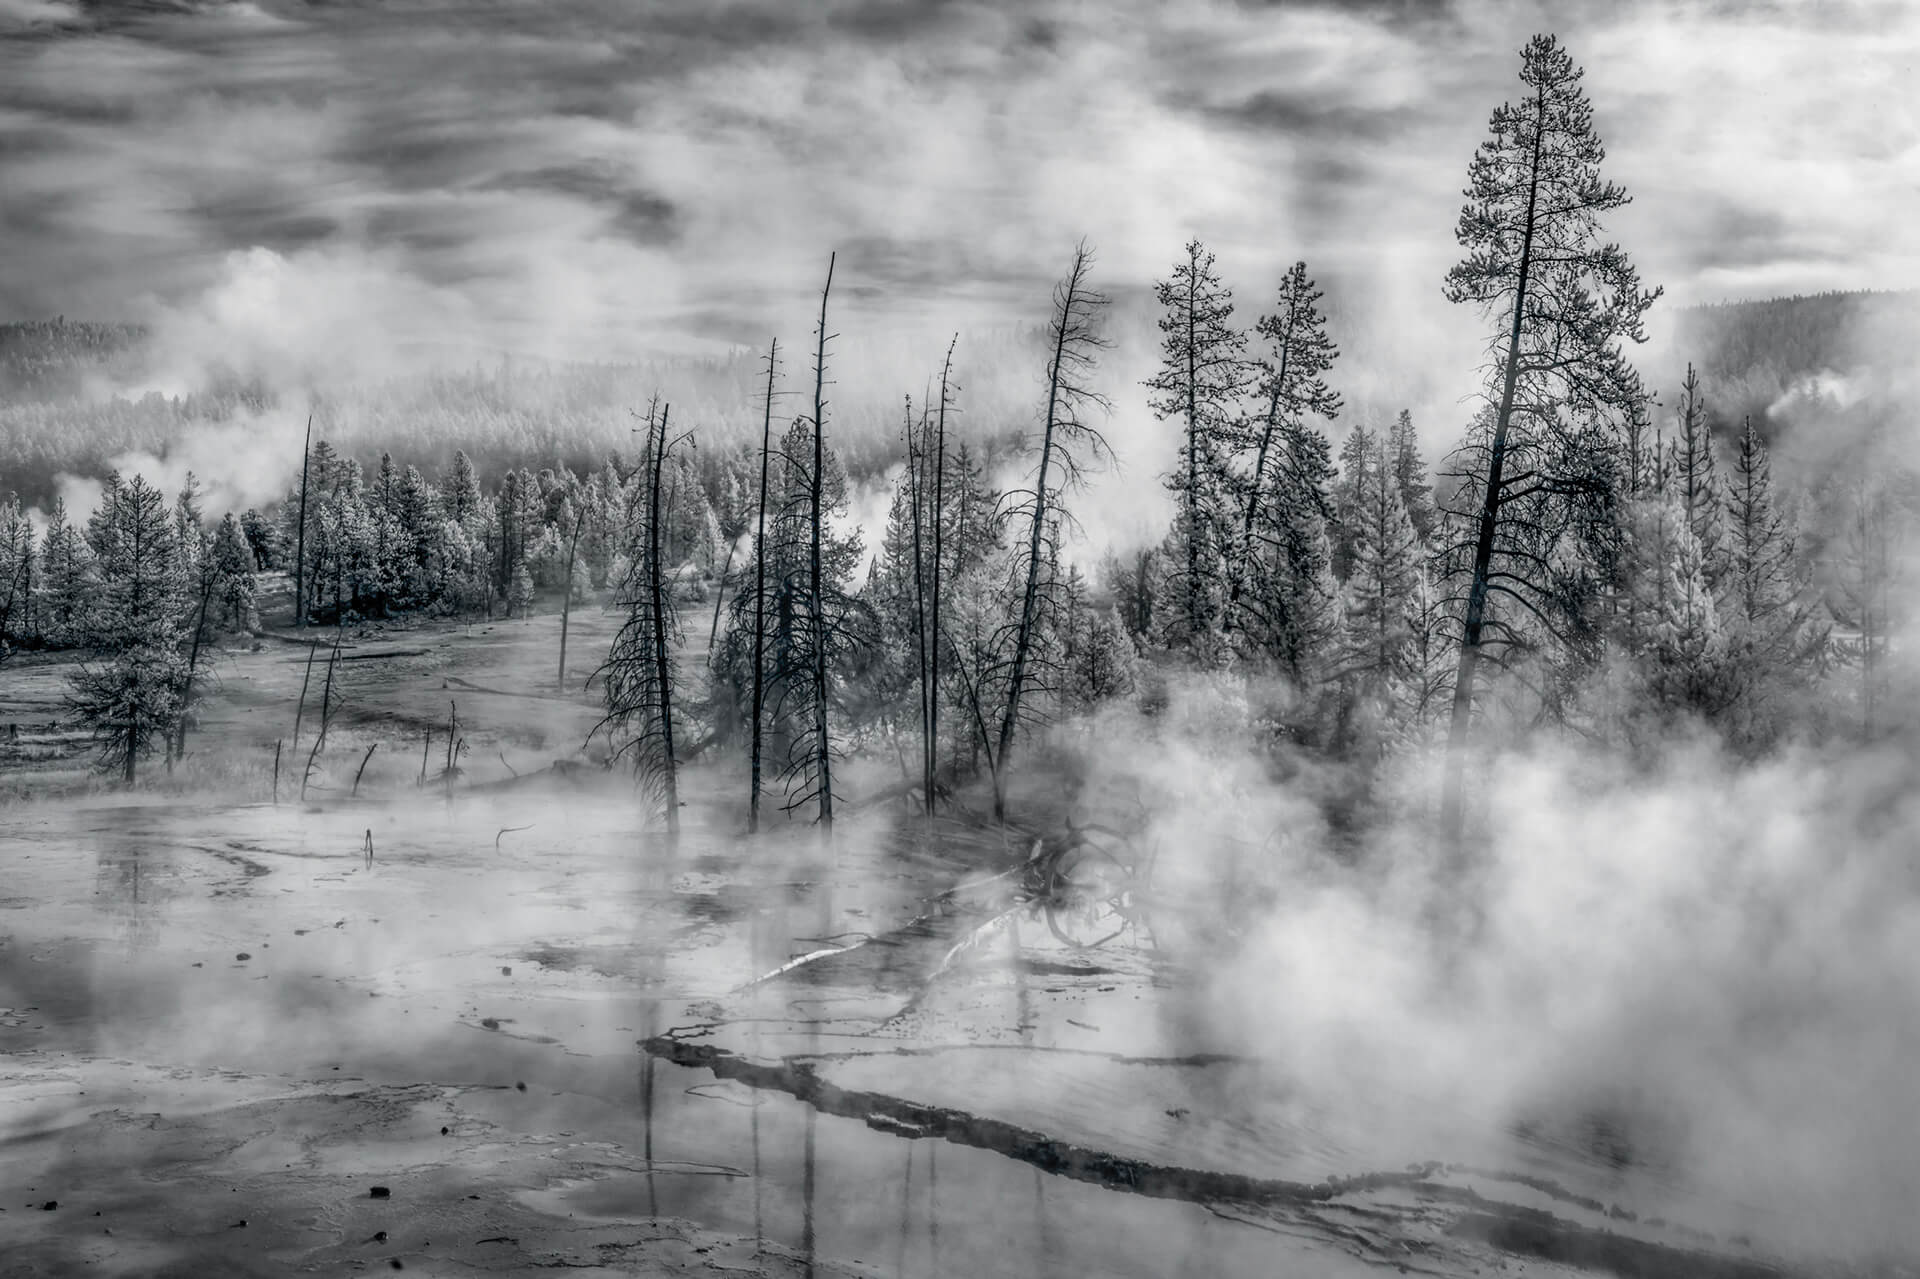
A big surprise for me was how the different minerals in the rocks in Death Valley render in infrared. Another shocker was that not all foliage will be white. For example, the short needle evergreens in Yellowstone National Park render black, much like visible light, whereas long-needle pine trees glow infrared. You won’t know until you make an image.
This image of a building with a tree and grass shows how Chlorophyll in plants reflect near infrared waves along with visible light waves. Even though we can’t see the infrared waves, they are always there. The visible light waves drawn on this picture are green, and the infrared ones are pale red.
Other satellites, like the Infrared Astronomy Satellite (IRAS) look up into space and measure the infrared light coming from things like large clouds of dust and gas, stars, and galaxies!Satellites like GOES 6 and Landsat 7 look at the Earth. Special sensors, like those aboard the Landsat 7 satellite, record data about the amount of infrared light reflected or emitted from the Earth’s surface.
Although our eyes only see visible light, here are some observations and an approach to learning how to “see” infrared light. With a few tips, you will be well on your way to understanding infrared light.
Infrared light lies between the visible and microwave portions of the electromagnetic spectrum. Infrared light has a range of wavelengths, just like visible light has wavelengths that range from red light to violet. “Near infrared” light is closest in wavelength to visible light and “far infrared” is closer to the microwave region of the electromagnetic spectrum. The longer, far infrared wavelengths are about the size of a pin head and the shorter, near infrared ones are the size of cells, or are microscopic.
Consider shooting during the blue and golden hours as well. Your images will have a magical feeling at those times of the day. I prefer the early morning, about an hour and a half to two hours before sunrise. For me, by the time the sun comes up, the light becomes harsh, and the shadows can be very dark.
Far infrared waves are thermal. In other words, we experience this type of infrared radiation every day in the form of heat! The heat that we feel from sunlight, a fire, a radiator or a warm sidewalk is infrared. The temperature-sensitive nerve endings in our skin can detect the difference between inside body temperature and outside skin temperature. Infrared light is even used to heat food sometimes – special lamps that emit thermal infrared waves are often used in fast food restaurants!
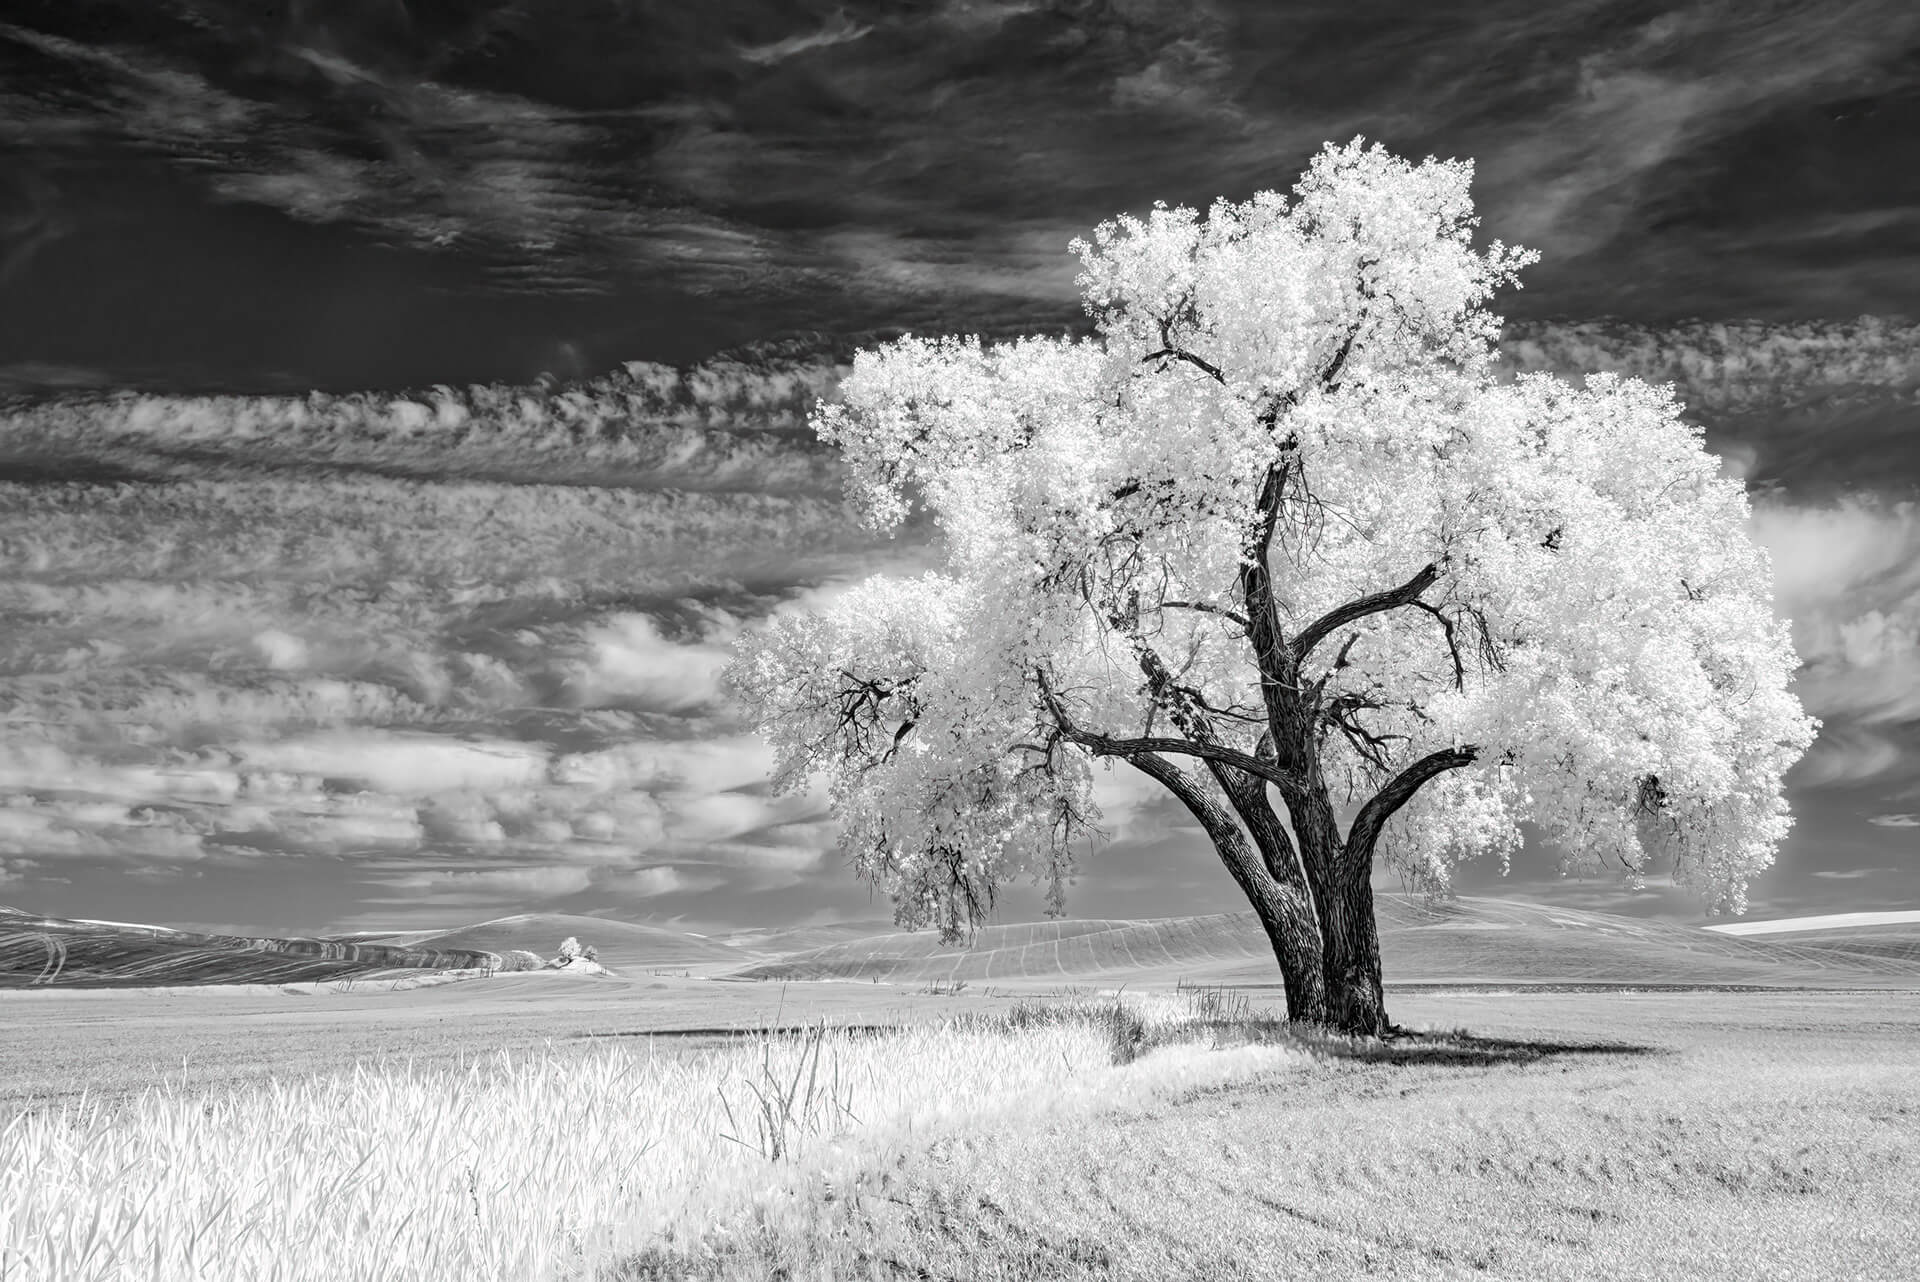
Try experimenting with subjects other than green foliage, such as architecture, monolith rocks on land or at the edge of the sea, cacti or other plants, or morning fog in the trees.
infrared中文
Penelope Taylor is a New Jersey-based photographic landscape artist. Her father introduced her to film cameras in her early teens. Her passion is traveling throughout the United States and Canada to capture her favorite subject — landscapes. In 2015, she began to exclusively produce work using Nikon digital cameras converted for infrared photography. In 2017, Penelope began to offer infrared-specific landscape photo workshops where she teaches capture and black-and-white processing techniques. She is available for group lectures and one-on-one instruction in person or online.
We know, from looking at an infrared image of a cat, that many things emit infrared light. But many things also reflect infrared light, particularly near infrared light. Near infrared radiation is not related to the temperature of the object being photographed – unless the object is very, very hot.
This image shows the infrared data (appearing as red) composited with visible light data at the blue and green wavelengths. If near infrared is reflected off of healthy vegetation, what do you think the red square shaped areas are in the lower left of the image?
infraredradiation中文
Most beginners only shoot infrared during the spring and summer (peak green foliage) and only when the sun is very bright and high in the sky. You can tell what time of day a photograph was taken by looking at the shadows. If the shadows are tight and close to the subject, the sun is high, and it is probably summer. If the shadows are long and away from the light source, the image was taken around sunrise or sunset.
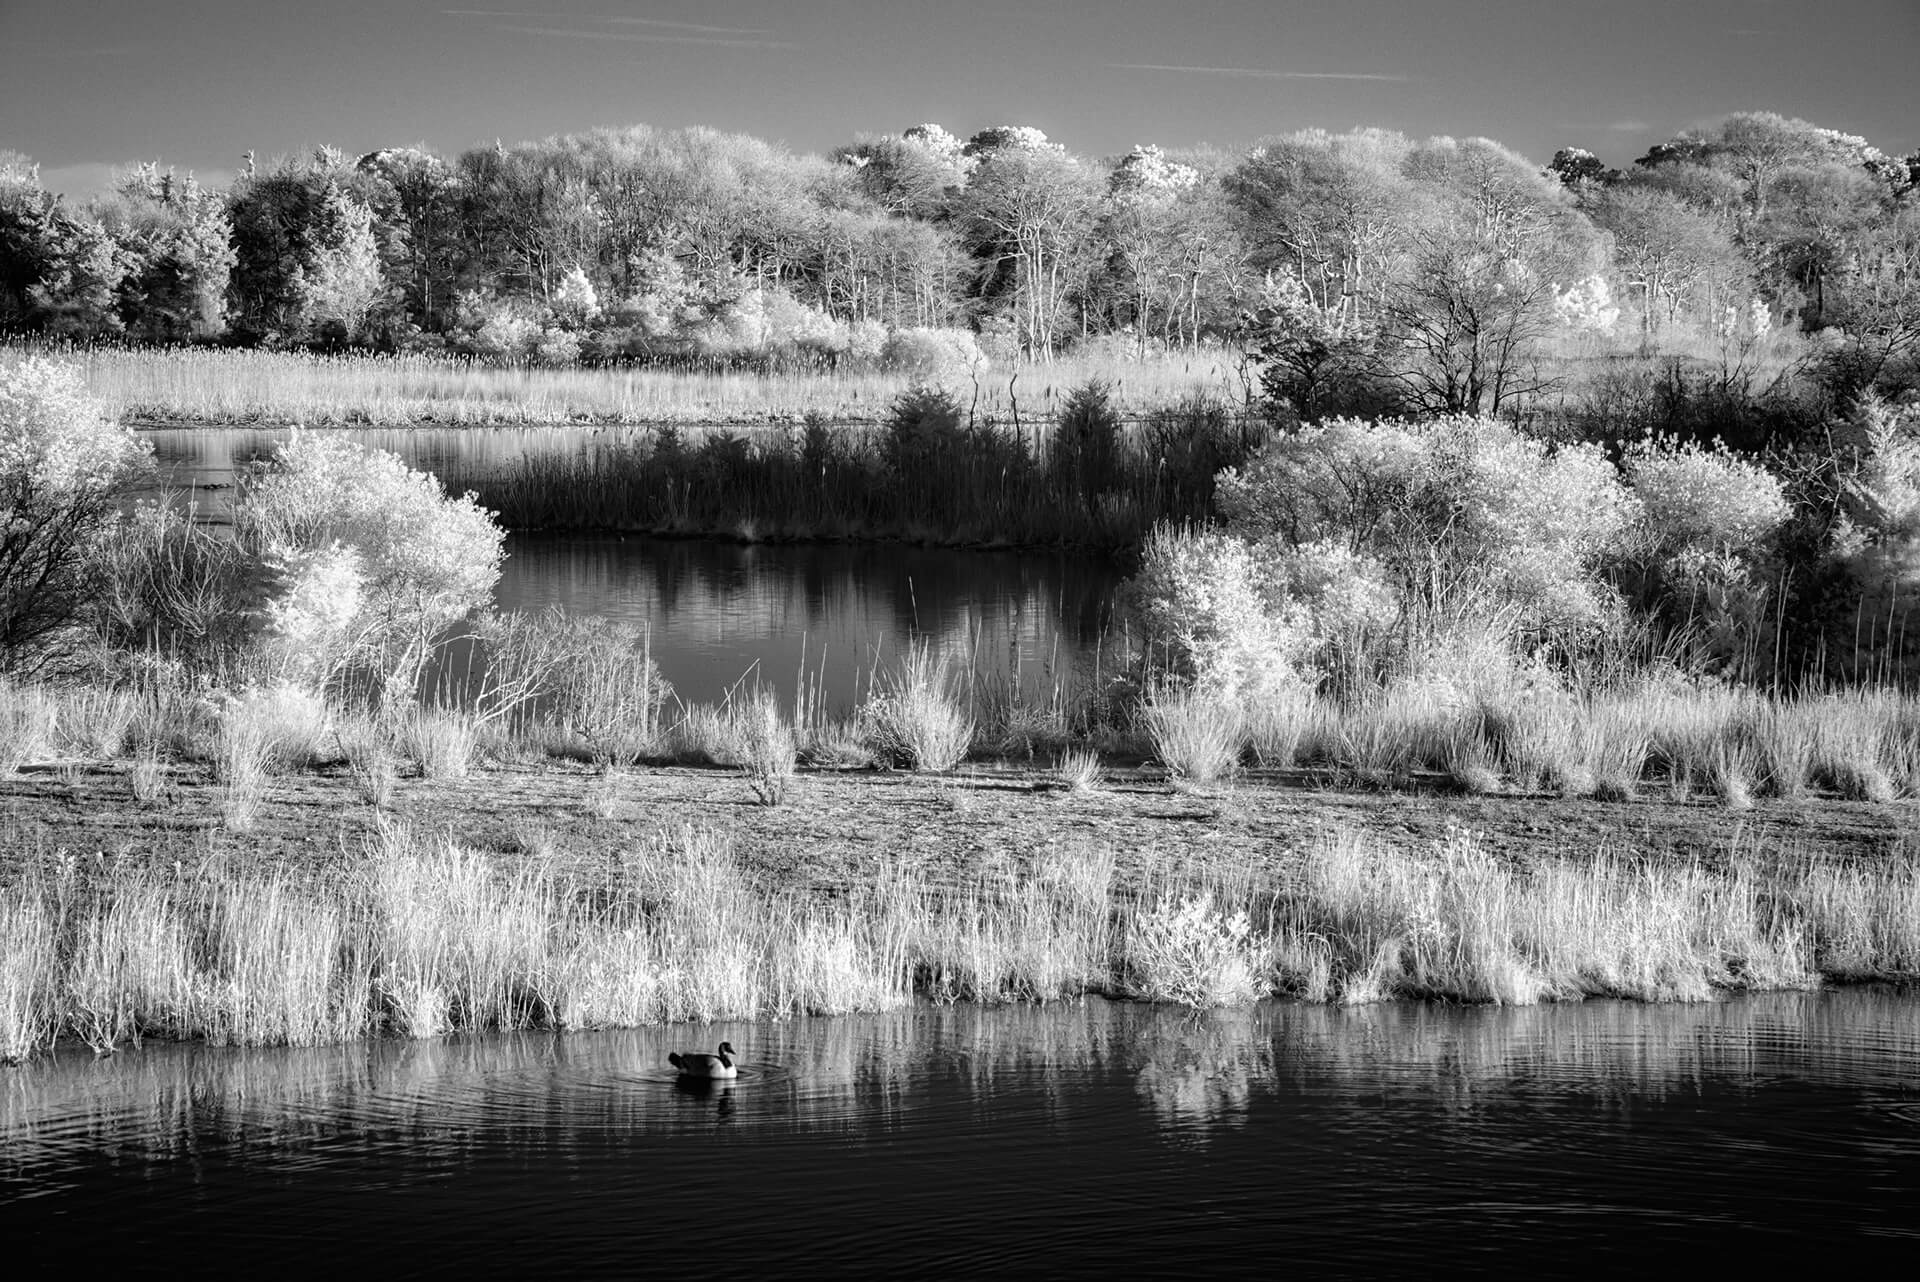
Shoot year-round. Shoot long exposures of clouds or water. One would think brown sea or marsh grasses in the winter would not pop white in infrared, but they do! Chlorophyll gives plants their green color, which turns white in 720nm and 850nm black-and-white infrared. Even though the brown shade of the dried grasses might imply the plant is dead, the chlorophyll still reflects the infrared light all year.
Remember to use your lens hood! And always take the time to look at your preview images thoroughly. I find it very hard to remove flares in post-processing, and it is best to try another shot while you are at the location. I use a Hoodman loupe in bright sun to cover the camera screen. It can be incredibly frustrating when you get a terrific shot, but it is unusable due to faint flare issues.
This second image was taken with special film that can detect invisible infrared waves. This is a false-color image, just like the one of the cat. False-color infrared images of the Earth frequently use a color scheme like the one shown here, where infrared light is mapped to the visible color of red. This means that everything in this image that appears red is giving off or reflecting infrared light. This makes vegetation like grass and trees appear to be red. The visible light waves drawn on this picture are green, and the infrared ones are darker red.
Infrared light still surprises me constantly. I am never certain what I will get until I press the shutter. Test the light by making the shot. Review it to see the possibility. If the image works for you, keep it. If it doesn’t, ditch it. That’s the workflow. Clients in the field learn quickly not to ask me, “Do you think this shot will look good in infrared?” I always respond, “I don’t know. Make a shot, and let’s look at it.” Very quickly, they understand I am trying to encourage experimentation. When I see it, I will know if the shot worked and has potential through processing. I learn more from my failures than from my successes.
Looking at the image in monochrome on the back of the camera taught me where, how, and if the infrared light appeared in the scene. It is possible you won’t find anything that is reflecting the infrared light.
Near-infraredwavelength
Infrared light
If you process infrared for black-and-white, no matter where you live, you can make beautiful images in the city, the mountains, the seaside, or the forest. No time of year is bad for infrared, and no subject is off-limits. I feel that setting up the infrared camera back to display in black-and-white has made me a better photographer – my compositions quickly improved the more I shot, and I understand the full spectrum of light better by working in infrared.
A monochrome image on the camera display will instantly reveal your composition. Since my end goal is processing for black-and-white, the monochrome JPG is very close to the final processed IR image.
Infrared wavelength range
Now that the camera is set up for black-and-white capture, how do I see the infrared light? I cheat by looking at the monochrome JPG! In most cases, I lean on my years of success and failure in different conditions, but to start, I suggest looking for where visible light (sunlight or moonlight) reflects off the subject in the scene. Where is the light source? Where are you standing in relation to the scene and the light source? What areas are awash in visible light? Where are the shadows? Your “best” shot might be behind you!
near-infraredlight
Side light is usually a light source to the left or right of the camera. The lower the sun is in the sky, the stronger the light will be. Watch for deep shadows on the “shade” side of your subject. Make sure you always have details in the shadows.
This is an infrared image of the Earth taken by the GOES 6 satellite in 1986. A scientist used temperatures to determine which parts of the image were from clouds and which were land and sea. Based on these temperature differences, he colored each separately using 256 colors, giving the image a realistic appearance.Why use the infrared to image the Earth? While it is easier to distinguish clouds from land in the visible range, there is more detail in the clouds in the infrared. This is great for studying cloud structure. For instance, note that darker clouds are warmer, while lighter clouds are cooler. Southeast of the Galapagos, just west of the coast of South America, there is a place where you can distinctly see multiple layers of clouds, with the warmer clouds at lower altitudes, closer to the ocean that’s warming them.
Shooting into the sun or full moon usually results in flares when using infrared filters, either on the lens or sensor. Flare can be a creative concept, but it is a deal-breaker for me. Flares should not be confused with a lens hotspot. Lenses have special coatings to cut down on flare, but those lens coatings are ineffective when using an infrared-converted camera. Many times, when I review an image on the back of the camera and see a flare, all that is needed is to slightly change the camera’s position relative to the angle of the light source or change the focal length (longer or shorter).
When I started down the rabbit hole of infrared, there were no books or YouTube videos regarding what I wanted to do: make black-and-white landscape images at 720nm. Lots of information was available for faux color (590nm) but nothing for black-and-white. Only by shooting thousands of infrared frames in all kinds of conditions over the years did I learn what probably would happen and how it would render given my subject (i.e., rocks, foliage, water, skies).
Since the primary source of infrared radiation is heat or thermal radiation, any object which has a temperature radiates in the infrared. Even objects that we think of as being very cold, such as an ice cube, emit infrared. When an object is not quite hot enough to radiate visible light, it will emit most of its energy in the infrared. For example, hot charcoal may not give off light but it does emit infrared radiation which we feel as heat. The warmer the object, the more infrared radiation it emits.
Infrared wavelength
Infrared film ‘sees’ the object because the Sun (or some other light source) shines infrared light on it and it is reflected or absorbed by the object. You could say that this reflecting or absorbing of infrared helps to determine the object’s ‘color’ – its color being a combination of red, green, blue, and infrared!
This is an image of Phoenix, Arizona showing the near infrared data collected by the Landsat 5 satellite. The light areas are areas with high reflectance of near infrared waves. The dark areas show little reflectance. What do you think the black grid lines in the lower right of this image represent?
I find that compositions with front light or strong side light are a good starting place to learn about visible or infrared light. Front light means you are standing between the subject and the light source, facing your subject with the light source to your back – just watch out for your shadow in the shot!
I encourage you to be fearless. Experiment when you find something interesting to photograph. Ask yourself, “What would that look like in infrared?” When working with clients in the field, most refuse to press the shutter unless they can visualize the shot. If you only shoot infrared occasionally, chances are you don’t have enough experience to pre-visualize an image through the viewfinder in a spectrum we cannot see. The only way I learned was to shoot many frames and move around the subject until I finally “found” the infrared light.
Shorter, near infrared waves are not hot at all – in fact you cannot even feel them. These shorter wavelengths are the ones used by your TV’s remote control.
To make infrared pictures like the one above, we can use special cameras and film that detect differences in temperature, and then assign different brightnesses or false colors to them. This provides a picture that our eyes can interpret. The image at the left (courtesy of SE-IR Corporation, Goleta, CA) shows a cat in the infrared. The orange areas are the warmest and the white-blue areas are the coldest. This image gives us a different view of a familiar animal as well as information that we could not get from a visible light picture.
I remember the first infrared exposure I made and what a shock it was to my system when the RAW file displayed on the back of my camera. What is THAT funky thing? How do I know what I am looking at? I got the idea (I am sure others did this, but I had no knowledge of it) to set the camera to capture both JPG and RAW. I set the JPG and, therefore, the camera display to monochrome. The RAW file is untouched, but the JPG is black-and-white.
Many things besides people and animals emit infrared light – the Earth, the Sun, and far away things like stars and galaxies do also! For a view from Earth orbit, whether we are looking out into space or down at Earth, we can use instruments on board satellites.
Humans, at normal body temperature, radiate most strongly in the infrared at a wavelength of about 10 microns. (A micron is the term commonly used in astronomy for a micrometer or one millionth of a meter.) This image ( which is courtesy of the Infrared Processing and Analysis Center at CalTech), shows a man holding up a lighted match! Which parts of this image do you think have the warmest temperature? How does the temperature of this man’s glasses compare to the temperature of his hand?


 Ms.Cici
 8618319014500