
Axon Signal Sidearm - TAG Electronic Information Defense ... - signal sidearm
Cool colors, as shown below, and taught in the Color Theory Photography Guide, also produce calming effects on the overall mood.
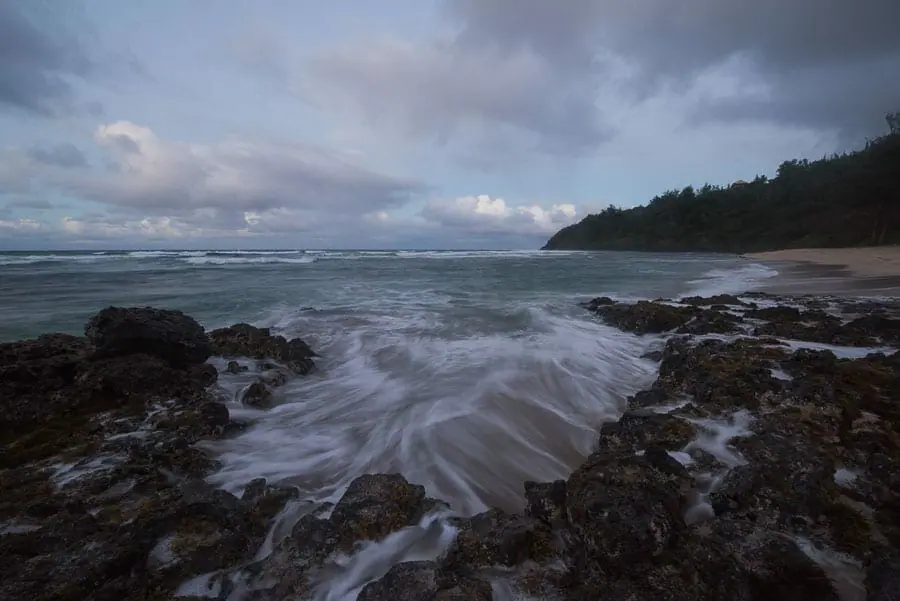
Due to the shutter speed of 1/15th of a second, in the image below, water movement details are visible, producing a dynamic effect.
Over a 3-day weekend, I can teach you everything I know, plus provide 1 on 1 feedback that will quickly improve your skills.
The following images are unedited RAW files showing actual outcomes of varying shutter speeds without changes due to photo editing.
The question, “What Shutter Speed Do I Use?”, leads down the path of dependence, without an actual understanding of the topic.
The ideal exposure is achieved when each pixel collects as much light as possible, without any pixels “blowing out”, or becoming pure white.
Technical Note: DSLR cameras have a physical shutter. Mirrorless cameras do not. Other than this fact shutter speed works in the same manner for both.
Shortening the shutter speed, producing a shorter exposure time, forces the image sensor to collect less light information, producing a darker image with less motion blur.
Lengthening the shutter speed, producing a longer exposure time, allows the image sensor to collect more light information, producing a brighter image with increased motion blur.
An image attribute is a specific visual effect obtained from different camera settings such as f-stop, ISO & shutter speed.
To maintain constant image brightness, while increasing or decreasing shutter speed, changes in ISO or f-stop must be made by the same number of stops in the opposite direction.
Using ETTR / Expose to the Right, the photographer can capture extra information from the dark parts of the scene than they could have with a standard exposure.
Prior to taking the image, take a mental guess at the image attribute a specific shutter speed may produce for a specific shooting scenario.
An exposure stop, or stop for short, provides a universal scale to measure the increase and decrease in light, exposed to the image sensor, due to changes in shutter speed & f-stop.
When this value is exceeded, too much light is collected, and the pixel becomes “clipped”, also known as, “overexposed”, or “blown out”.
Using varying shutter speeds the photographer can add “interestingness” to the photo by showing movement in a still picture.
When you push the shutter button to take an image, the shutter opens and the sensor is exposed to light for the amount of time denoted by the shutter speed setting.
As more light information is collected by the image sensor, over the allotted exposure time, more detail & data are displayed in the final image, resulting in less image noise.
For example, a stop up in shutter speed would require a stop down in ISO, f-stop, or a combination of both, to maintain the same image brightness.
Without slightly overexposing the highlights, I would have lost data in the dark parts of the image, as shown in the following histogram.
The best way to improve quickly is by learning firsthand from someone that’s optimized their skills, over a decade or more through trial and error.
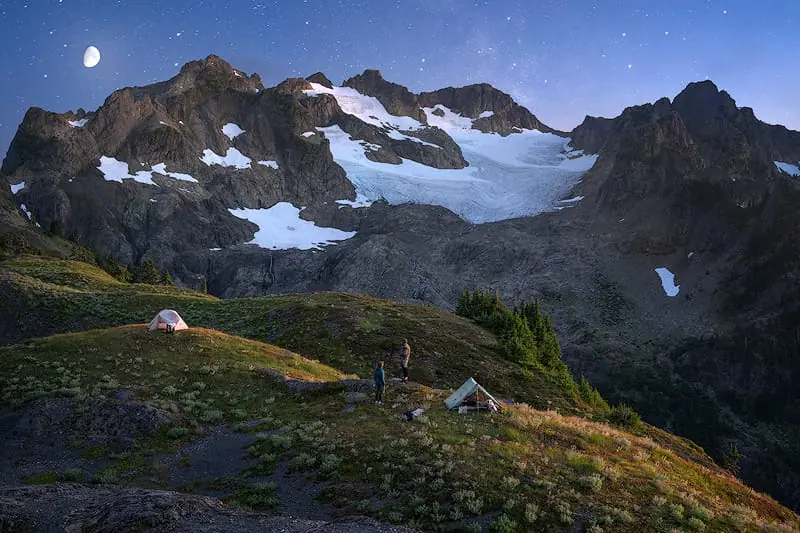
These slow shutter speeds are used for long exposure low light conditions including, milky way, star trail, and northern lights photography.
We cannot complete your request due to a technical difficulty. You may return to the previous page or go to the homepage and explore other options. For immediate assistance please call us.
Taking your camera outside and experimenting is the only way to really understand the best shutter speeds for every shot.
All of the information above provides the foundation for selecting the best camera settings using the Photography Exposure Triangle.
The following shutter speed ranges are provided to help you visualize varying exposure times & their corresponding image attributes.


 Ms.Cici
 8618319014500