
Laser Collimators for Easy Telescope Optics Alignment - collimator
Let's start by saving a version for print use. We’ll use the Save As command to save the print version as a TIFF file, so we have a copy of the file that contains all of the image's original color data and can be opened by a wide range of photo editing programs if needed.
The following table outlines some of the more popular image file types, where they’re best used, and describes what some of their main characteristics are.
At this point, we are ready to save our image. The file type we choose depends on what we’re planning on doing with the image once it’s done — if we want to share the image on the web, we’ll need to save it in a different format than we would if we wanted to print the image. There are certain file types that are better for print, and others that are better for web or screen graphics.
NOTE: To learn more about using Photoshop to create web graphics, consider enrolling in the IT Training course Creating Graphics for the Web, which discusses the creation of web graphics in Photoshop in more depth.
Collimated beam
To better understand the concept of image resolution, we first need to learn about the basic building block of all digital images: pixels. Pixels are tiny square-shaped spots of color that, when viewed all together, resolve into an image on our computer's screen. If we zoom in far enough on an image, Photoshop will display the individual pixels of color like we see in the following close-up image of the girl's shovel:
Normally, when we change any values in the Image Size dialog box, Photoshop will resample the image. Resampling involves throwing away any pixels that Photoshop feels it doesn't need when making an image smaller, or attempting to create new pixels when making an image larger. We can easily convert this image to a higher resolution while keeping the same number of pixels, however. We can do this by turning off the Resample option, then adjusting the resolution of the image.
Collimator lightmeaning
The top of the dialog box displays the file size of the image, as well as the current dimensions of the image in pixels. Below this, the document's size is displayed. By default, these size dimensions appear in inches, and the current resolution is represented in pixels per inch.
Shipping Policy | Privacy Policy | Return Policy | Imatest Terms and Conditions
For information on the validation of collimators vs. real-world testing, see Verification of Long-Range MTF Testing Through Intermediary Optics
use ofcollimatorin x-ray
Lossy image compression, on the other hand, results in smaller file sizes by removing some of the original image information. This can sometimes result in lower-quality images, depending on how aggressively the image is compressed. However, images saved in a lossy file format will typically have smaller file sizes than lossless images. This can be helpful when working with images for web use, as smaller files will load more quickly.
Now, let's save a version we can use on the web. For saving a web-friendly version of the image, we'll use the Export As command. This will give us additional options for saving the image that will help us optimize it for web use. We'll save the image as a high-quality .jpg file, and adjust the image size so the width is 1000 pixels.
When creating an image, or preparing it for use outside of Photoshop, you’ll want to think about the intended destination and set the resolution accordingly.
It's time to start thinking about the output of our image - whether we'd like it to be printed or just display it on the web. The two main concerns we have when thinking about output are the resolution and the file type. What you intend to use your image for will affect both the image's resolution and what type of file it's saved as.
Collimator lightx ray
Resolution refers to the number of dots of color that are displayed per linear unit of surface — typically either a screen or a sheet of paper. Units of resolution are typically represented in pixels per inch (ppi) on a monitor, or dots per inch (dpi) on a printed surface. When we print an image, these pixels are translated into dots of ink on the page. If there are more of these dots of color per linear unit, our eyes can’t pick out the individual spots of color and they appear to mingle into smooth, continuous tones. The higher the resolution, or number of dots per unit of surface, the smoother our image will look. However, if we have too low of a resolution, an image may end up looking grainy or blurry.
Collimatordiagram
For printed output, the recommended resolution depends on how and where the image will be used. Generally, pictures in publications destined to be printed on plain paper, such as a newsletter, may be saved at a resolution of 150-200 dpi. For printing photos on a specialized photo printer, the minimum recommended resolution is 240. However, 300 dpi is best if printing images on high-quality photo paper or for other high-quality print projects.
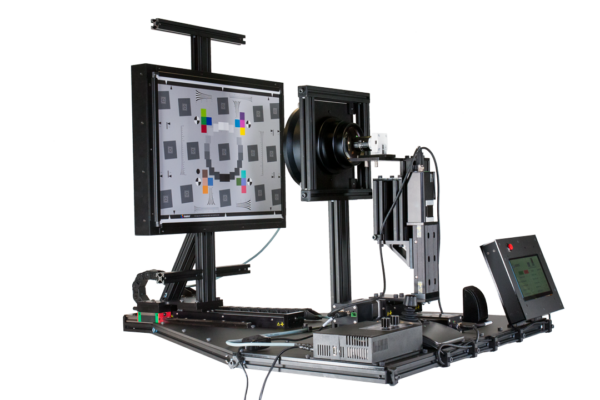
Test your imaging system at distances up to infinity within the limited space of a test lab. The Collimator Fixture is configurable to your working distances and fields of view with an adjustable lens-to-chart distance, interchangeable collimating lenses, and charts. This relay lens system for simulating large test distances in a compact space is ideal for R&D. Download PDF Info Sheet
Our product pricing and shipping rates do not include import duties, taxes or fees. The customer / recipient is responsible for these expenses.
How to collimatelight
For on-screen display, we'll want to keep the file size relatively small. This reduces the amount of time it takes to load the image. For images intended for PowerPoint presentations or Web pages, we should use an image resolution of 72 dpi.
For print, can be used for detailed images — main limitation is the fact that PNG files use the RGB color space, so colors may look different printed than on screen.
For assistance identifying the right configuration for your testing needs or to request a quote and lead time, please email sales@imatest.com.
NOTE: Printers do have a limit to how high of a resolution they can print at — this varies depending on the printer and its capabilities. For example, a basic photo printer may have a maximum resolution of 300 dpi. If a picture with a resolution of 600 dpi is sent to that printer, it will only print at 300 dpi. To see what your printer's maximum printing resolution is, check the owner's manual.
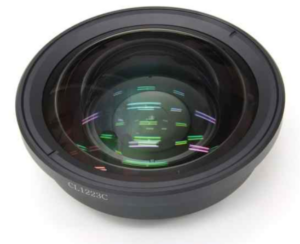
Collimating lens
What is collimation in radiology
Size: 951mm long x 1300mm wide x 797mm high (37.44″ long x 51.18 wide x 31.38 high), depending on required panel distance.
Another thing to think about when saving a file is the compression type each file type uses. There are two main categories of file compression: lossless and lossy.
![]()
Next to the Width and Height fields is a link icon. When the link icon is selected, the height and width of the image are proportionately linked. This means if one value is changed, the other value will change accordingly to keep the image in proportion.
In the document's width and height fields, we can see that the image is approximately 30 inches wide by 17 inches tall. We also notice that the image has a resolution of 72 pixels per inch. This means if we were to try to print this image as it is right now, we would end up with an extremely large image of low quality. We can fix this by adjusting the resolution of the image, indicating that we want to have more spots of color present per linear inch of surface.
Lossless image compression keeps all of the original image information when compressing a file, resulting in high quality images — however, images saved using a lossless file format result in larger file sizes than lossy file formats. Lossless compression is ideal when working with images with a high amount of detail or images that will be printed, as all of the original image information will be preserved.
At this point, the width and height will change to 7.347 inches wide by 4.243 inches high — however, the pixel dimensions will stay the same.
This video describes the validation of collimators vs. real-world testing. See Verification of Long-Range MTF Testing Through Intermediary Optics


 Ms.Cici
 8618319014500