
Kleinaufbewahrung & Organisation - sortiersystem schrauben
The Nikon D200 has a big legacy for me. This is the sad part of the whole story. My buddy, Brandon, passed away in 2022, suddenly. He was a young man with a wife and two young children. We spoke every day without fail usually, even if it was just about something we’d read or something about a camera or work. When the news came in that he was gone, this led to the longest period of me not shooting since I started. It lasted a couple of months until I started picking up the cameras again. This might seem like a short period of time, but you have to remember - for someone that had a camera in their hands almost daily, that is a long time in the grand scheme of things. We couldn’t offer much. What can anybody do in a situation like this, except to affirm that if they need anything, they are here? It led my son and I to express it the only way we knew how to properly justify what we felt. We made a picture. That picture is below, shot with the Nikon D200 and a Sigma 35mm f/1.4 Art prime lens. The concept of this picture is obvious, however the technical side was to ensure a natural shadow pallate with a smooth and controlled highlight rolloff, without it feeling like it has had the HDR treatment. This picture was shared online and has been viewed many times - it is very touching to me. I have had many people contact me to say that it inspired them to pick up a D200 which is really nice to hear. And some it just made them pick up and use the camera that they have - which of course is also lovely to hear that someone has been inspired to get out and use their gear.
Digital Camera World is part of Future US Inc, an international media group and leading digital publisher. Visit our corporate site.
This has the effect of softening the transition and making a hard grad look more like a soft grad. Take this into account when selecting your filter to ensure that it will provide a suitable effect for the scene you are shooting.
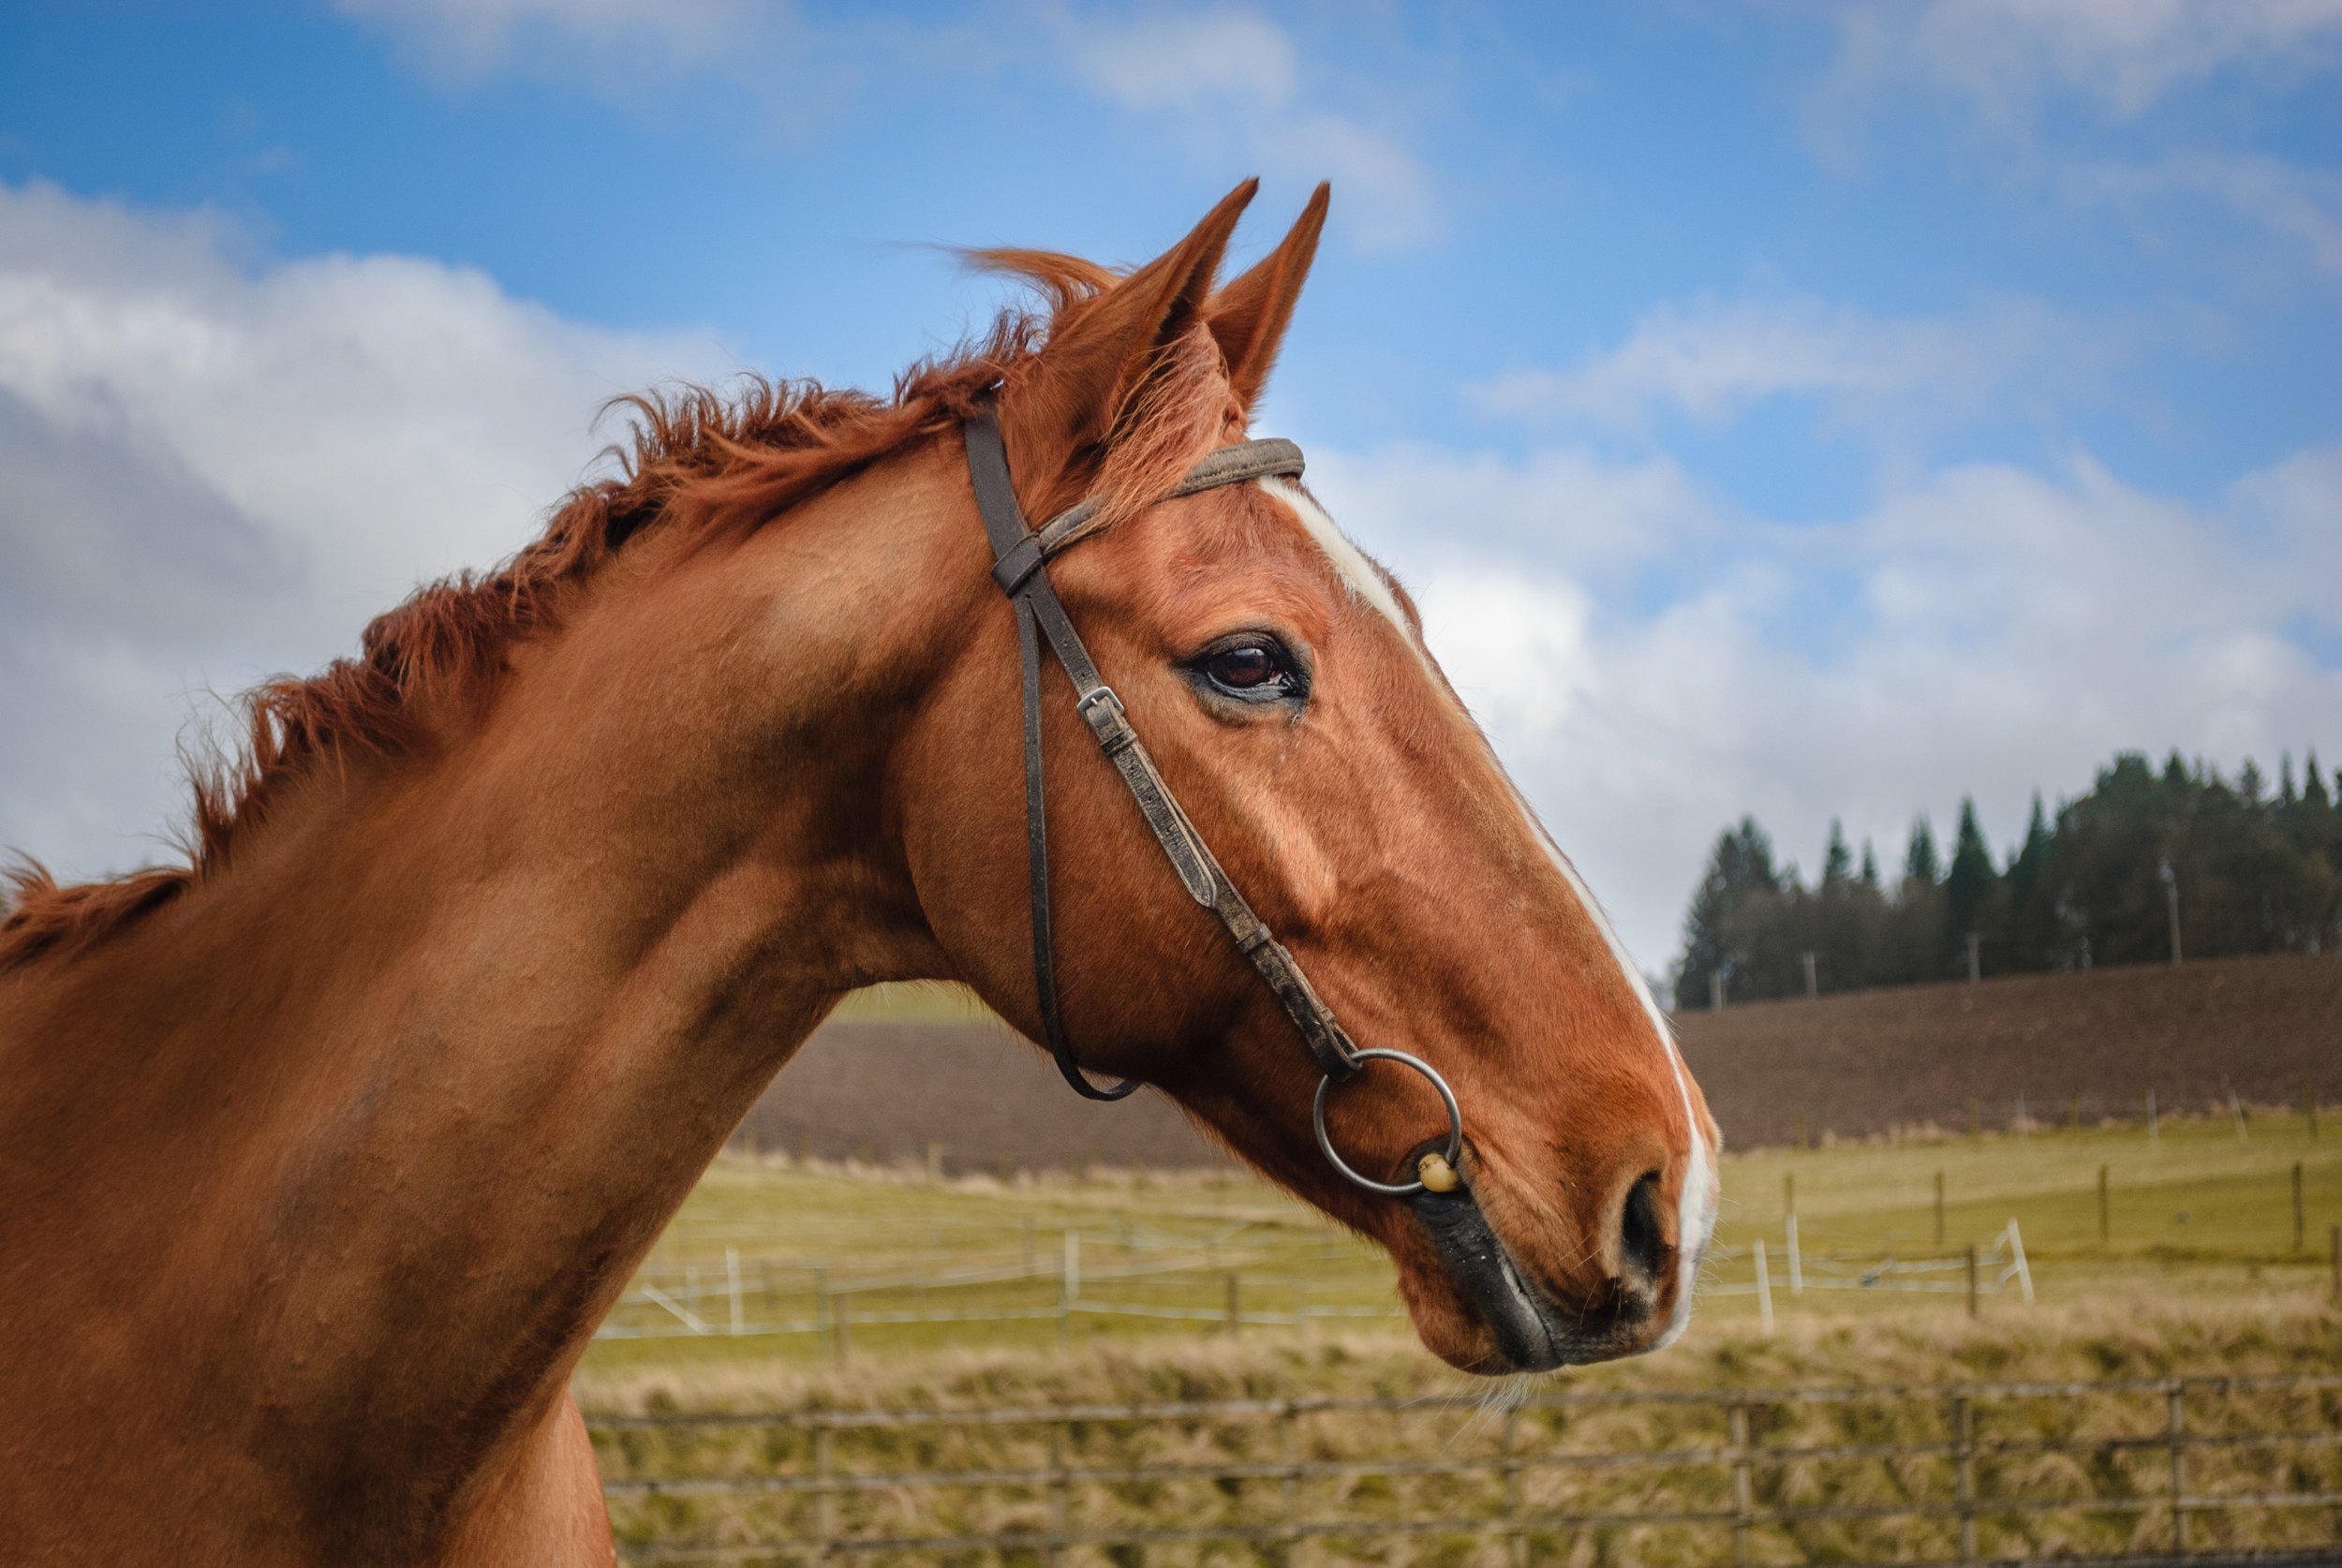
I am sure many people reading this are still extremely fixated on megapixels. Some of this might come from pressure from other shooters, or a preconceieved idea that more is better. I used to be a little bit like this, however not nearly as extreme as some of the pixel peeping crazies we see in forums. I am very used to shooting high megapixel bodies and have good technique because of this. I am no stranger to 36 - 60 megapixel files, and I make panoramic pictures regularly. I am a technical shooter through and through. I maximse data collection at the scene. I use good technique, solid equipment and expose in order that I can get the most out of each file as possible, most of the time for daylight work that involves exposing to the right (ETTR) and if dynamic range exceeds the sensor capture range, bracketing shots. All that said however, I am not beholden to this megapixel thing so many seem to be, and I am so glad I freed myself of it. The Nikon D200 has 10 Megapixels across it’s large Dx sensor. I find them absolutely plenty and I use a 4K proart monitor to edit on. The D200 should be clamped to base ISO, or as near as it as possible at all times. Give it light. Expose as far to the right as possible so you will be able to bring up some shadow detail later in the RAW, bracket if required. RAW convertors have given a new life to early digital tech. We can do a great deal more with these files than we could in 2005. The D200 has a maximum native ISO of 1600, however as I point out - there are better tools for that task if needed. I do like using primes on the D200 - one of my favourite is the nikkor 24/1.4G, giving a nice 35mm equivalent view to full frame on this dx body. If I am hiking / walking / taking the D200 out for serious landscape work, I pop the 18-55 lens on it. I may seek to add a wider dx lens for this purpose, at some point in the future. I do love my foregrounds…
o If skin tones look way too strong bring Vibrance down to taste. +25 is good as a default but occasionally I have to use -10 simply because the lighting saturates the colors more than usual.
It’s not the first thing many photographers think about when choosing a filter, but the size of the sensor in your camera will affect how it works. Smaller sensors apply a magnification factor that effectively zooms the image, meaning the gradient of an ND grad filter, for example, will cover a greater area of the visible frame.
ND filters are essentially darkened pieces of glass that go in front of your lens, and they come in several varieties: solid, graduated and variable. But which one should you choose? The best variable ND filters are incredibly useful when you don’t know which densities you will need and don’t want to carry four or five separate strengths. By rotating the filter, you can choose a stepless density range of often around two to eight stops.
So what is next? Well, I would like to pickup some other bodies from this era, such as a D60. For now I will continue with the D200 to see what I can produce over the coming months into the summer and perhaps another blog post will come about from that. You can now enjoy that post here.
Neutral Density filters are made in wide number different strengths, and different scales are used to measure this. Some manufacturers use an NDxx number, others can quote a number for the optical density, and some use a figure to describe the light reduction in ‘stops’.
I’m going to leave you with my buddy’s best D200 process settings to get the most out of the camera that I still use to this day. Feel free to give them a go. Make sure you tweak your picture control settings. In camera matching ‘Neutral’ for Adobe Lightroom works well. Adobe Colour also works, but is much more contrasty so you may have to make allowances for this. The settings are listed below:
Since that day, we have both used this body a great deal. For what I call reportage landscape photography, it is excellent, and works well. We have even used it for long exposure photography, despite it’s lack of liveview functionality. I am using it a great deal whlist I wait on long exposures completing on my Z 8 camera.
o Push up the black point so that it just barely clips. When processing portraits I make sure no blacks are clipped in eyes/hair. I don't touch the White Point slider anymore these days.
o Fine tune your mid-tones with the Exposure slider. I use my Lightroom exposure preset tree (shared earlier) to quickly preview the optimal mid-tone point. Often I’m backing the exposure down -.33 or -.67 in order to get the highlights safely to the left of the “Whites” range. This will leave the image a bit under-exposed and dull but I use Nik’s Pro Contrast filter to brighten the image back up in Photoshop later. That boosts both highlights and shadow areas with the added benefit of boosting local contrast (which adds to the 3D Pop).
Chris George has worked on Digital Camera World since its launch in 2017. He has been writing about photography, mobile phones, video making and technology for over 30 years – and has edited numerous magazines including PhotoPlus, N-Photo, Digital Camera, Video Camera, and Professional Photography.
He has written about technology for countless publications and websites including The Sunday Times Magazine, The Daily Telegraph, Dorling Kindersley, What Cellphone, T3 and Techradar.
The D200 has a special mix of a 10MP Dx CCD sensor and a strict colour filter array (CFA). A CCD sensor stands for a charge-coupled device, which is an integrated circuit containing an array of linked, or coupled, capacitors. The CCD sensor was indeed very common at the onset of digital camera tech - with many companies using them in their cameras. What tended to happen over time, was that as the demand for cleaner high ISO increased, cameras with these sensors tended to fall apart in terms of their noise performance, so demand for different tech came about. Along came CMOS sensors, which filled this need, and they slowly became in vogue, whilst also becoming cheaper to produce. With regards to CCD sensors, the specific part that makes or breaks them with regards to colour, is called a Colour Filter Array. A colour filter array (CFA) is a mosaic of colour filters (generally red, green and blue) that overlays the pixels comprising the sensor. The colour filters limit the intensity of light being recorded at the pixel to be associated with the wavelengths transmitted by that colour. Some people make the mistake of thinking all CCD sensors have ‘good’ colour. Whilst there might be some secret sauce in these sensors (which is beyond the scope of this blog post), it is the CFA that differentiates said colours, allowing punchy and subtle saturated colour. More CCDs in the early days had stricter CFAs, thus they became associated with the trait of having good colour, which is of course a subjective quality. The CFA then, in a very real sense, differentiates and separates each colour so that if done optimally / correctly, subtle colour gradiations can be recorded and made vibrant and punchy. The general trend over the years, was to achieve cleaner higher ISOs, that manufacturers’ weakened the CFA properties in cameras generally compared to early digital cameras that had CCD sensors. This allowed more light to pass and be recorded by the sensor, (thus helped with noise performance) however it also muddied colours and individual graduations don’t tend to show as well, or as punchy. Some colours even skew a little, yellows might slip to green tinged etc, other colours might contaminant others. Some people will tell us that they can get any file to look like a D200 RAW file, or any other camera. I’ve yet to see proof of that yet, but I suppose if it is possible, it would be a lot of work, so why not just use the camera that does it off the bat? The power of the CCD and a strong CFA is easy to see in the D200 - colour separation makes the different colours pop like with Kodak Ektar film or Kodachromes. To reproduce the same color micro contrast tones on Sony CMOS files, you’ll need to fine tune every different colour separately and fabricate presets depending on the lighting too - that is a huge task. Further to this, you will have to be very careful during RAW development that you don’t cause the already saturated colours to go ‘nuclear’ when dealing with the subtle tones. That isn’t a workable solution in my mind…I’ll just use a D200, rather than trying to pretend I own one.
The best neutral density filters will help you capture incredible long exposures – even in bright sunshine. The chart below shows you how different filters affect your shutter speed
o Set Red Primary channel to Hue -15 and Saturation +15. (This corrects for Adobe's orange skin tone bias with Nikon cameras)
His first serious camera was the iconic Olympus OM10, with which he won the title of Young Photographer of the Year - long before the advent of autofocus and memory cards. Today he uses a Nikon D800, a Fujifilm X-T1, a Sony A7, and his iPhone 15 Pro Max.
A good practice is to carry a 0.9ND, a 0.3ND and a variable ND, meaning if you can manage with a single filter, then do, but you have a variable model at your disposal, for intermediate densities.
o Open Nik Color Efex Pro 4 and choose “Pro Contrast” from the left panel. Leaving the Color Cast and Correct Contrast sliders at 0%, push up only the Dynamic Contrast slider until the image feels right. This will raise the brightness of your highlights back to normal while still generally protecting your colors from clipping. 20% to 30% is safe for almost any image including those with people. Some images without people in the frame can take 50% or even 70%. I have Photoshop actions setup to automate this function at 10% increments from 10% to 100%.
• Camera filters explained • Best filter holders • Best polarizing filters • Best ND grad filters • Best variable ND filters • Best lens protection filters
o Fix local exposure issues or local over-saturation issues with Viveza 2. I find that mildly oversaturated skin falls back into place with Saturation of -15, strongly oversaturated skin falls into place with Saturation of -25.

I read all about this stuff that my buddy was showing me, however I mostly continued ‘business as usual’ shooting with bodies like the D800, D810, D850, bringing out the D200 I eventually bought for my son only occasionally. I will be honest, I still use these a huge amount, they have bags of dynamic range, and they are obviously no doubt better at night. I am not for a minute advocating everyone pick up old bodies and just use them - unless of course you feel this fits for you. However, in buying a D200 for my son several years ago to get him along on trips with me, I have found myself using it more and more. I managed to find this copy on ebay with only a couple of hundred shots on it and in absolute mint condition, for next to nothing. I unfortunately blew the highlights a little on his knee at the bottom left, in the pure excitement of him opening the D200 box. This was not a staged photograph!
o Now shift-double-click the Highlights label to auto-set clipping protection for your WB. Don’t be worried about big numbers like -71, etc. You want the color clipping protection it affords. If you change your WB later, re-do this step.
• 10 things you need to know about camera filters • Best variable ND filters • Best camera accessories • Best protection filters for lenses • How to use ND filters for long exposures during the day • How to shoot and process long-exposure seascapes • The best polarizing filters
NB: Despite these being my thoughts, I still recommend setting up appropriate picture controls in camera and in your software as your best starting point for your edit style and goals.
o Adjust noise reduction to taste. If I’m a little above base ISO or pushing up exposure by +.67 then I’ll use Color NR +15. If I’m above ISO 400 or pushing up exposure +1 or more I’ll use Color NR +25. Otherwise I’m at 0 for both Luma and Color NR.
I always like to have a camera with me these days. For a while, I stopped unless I was in “Serious Landscape or Astro-Photography Mode,” and I just used my phone - which I was never really that happy with except in a pinch - like maybe at a theme park or something where I absolutely felt I could not bring a camera in with me, or if I did it would be a real annoyance all day. I used to lug the big cameras everywhere, for every occasion - I am speaking about FX Nikon DSLR or mirrorless bodies like the D810, D850, Z 8. I love using them, however they aren't lightweight systems, so in recent times I've made a much more concious effort to free myself from that weight and use a Nikon D200 with an 18-55 mm f/3.5-5.6. Such a brilliant combo, and sometimes I pack a tiny 50/1.8 prime too. With regards to weight; it feels like I don’t even have a camera with me at all. The CCD colours are just sublime. I love the way this sensor draws. The D200 gives me a different look to the other cameras, and I really like using it. I know many would be screaming at their screens reading this, telling me “oh buy a Z 7, it’s lighter, that will work,” or something along those lines. However a long time a go a friend of mine from overseas who used to shoot the same body I did at the time - the D800, was experimenting with CCD bodies from the classic era of digital tech. At first, I thought he might have been crazy to ditch something as technically proficient as a D800 for this, however over time I began to see what he was speaking about. (And no, I didn’t ditch the high resolution cameras).
The Daisy. This was shot by my at the time, 8 year old son. I love this picture - Nikon D200, 24/2.8D prime. Notice the almost painterly appearance it has, helped by the slightly rougher bokeh of the 24/2.8D lens and the beautiful colours of the D200.
The best neutral density filters are an excellent tool for landscape photographers, since they reduce the intensity of light hitting the lens (and your sensor) and enable you to extend the shutter speed – even in the middle of the day. In doing so, you can capture creative long exposures, such as blurred water movement at the coast or ghostly clouds across the scene.

o Add saturation. I use Photo Wiz’s ContrastMaster filter to boost saturation as it automatically figures out a natural looking result for the ambient surroundings. Sometimes it over-boosts skin tones, however, so I leave them as is and reign skin back in with Viveza2 as described below. If you need a copy of ContrastMaster let me know.
The table here compares the systems and shows how much slower a shutter speed each filter type will let you achieve with your camera. Why not save it to your phone and refer to it the next time that you're shooting a glorious landscape in the field.
o Verify that the white balance is accurate and adjust it if not. Cloudy looks good around 6650K +10T and artificial lighting requires dialing in like usual.
Are you wondering how the strength of a filter affects your exposure and therefore the shutter speed that you should be using?


 Ms.Cici
 8618319014500