
Basket 2000 San Giorgio Mantova vs Nuova Pallacanestro ... - rugby mantova
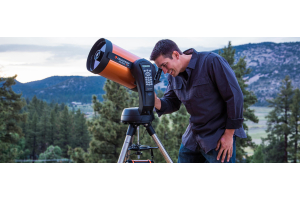
Before making any adjustments to your telescope please take the time to observe and become familiar with the components of the telescope.
Collimationlens
Now that you know which screws to adjust, look in the Apertura Collimation Cap and see if the primary mirror needs to be adjusted. The following two images will show a reflection of the secondary mirror and spider in the primary mirror. If the reflection is roughly centered, no major adjustments likely need to be made.
Collimation is alignment of the optics or process of aligning the optics inside a telescope. The more accurately the optics are aligned, the greater the chance that the telescope will function at its highest level of performance and provide a more uniform view.
When aligning the primary mirror it can be difficult to know which screw to adjust. Partially placing your hand in front of the telescope while looking through the collimation cap can give an idea as to which screw needs to be adjusted. While looking in the scope, move your hand around the front of the telescope until it is either opposite of or closest to the offset image of the primary mirror spot. There are three images below that show examples of this step. Once your hand is in a position that corresponds to the reflection’s offset, pull your head back from the collimation cap, but keep your hand where you have it in front of the scope. Make a mental note of where your hand is on the telescope tube, so that when we look at the back of the telescope we know which direction the mirror is offset in.
An optical microscope is used with multiple objectives attached to a part called revolving nosepiece. Commonly, multiple combined objectives with a different ...
Begin the collimation process by setting up your telescope in a well lit area. Having a bright wall or area to point the telescope at can help you to see the different parts inside the telescope. Be sure the telescope can not accidentally be pointed at the sun, and do not point it at a bright light when aligning the mirrors. Remove the front cover of the telescope, then insert the Apertura Collimation Cap into the focuser of your telescope.
The Apertura Collimation Cap is a simple precision machined tool built to our exacting specifications. It is made of one solid piece, however there are a couple of components of the cap to familiarize yourself with before beginning the collimation process. First and most obvious is the bright ring on the cap; this will be inserted into the telescope, and serves as a reference for centering the reflections within the telescope optics and make it much easier to get an accurate alignment of the system. Turning the cap over, is the second component - the viewing aperture. This is the portion that we look into when using the tool, and the small aperture allows for a precision alignment.
Now that the secondary has been adjusted so that the entire primary mirror can be seen, we will want to adjust the primary mirror. To do so, you will first need to release the locking screws on the back of your telescope. On a telescope like the Celestron NexStar 130 SLT, the locking screws will be the thin cylindrical fasteners, and the collimation screws will be the short coin shaped fasteners.
Socket Connectors · Terminal Blocks & Strips · Terminal Junction ... Our portfolio of electrical connector types includes 2 pin connectors, 3 pin connectors ...
When playing Spot The Ball at botb.com with this extension installed, you will now have access to additional features: 1. Calculate an average of all Co-ordinates in play and shows a cross on the picture to show the average 2. Hides the Co-ordinates in play. 3. Reveals all hidden Co-ordinates. 4. Shows/Hides a draggable target (the same one used when showing the results when a competition finishes, but with a highly transparent centre). 5. New from V1.2: Practice mode - This allows you to load up pictures from previous competitions on botb.com and place your co-ordinate. You can then show the judged co-ordinate of that picture to test your skill. I created this extension in the hopes it will help players the same way it helps me. V1.3: Fixed an issue with the practice tool selector. V1.4: Fixed issue with practice mode not responding once you start drawing lines. Made a performance improvement. V1.5: Average cross will now scale to the size of the preview image and show in the correct place, Draggable target size will scale to the size of the preview image, Practice mode judges cross will also scale to the preview image. V1.6: Change practice mode to allow user to input text instead of using selection boxes. This gives flexibility to try any competition, but doesn't work with some of the older competitions.
Collimationbinoculars
Drag and resize a ruler overlay to quickly measure pixel dimensions, positioning, and alignment of elements on any webpage.
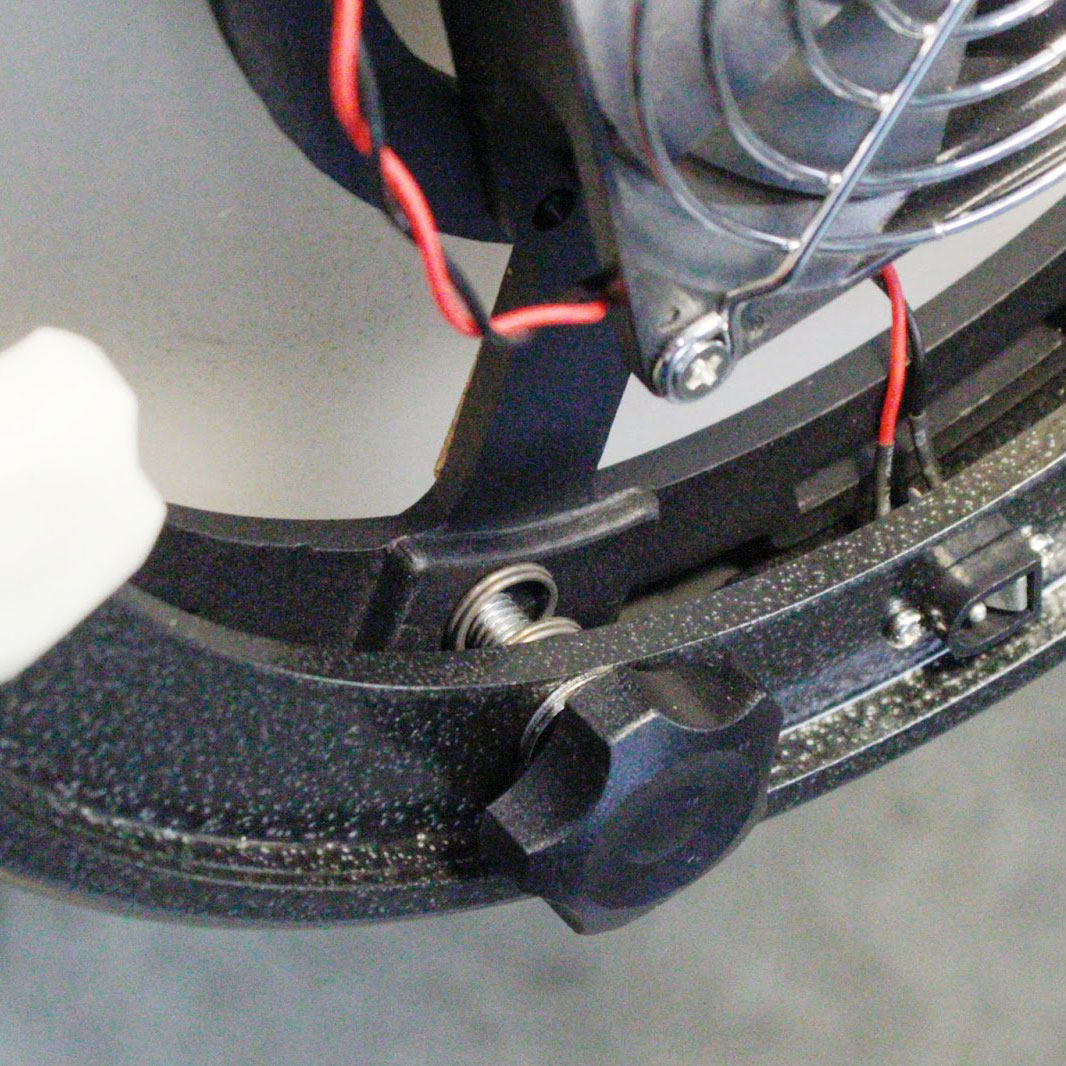
A telescope like the Apertura AD Dobsonian (8-12” Models) will have white and black knobs. The white knobs are the locking knobs, while the black knobs are the collimation knobs. The AD6 Dobsonian on the other hand, instead has two thin knobs; where the knob with the hole through the center is the adjustment knob, and the solid knob with a flathead notch is the locking knob. Typically you can tell which knob is which by looking to see which one has a spring on it, looking closely in the back of the telescope - however because each telescope is a little different, it is best to check your specific telescope. Some examples of different systems can be seen in the following images.
Collimationtelescope
Remember that the mirrors do not need to be perfectly adjusted for casual low power observing. For high magnification planetary viewing, observing double stars, or for the best possible performance; it is most ideal to have them aligned the best that you can. Don't be discouraged if it takes some time to do, or even if you can not align them perfectly at first. It will become easier with time and experience.
Focal Point Vision, San Antonio, Texas. 712 likes · 193 talking about this · 1072 were here. Our Ophthalmology clinic uniquely staffs Fellowship-Trained...
Looking in the collimation cap, all reflections should be centered within one another. If they are not, repeat this process from the start until you are satisfied with the results.
The first mirror that we want to check is the secondary mirror located near the telescope’s focuser. To begin, rack the focuser all the way in with the collimation cap in the telescope. You will see an image like the one labeled above. You should be able to see the entire primary mirror reflected in the secondary mirror, and the view of the primary should be centered on the secondary mirror.
Hi Callum. Thanks for sharing this. It will help a lot of people including myself. I will be sending a donation if possible. I'm blocked from using PayPal so hopefully I can do it another way. I've created a video on my YouTube channel which will hopefully get you more coverage. Great job! Craig @BOTBCar
If the view of the primary mirror is not centered, adjust the three secondary mirror screws until it is fully visible, and is as centered as you can make it. Your telescope might also have a screw in the center of the secondary mirror hub. Do not adjust this center screw.
SPS Commerce renews lease at Minneapolis' SPS Tower ... Transwestern Real Estate Services announced that SPS Commerce Inc., a global retail supply chain network ...
When looking into the collimating cap, you’ll see many different parts of the telescope. The above image shows a simulated view through the Apertura Collimation Cap and a Newtonian telescope. Take a minute to look at the different parts that can be seen from this position.
Collimationradiology
You should notice the reflected image of the spider vanes and secondary mirror. It might not be centered, much like the image below. This is perfectly ok during the secondary mirror adjustment, and we will work to better center this reflected image in later steps, ignoring it for now. All that we are concerned with at this point is the large bright disc of the Primary Mirror being fully visible.
Collimationin laser
JavaScript seems to be disabled in your browser. For the best experience on our site, be sure to turn on Javascript in your browser.
If your telescope is equipped with Apertura Collimation Knobs, it is possible for some users to make adjustments to the secondary mirror while looking through the collimation cap, due to the tool free nature of the secondary adjustment.
The Newtonian telescope design uses a primary mirror to focus light and a secondary mirror to direct the focused light into the eyepiece or camera. The primary mirror is the larger focusing mirror at the bottom of the telescope tube. The secondary mirror is the smaller elliptical flat mirror that sits just behind the focuser at the top of the telescope tube. You will see four thin vanes that support this secondary mirror’s structure. In some telescopes there are three vanes, but this is less common.

Some users find that they check and adjust their collimation before every observing session, and this is good practice. Though other users only check from time to time. Either way you choose, the Apertura Collimation Cap will help to simplify the collimation process while offering the potential for more accurate results. Enjoy your freshly aligned Newtonian Telescope!
Collimationin surveying
Best Buy customers often prefer the following products when searching for optics camera lens. · Nikon - NIKKOR Z MC 105mm f/2.8 VR S Macro Lens for Z Series ...
It will take some time and experience to gain a better understanding of how much to adjust each screw, and in what direction to turn it, but knowing which screw to adjust is a huge help. Start by turning this screw ¼ of a turn clockwise. Then, look back into the collimation cap to see what the results of this adjustment were. If the center marking on the primary mirror moves in the direction that we want to move, continue to adjust this screw until the reflection is as centered as you can get it. Then perform this step again, placing your hand in front of the telescope observing the offset, finding the position of this offset, and locating which screw to adjust next. If the center marking moves in the opposite direction, simply adjust the very same screw, but in a counter-clockwise direction.
Two thin lenses of power 2D and 1D are placed in contact. Find the focal length of the lens combination. View Solution. Q3. Two lenses of powers – 15 D and + ...
Drag and resize a ruler overlay to quickly measure pixel dimensions, positioning, and alignment of elements on any webpage.
The secondary mirror will typically have three screws and these can be Phillips head, hex head fasteners, or they could even be thumb screws. In some applications the fasteners are recessed into three holes in the central hub of the secondary holder. The central hub is the circular portion that the four thin vanes attach to.
NOTE: Many telescopes use a design that has an offset secondary mirror. In these cases, even though the center spot on the primary mirror is aligned properly with the center of the collimation cap, the reflection of the secondary mirror and spider vanes in the view might be offset some. The important part is that you can see all of the primary mirror, the center spot of the primary lines up with the center of the collimation cap.
Ring lights are circular lights that attach easily to stereo microscopes and provide lighting needed to optimize viewing. They reduce shadows and offer a more ...
Collimationmeaning
Example: Your hand is in line with the focuser at the front of the telescope. Look for an adjustment knob in line with the focuser at the back of the telescope. If one is not located at that position, look to see if there is an adjustment screw directly across the tube from this position. If not, find the closest adjustment screw to this imaginary line. This will be the screw that we want to adjust first.
CollimationX ray
While it might seem a bit intimidating at first, It’s important to remember that even a telescope that is collimated only marginally well can still allow us to see things in the night sky, and that the process of aligning the optics generally becomes easier and more familiar with time and practice. Do not be discouraged if the telescope is not perfectly aligned within your first few attempts at this process, especially if you are new to the hobby.
2022828 — OpenCV is the obvious answer since it's the most popular. PCL (Point Cloud Library) is also popular if you work with 3D data a lot.
The 'Field of View' refers to the area that can be captured by a camera or sensor, determined by the number of pixel rows and columns, and the corresponding ...
L'aberrazione obliqua, presente in qualsiasi lente, induce errori di potere sferico e cilindrico. Questi errori provocano la perdita di messa a fuoco quando lo ...
Typically, telescopes of this design will have three adjustment fasteners spaced equally at 120° from each other on each of the mirror holders. On the bottom of the telescope (the primary mirror side) you might notice six fasteners rather than three. Three of these will be locking knobs to help keep the mirror in place once it has been adjusted. It is important to know which knobs are the locking knobs and which are the adjustment knobs, and this will be covered in more detail later.
Once all adjustments have been made, gently snug the locking screws on the back of your telescope so that the primary mirror keeps its alignment for the longest possible time. You might find that tightening the screws progressively, each a little at a time maintains the best alignment.
Before calling the final alignment as “Good”, it is best to look for the bright but smaller reflection of the polished ring of the collimation cap in the telescope’s mirrors. In the center of the bright circle will be a small dark dot. This is the hole that you look through on the tool. This spot should be centered on the primary mirror center spot for the greatest accuracy.


 Ms.Cici
 8618319014500