
Customizable Full Size LED Light Bars - bar of lights
That covers the most common types of film lighting, but it is only the beginning of the story. Creating light is one thing, but shaping and controlling it is the most important skill of all to learn.
If you don't want to cut your LED strip in too many pieces or you don't want to solder too much you can take a LED strip of around 30 cm and glue it to the inner side of the LED holder ring.
A fluorescent light is much more efficient than an incandescent light, and is capable of generating up to 100 lumens per watt, similar to the output of HMI.
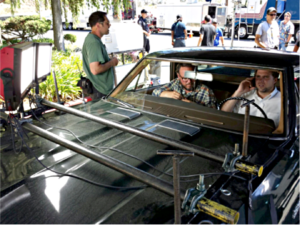
A practical light is considered any light source that will appear in the scene such as a table lamp, any visible interior light sources, even a hand held flashlight. Often existing bulbs are swapped out for those of different wattage or color temperature depending on the needed effect and desired contrast ratios within the scene.
Extremely hotHigh power requirementThe lamp is sensitive to oils and cannot be touchedThe bulb is capable of blowing and sending hot glass shards outward. A screen or layer of glass on the outside of the lamp can protect users.
Remove the LED ring from the cardboard ring and peel of the tape cover on the back of each LED. Place the LED ring in the 3D printed LED holder ring. Make sure the wires are sticking through the hole of the holder ring
A potentiometer has 3 pins. The left pin is the GND, the middle one is the signal pin and the last one is the 5v pin. Solder the GND pins of the 2 potentiometers together and do the same for the 5v pins. Finally solder 2 wires to the signal pins.
Fluorescent film lighting is most often used in fixtures containing banks of tubes. These tubes are normally either tungsten or daylight color balanced, or the tubes can be mixed within the fixture to vary the overall color mix of the light. They produce a soft and even light and can be used in relative close proximity to the subject. Fluorescent lighting is often used to light interiors and has the advantage of being more compact and cooler in operation than tungsten or HMI lighting.
Grab the switch and place it into the hole next to the Micro-USB input. Solder the 5v wire of the powerbank to one pin of the switch and solder a wire to the other pin. Solder the negative side of the capacitor to the GND pin of the powerbank. Next solder the wire of the switch to the positive side of the capacitor.
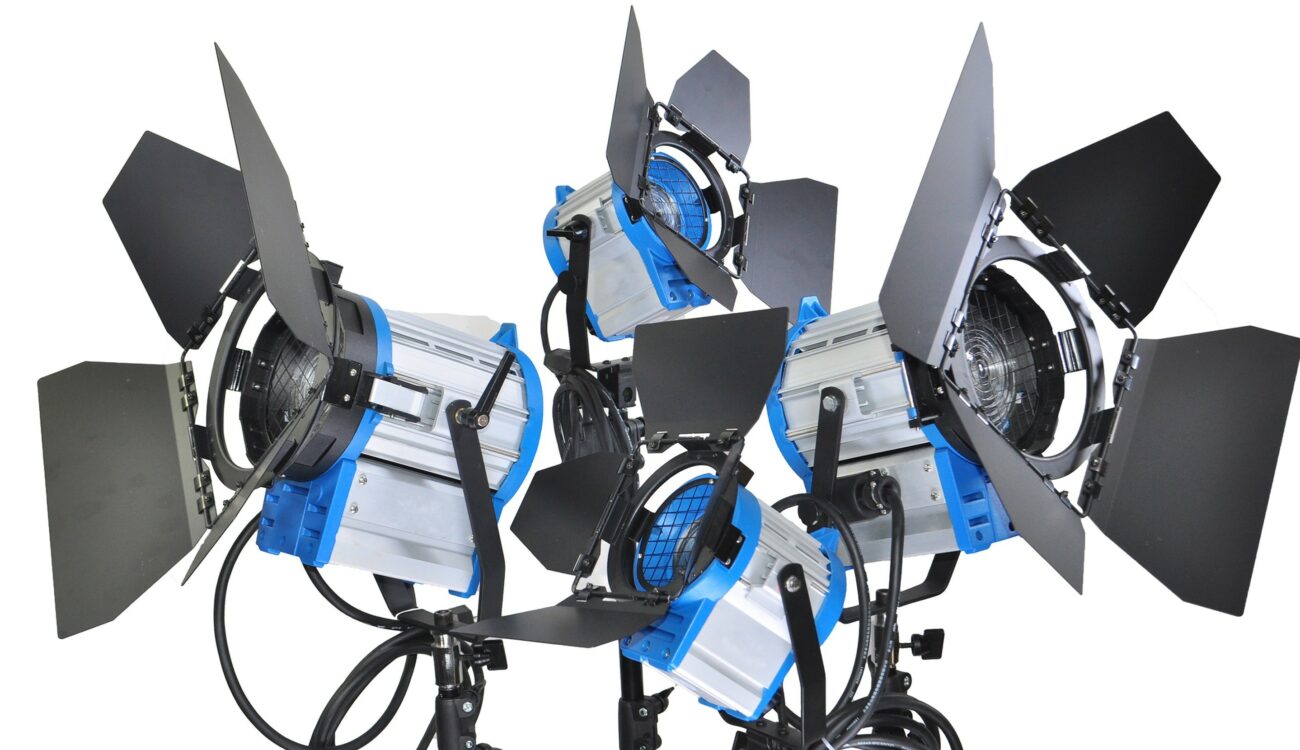
Tungsten light is cheap and is still the workhorse of interior lighting. LED Fresnel technology may at some point reach a practical equivalence but even with Arri’s most powerful L-series, it’s not going to replace the medium to high output Tungsten lamp heads soon.
Glue the top to the base and finally glue the diffuser to the LED holder. If you don't want to glue the top to the base because you want to be able to upload code at any time, you can use double sided tape in the corners of the base. This should be enough to keep everything together.
When everything is working correctly insulate the open connections with some hot glue or heat shrinks. After that we're ready for the next step!
You can unsubscribe at any time via an unsubscribe link included in every newsletter. The data provided and the newsletter opening statistics will be stored on a personal data basis until you unsubscribe. For further details, see our Privacy Policy
CRI stands for Color Rendering Index. It refers to the ability of a light source to properly and faithfully reveal the color of an object compared to an ideal or natural light source. The highest possible CRI is 100 and is attributed to a perfect black body (a tungsten light source is a perfect black body, as is the sun).
A HMI bulb contains mercury vapor mixed with metal halides. An electrical arc between two electrodes excites the mercury vapor and metal halides resulting in a very high light output and luminous efficiency. HMI lamps are capable of between 85 and 108 lumens per watt, up to four times that of conventional incandescent lamps.
Beyond the camera and lens, the most important technical and creative skill you can have is learning to use and shape light. A good place to start is knowing the tools you have at your disposal.
Solder the wire connected to the negative side of the capacitor to the GND pin of the Arduino. After you've done that, solder the resistor connected to the Din wire to pin D6 of the Arduino. Finally solder the wire connected to the positive side of the capacitor to the Vin pin of the Arduino.
Tungsten lighting is usually used to light interiors as it matches the warm light associated with domestic incandescent lighting.
The next thing is a for-loop. This makes sure every LED will turn on and will compare the values of the potentiometer with different programmed colors. A potentiometer has a range of 0-1023. The value of the potentiometer will change when you rotate it." if (potValue < 200) { leds[i] = CRGB(255, 255 , 255); ". This means that if the value of the potentiometer is less than 200 the LEDs will be white. "CRGB(R, G, B)" controls the color in RGB.
Take the flat side of the ball head and insert the 3 wires through the hole And glue the ball head to the LED holder ring.
LED’s are also a permanent addition to the lighting department. For space restricted setups and the sheer portability that battery power affords these lights have become indispensible.
We start off with the LED strip. I used a LED strip with 30 LEDs per meter. For the ring light we'll be using 7 LEDs. Use a pair of scissors to cut the LED Strip along the given cutting lines. You can use more LEDs but this will drain the battery faster.
Big HMI’s are going nowhere. When you need to manufacture sunlight, the only way to do it is with big power hungry HMI’s. There is simply no other way to generate that amount of light. Yes, this means generator trucks and added crew, but when it comes to lighting big exteriors none of this is about to change. Even on a conservative job I would suggest having a 2K and 5K HMI available.
Take the 3 wires of the top we made in the previous step and solder the 470Ω resistor to the Din wire. Solder the 5v wire to the positive side of the capacitor. Then solder the GND wire of the top to the negative side of the capacitor. Finally, solder 2 more wires to both ends of the capacitor.
Want regular CineD updates about news, reviews, how-to’s and more?Sign up to our newsletter and we will give you just that.
Grab the ball headtightener and place it around the ball head. Put the 3 wires of the LED ring through the 3D printed top of the ring light and tighten up the ball head.
High efficiencyLow power requirementLow costLong lamp lifeCoolCapable of soft even lighting over a large areaLightweight
Relatively high cost, but this is balanced out by increased outputHigh power requirementRequires an external ballast for arc ignition (up to 70,000 volts)Dimming is possible only to about 50% and the color temperature increases in conjunction with dimming, thus creating a bluer lightIf dropped while lit an HMI bulb can explode releasing super hot quartz glass and mercury vapor
Outline the 3D printed diffuser on a piece of cardboard and cut out the outline. You should end up with a cardboard ring. Glue the LEDs to the cardboard ring but make sure the LEDs are evenly distributed on the ring.
Grab 3 wires of about 15 cm and solder them to the Din, GND and 5V of the first LED. Solder the Do, GND and 5V of the first LED to the Din, GND and 5V of the next LED (Din to Do, GND to GND and 5V to 5V). Do this for all LEDs until you get to the last LED. Leave the Do, GND and 5V of the last LED open.
Soft, even lightingPure light without UV-artifactsHigh efficiencyLow power consumption, can be battery poweredExcellent dimming by means of pulse width modulation controlLong lifespanEnvironmentally friendlyInsensitive to shockNo risk of explosion
Because I have never designed anything it was quite a challenge to design the ring light. I started with a cardboard prototype and tested different measurements. I had to make many prototypes to finally get to the design I used. With that done, all I had to do was to put everything into a printable 3D model. I used Fushion 360 to make the 3D model.
A Fresnel lens is a special type of lens that is divided into concentric circles, resulting in a much thinner lens than a conventional lens of the same power. This lens evens out the light and allows for the beam to be varied from flood to spot by changing the distance between the lamp/reflector unit and the lens.
Open the case of the powerbank and take out the battery with the connected circuit. Solder two wires to the GND and 5v pin of the USB output. The USB output has 4 pins. The left one is the GND pin and the right one is the 5v pin. We won't be using the 2 pins in the middle. Place the power bank in such a way that the Micro-USB is perfectly aligned with the hole of the 3D printed base and glue it to the base.
A fluorescent lamp uses the excitement of low pressure mercury vapor to produce ultra-violet light, in turn causing a phosphor coating on the inside of the glass tube to glow giving off light in the visible spectrum.
Near perfect color renditionLow costDoes not use mercury like CFLs (fluorescent) or mercury vapor lightsBetter color temperature than standard tungstenLonger life than a conventional incandescentInstant on to full brightness, no warm up time, and it is dimmable
The circuit is finally done! Test it by turning on the switch. The power LED of the Arduino should light up as shown on the pictures. If this isn't the case make sure the circuit meets the following requirements:
Solder the 5v pins of the potentiometers to the 5v pin of the Arduino. Solder the GND pins of the potentiometers to the GND pin of the Arduino. Lastly solder the signal wire of the first potentiometer to the A0 pin and solder the signal wire of the second potentiometer to the A1 pin.
The specific mix of gases in a HMI bulb is designed to emit a 6000K color temperature light, closely matching natural sunlight. Electronic ballasts produce a flicker free light due to their very high frequency operation. Pulse width modulation can be used to dim HMI lights.
Fluorescent lights for film use have a high CRI, however the use of domestic tubes may have a far lower CRI and poor color rendition.
Want regular CineD updates about news, reviews, how-to’s and more?Sign up to our newsletter and we will give you just that.
White light can be warm (yellow/orange) or cool (blue) and our eyes automatically adjust. However, the color temperature of light sources and especially the mixing of different color temperatures becomes very important when designing film lighting.
Tip: If you ever want to design or test something, it can be useful to make it from cardboard/paper first. It is considerably faster and cheaper than 3D printing your objects directly!
The key difference is that these use bulbs that take advantage of what is known as the halogen cycle. The pressurized halogen gas inside the bulb helps to redeposit evaporated tungsten metal back onto the filament. The glass bulb is made from a much stronger quartz or aluminosilicate glass. The lamps operate at a higher temperature than normal incandescent tungsten bulbs, and so they can achieve a higher color temperature, and higher luminous efficiency. They naturally produce a warm light, but blue color correction gels can be used to simulate daylight.
Richard Lackey is a cinema camera and workflow specialist, colorist (CSI member), producer & writer with 10+ years of industry experience. Richard has a passion for cinema technology & beautiful imagery.
You can unsubscribe at any time via an unsubscribe link included in every newsletter. For further details, see our Privacy Policy
When all is said and done, all of these lights have a specific purpose, and you’re likely to see them all on any film set. Not one of these lights can be used for every purpose and any lighting kit list would be severely compromised if any of these were missing.
Fluorescents provide a lovely soft even light. They offer higher output than LED panels and can be larger in size, although LED panels can of course be tiled. Fluorescents are also very cost effective.
LED’s are also powering more traditional Fresnel style lamp heads such as the Arri L-series. Overall power outputs are on the rise, which is good news.
Color temperature refers to the “color” of white light emitted by a light source based on that radiated by a perfect black body at a given temperature measured in degrees Kelvin.
An open faced lighting fixture is used to create hard light that casts hard shadows. It is not much more than a housing and reflector for the bulb, and provides nothing in between the bulb and the subject.
1,700 K: Match flame1,850 K: Candle flame, sunset/sunrise2,700–3,300 K: Incandescent lamps4,100–4,150 K: Moonlight5,000 K: Horizon daylight5,500–6,000 K: Vertical daylight6,500 K: Daylight, overcast15,000–27,000 K Clear blue poleward sky
Upload the code to the Arduino, unplug the cable and turn on the switch. With the code I provided you'll be able to choose from 5 different colors. If you want you can change the functions of the potentiometers and create really cool things!
LED stands for light emitting diode and is a solid-state semiconductor device. Only recently, LED’s of sufficient power have become available to make practical LED film lighting possible. LED’s are extremely efficient but are still limited in overall light output when compared to any of the other light sources.
Are you tired of the dark days? These days are over with this new DIY mini ring light! Use it for your selfies, vlogs or even blogs! With an astonishing battery capacity of 1800 mAh you will be able to use the lamp for around 4 hours on full brightness! Use the potentiometers to change the color and brightness to your liking and recharge the ring light with a Micro-USB cable. With the Arduino IDE you will be able to adjust the code to choose all colors you want. You can even make cool animations! The best thing about this lamp is that you can build it for around 10 dollars without the cost of supplies of course.
LED’s are becoming more and more common on film sets. They can easily be battery powered making them very portable and requiring no separate ballasts or heavy cabling. Panels made from LED lights can be small and compact, or large for a variety of situations.
LED’s are by nature monochromatic, producing only a single wavelength of light. So the challenge of LED lighting has been in creating a full spectrum white light. This can be done in two ways, either by combining the light of red, green and blue emitting LED’s, or with white LED’s whereby the visible white light is actually created by phosphors that are excited by an ultra-violet emitting LED.
Flicker can be a problem with domestic fluorescent installations not intended for photographic use. Those designed for film use have electronic ballasts and produce flicker free light.

3D print the STL files attached. I used the Creality Ender 3 with 1.75mm white PLA. I sliced the parts in Cura 4.4 and used the following settings:
The spectrum of light emitted is different to an incandescent source and depends on the mix of phosphors used. However a CRI up to 99 can be achieved. The color temperature of a fluorescent can vary also from 2700K to 6500K depending on the phosphor mix.
LED lights can be daylight or tungsten balanced, sometimes switchable or having variable color temperature. Some have variable color through the entire RGB spectrum, which is something not possible with any other lighting technology. The CRI rating of LED lighting can be over 90.
You can unsubscribe at any time via an unsubscribe link included in every newsletter. The data provided and the newsletter opening statistics will be stored on a personal data basis until you unsubscribe. For further details, see our Privacy Policy
HMI’s are often used when high output is required and when recreating or augmenting sunlight shining into interiors, or for exterior lighting. Powerful HMI’s can be used to light large areas.
Tungsten lighting fixtures can be open faced or Fresnel up to about 20kW in power and are dimmable. They produce a continuous spectrum of light from near ultraviolet to infrared, producing near perfect color rendition.
The last few lines control the brightness. Because the maximum brightness is 255 we'll convert the 1023 steps of the potentiometer to 255 steps in total. If you rotate the potentiometer the brightness will change with a range of 1-255
Tungsten light sources are basically related to the same type of incandescent filament bulbs which until recently were common in homes and offices everywhere.
The loop starts with two lines: " int potValue = analogRead(A0); " And "int potValueBrightness = analogRead(A1);" . These lines read the analog pins of the two potentiometers. As you can see the A0 pin is going to control the color and the A1 pin is going to control the brightness.


 Ms.Cici
 8618319014500