
Use AI to Create Your DMX Light Show With Disco DMX ... - ai dmx controller
Hi rad. :D It is enabled/disabled through the Driver Information/Message Center. You can scroll through the programmable settings or just look in the Owners Manual. The instructions for all driver programmable features are in the Owners Manual so it would not be a bad idea to take a look through it.
I just got a new 2010 Edge SEL. The parking lights and dash lights come on whenever a door is opened. Does anyone know how to turn this OFF?
Backlit lightingphotography
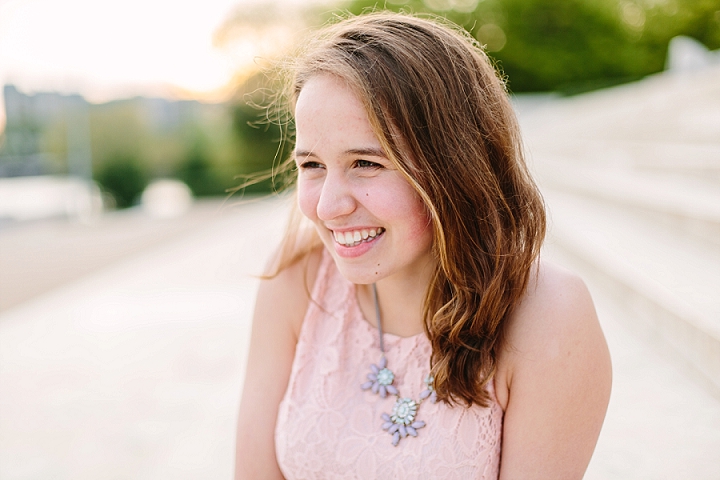
The first thing I do with a client is look for good lighting. I used to think location was the most important, but quickly realized that this was SO wrong! If you have good lighting, your images will always be beautiful no matter where you’re shooting. On the other hand, if you ignore light and go for location first, you could end up with some really unflattering pictures. At the start of a sunset session when the sun is still a little higher up than I like, I bring my clients to places with spotty or “dappled” light hitting the ground, which is usually caused by a tree or building. When the sun is too high up and you’re shooting into (towards) it, the direct light can give you that unrecoverable greyed-out haze that I now avoid! As the sun starts to set, I’ll start moving into more open spaces since the sun isn’t as harsh when lower.
Thanks for taking the time to reproduce those instructions. Unfortunately, they didn’t work. I tried the procedure at least a half-dozen times. Each time, the horn chirped or honked as indicated, but there was no change to the Perimeter Lighting. Now, that’s really weird! Perhaps there’s an additional step for the 2010 Edge - pay the dealer $118.
I’ll admit…the photo below was one of the HARDEST lighting situations I have ever been in! For Katherine’s shoot we decided to split her two-hour session into two locations, and this place happened to be the first. Katherine mentioned that she reaaalllyyy wanted to get photos on the dock with the water behind her when we met up, and I immediately knew it was going to be difficult since we had to leave for the last location an hour before sunset, which meant that the sun would be high and intense in the sky with nothing to hide behind…coupled with BRIGHT water and HIGH winds. This meant that my background would be VERY light, Katherine would be VERY dark, and that she would probably have hair in her face 75% of the time (ended up being more like 90% b/c of those high winds!)…yikes. After she told me this, I decided to go to this spot LAST before heading to our next location since the sun would at least be a little lower. It took a few test shots coupled with moving around, directing Katherine into different positions, and altering my camera angle by standing on my tip toes, but at last I found the “sweet spot” and we got this shot – still one of my favorites! This is another example of #4 – shooting directly into the sun…its just at an angle.
Thanks for taking the time to reproduce those instructions. Unfortunately, they didn’t work. I tried the procedure at least a half-dozen times. Each time, the horn chirped or honked as indicated, but there was no change to the Perimeter Lighting. Now, that’s really weird! Perhaps there’s an additional step for the 2010 Edge - pay the dealer $118.
Hi guys. :D Then I am fresh out of ideas for rad48. If he does not want the dash lights to come on with the dome lights (as most cars do anyway) then it looks like the choices are to pay "$118 to flip a friggin light switch", check with other Dealerships for a better price offer, live with it as is, or hope someone else will come up with another workable idea.
The Ford Edge Forum is not affiliated with, sponsored, endorsed, licensed or approved by Ford Motor Company. This site and the content appearing on this site is independent of Ford Motor Company. Powered by Invision Community
Some people think that the only way you can shoot backlit is with flash to fill in your subject’s skin! But, I beg to differ! When shooting with sun behind your subject, the background will be LIGHTER than your subject’s skin since the front of your subject will be in the shade. In order to compensate for this, 9/10 I will expose for my client’s face, and darken shadows a bit when editing. The few times I don’t mainly expose for skin is when my background is reallllyyyy light and I want to keep some of the background in the image! This can typically happen when water is behind, like a fountain brightly illuminated by the sun.
On the left, the sun was a little lower, but still strong, so I placed Amy in front of these trees. On the right, Amy herself is blocking the light. The sun was directly behind her body, giving her that glow! If I hadn’t directed Amy in this way and the sun was instead directly coming through my lens, the sun would have created too much haze for my style!
Low-keylighting
Hello. Thank you so much for the tips. They are really helpful and your photos are amazing! I’m just starting out and am trying to learn this all on my own. When you mention to ‘expose for the skin’ are you referring to the metering mode here? Would you typically use spot metering? Or is it something altogether different? Appreciate any insight you can give me.
Any other suggestions? I can’t find anything in the Driver Information/Message Center (or in the Owner’s Manual) which tells how to turn OFF the Illuminated Entry/Exit. I’ve set “AUTOLAMP” to zero, but this only affects the headlights. The parking lights & instrument lights still come on for 25 seconds, whenever a door is opened or closed (as discussed on pages 112 & 113 in the Owner’s Manual). On a previous vehicle (Dodge) I was able to disable these lights by simultaneously pressing buttons on the key. I suspect there is some similar feature on the EDGE, but it eludes me.
backlight背光
This location was also very hard to expose for! The background was completely WHITE if I exposed properly in camera for Gwen’s skin, but if I properly exposed for the fountain, Gwen turned into a silhouette. As a result, I compromised by exposing at a happy medium between the two, and slightly altering in post-processing. Gwen did have a natural light reflector (the white concrete), which did help a bit and is something I talk about below!
Angelika Johns is Washington DC-based photographer specializing in weddings, portraits, and editorial work. She is available for travel worldwide.
The shop manual says the "Perimeter lighting mode" is configurable in the SJB, which means the dealer might be able to do it in the same way they can turn on/off DRLs. But it's not something you can do without their computer.
You can post now and register later. If you have an account, sign in now to post with your account. Note: Your post will require moderator approval before it will be visible.
Hi rad. :D Through the 2008 (and possibly 2009) models, this is the procedure listed in the Owners Manual to enable/disable the Perimeter Lighting/Illuminated Entry feature:
Backlight LED

Any other suggestions? I can’t find anything in the Driver Information/Message Center (or in the Owner’s Manual) which tells how to turn OFF the Illuminated Entry/Exit. I’ve set “AUTOLAMP” to zero, but this only affects the headlights. The parking lights & instrument lights still come on for 25 seconds, whenever a door is opened or closed (as discussed on pages 112 & 113 in the Owner’s Manual). On a previous vehicle (Dodge) I was able to disable these lights by simultaneously pressing buttons on the key. I suspect there is some similar feature on the EDGE, but it eludes me.
I’m Angelika, a Washington D.C. and Harrisonburg based photographer. Photographing people and brands I love all around the world is my passion, and I would enjoy nothing more than to work with you too! Shoot me a message so that I can say hi, personally thank you for stopping by, or set up a session with you!
As a follow-up to my original question which was: “How can I disable the Illuminated Entry so that the parking-lights and dash-lights don’t come on whenever any door is opened or closed?” I e-mailed Ford Motor Company and received the following response: “Inquiries of a technical nature are best referred to our dealerships . . . They are in the best position to discuss and review your request.” I then went to the dealership, and the service advisor told me: “I don’t know. “ “You’ll need to schedule a service appointment.” A few days later, when I arrived for the appointment, the service advisor said that the illuminated entry CAN NOT be turned off. So, I gave him a copy of this forum with Waldo’s comments. He agreed to have a technician look at it. Four hours later, the service advisor called to say that yes, indeed, the Illuminated Entry could be turned off. But, since they would have to connect it to a computer, it would cost me $118. That’s right - $118 to flip a friggin’ light switch. I declined to pay, and will go on living with: “Hey mister, you left your lights on.” Plus, I get to share this story with future potential Ford customers.
backlight中文
For this photograph, I asked Kacey to sit down to decrease the intensity of the sun! As a result I shot at a DOWNWARD angle. If she had stood up, the sun would have been too intense!
Perhaps they neglected to put it in the 2010 Manual for one reason or another. I won't waste time guessing at the answer to that question. Whatever the story, give the procedure a try on your vehicle. If it works, great. If it does not, you can "share this story with future potential Ford customers" to your hearts content.
As a follow-up to my original question which was: “How can I disable the Illuminated Entry so that the parking-lights and dash-lights don’t come on whenever any door is opened or closed?” I e-mailed Ford Motor Company and received the following response: “Inquiries of a technical nature are best referred to our dealerships . . . They are in the best position to discuss and review your request.” I then went to the dealership, and the service advisor told me: “I don’t know. “ “You’ll need to schedule a service appointment.” A few days later, when I arrived for the appointment, the service advisor said that the illuminated entry CAN NOT be turned off. So, I gave him a copy of this forum with Waldo’s comments. He agreed to have a technician look at it. Four hours later, the service advisor called to say that yes, indeed, the Illuminated Entry could be turned off. But, since they would have to connect it to a computer, it would cost me $118. That’s right - $118 to flip a friggin’ light switch. I declined to pay, and will go on living with: “Hey mister, you left your lights on.” Plus, I get to share this story with future potential Ford customers.
When I first got into photography, I remember really struggling in this area. I dreamed about being able to create that “glowy look” during sunsets like other photographers, but somehow my photos never turned out the way I intended, and I couldn’t understand WHY. 9/10 times my attempted backlit images would turn out unrecoverably hazy with greyed out light and awful sun flare. It was definitely a process learning how to finally get backlit, glowy images like the ones you see on my website + blog today, so here are FIVE tricks (plus 2 bonus tips!) I use to create those dreamy looking images with sun flowing in from behind!!
Hi rad. :D It is enabled/disabled through the Driver Information/Message Center. You can scroll through the programmable settings or just look in the Owners Manual. The instructions for all driver programmable features are in the Owners Manual so it would not be a bad idea to take a look through it.
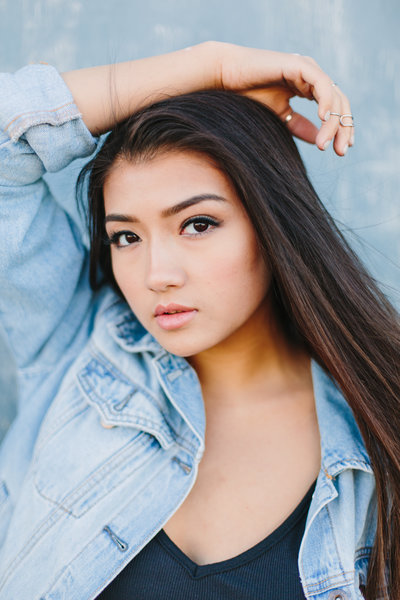
Shooting backlit is my favorite. Like… I LIVE for good backlighting during photo sessions. If you ever book a shoot with me you will see just how excited I get when I can implement it!! I use this lighting technique whenever I possibly can because of how amazing the results can be if done correctly. Backlighting is as straightforward as it sounds – light streaming into your frame from behind, which means that the sun is BEHIND your subject. When the sun is behind your subjects, it gives them a “glow” and can really make your photos stand out.
Fill light
Whatever’s in front of your subject will be reflected back onto their face, so brightly colored walls, buildings, or grounds will add some “fill light” onto your subject! The sun’s light from behind will bounce off of what’s in front of your client and illuminate them, so try to find bright, natural colors (white is the best) so that your subject’s skin tones don’t start looking a little off. For example, a dark green wall might produce a greenish skin tone. The distance your subject is to the “reflector” is also a factor, so if there’s a green wall 100 yards aways from you, that doesn’t mean you should avoid that location as the wall probably won’t affect your subject! Understanding natural reflectors takes practice, so don’t get frustrated if you don’t see results right away 🙂 Don’t forget to look for LIGHT first, and THEN natural reflectors after. For example, don’t go to a spot that has a perfect white wall, but terrible lighting!! I personally don’t use artifical light reflectors anymore, but used to play around with them. They are also a great option! You just don’t want to become dependent off of them! Click here for the one I used to use.
Golden hour happens during sunrise and sunset, and is when the sun is lower in the sky. I do ALL my shoots during golden hour, and will subsequently start two hours before sunset or begin at sunrise and shoot for two hours after. This ensures that my clients don’t get those unflattering, harsh shadows on their faces caused by midday sun, but instead even, glowy light!!
LCD backlight
A big part of why I was getting those ugly, hazy images when I first started out was because I didn’t know this technique! Just because the sun is behind your subject does NOT mean you’ll get that glowy, backlit look. Try breaking up the sun’s intensity by moving around until the rays are partially hidden behind a tree or building. When the sun begins to set lower, you can use your clients to break up the sun by having them stand in front!
Three-pointlighting
These two photos were taken RIGHT after the other. See how much of a difference angle makes? I love both images, but they have a completely different look!!
I know this sounds contradictory to what I just wrote above, but don’t close out this option completely! Shooting directly into the sun (aka the sun isn’t being partially blocked by anything) is EXTREMELY difficult to master , but if you practice A LOT, and get it down, you can get some gorgeous images with lens flare. It takes a really trained eye to get it on the first go consistently, so don’t be discouraged if you don’t get it for a while. I usually shoot into the sun as a last option though.
This photo was one of the first we took during Breny’s sunset shoot. The sun was still a little higher up than I wanted, so I directed her into a space where the light was being filtered by trees, but still coming through a bit (which can be seen by the dappled light on the grass). This prevented the light from being too harsh, while still giving her that “glow”!
I just got a new 2010 Edge SEL. The parking lights and dash lights come on whenever a door is opened. Does anyone know how to turn this OFF?
I just bought a 2010 MKX and wanted to turn off illuminated entry. So I looked in owners manual I found the procedure that was posted above. I tried it and the horn would chirp as if it had been disabled but they still came on. However, If you go to www.motorcraft.com and look at the owners manual for a 2010 MKX there are three different revisions for the 2010 model year. The first two have the steps necessary to disable the system but the 3rd revision does not mention anything about disabling the feature. So if it can be done I guess the only way is to go to the dealer.
I’m Angelika, a Washington D.C. and Harrisonburg based photographer. Photographing people and brands I love all around the world is my passion, and I would enjoy nothing more than to work with you too! Shoot me a message so that I can say hi, personally thank you for stopping by, or set up a session with you!
Sometimes you’ll have to play around with the angle of your camera and positioning of your subject to get the “sweet spot,” but it can be so worth it! Try angling your camera down by either climbing on a bench, rock, or stool (if you bring one), or by having your client sit if the sun flare is too strong.
Wow. Now thats what I call a procedure! Wonder why they just didnt put a little switch on the dash that would shut that off instead? Ill never understand engineers. LOL!


 Ms.Cici
 8618319014500