
Illumination Systems: Home - Denver - illuminations lighting
For the purpose of this article, however, we’re going to look at some of the most popular DIY lighting solutions that help you diffuse light without spending any of your budget on new equipment. (But you may end up needing to spend a few dollars on something.)
As you experiment with the demonstration program, please make sure you observe the following characteristics of combining ambient, diffuse, and specular lighting.
And if you want to find similar tips, tricks, and solutions to level up your filmmaking, here are some other articles from Soundstripe:
This code can be written in less lines if you combine the operations into single statements. For example, the diffuse calculation could be written like this in a single line:
Diffusedlighting
Notice that the final color of a pixel is simply the sum of the ambient, diffuse and specular calculations. This is a component-wise vector addition. That is, if a = and b = . Then a + b is equal to a 3-component vector .
It’s worth investigating any tool or learning any trick to improve the quality of your lighting. And because diffusing light is an easy, cheap, and efficient way to adjust lighting, it’s something that every filmmaker should at least be aware of.
On one hand, it’s difficult to control because so many moving parts are involved — natural light, reflective material, the Kelvin scale, etc. On the other hand, how you light a shot can make all the difference in post-production and eventually the final product.
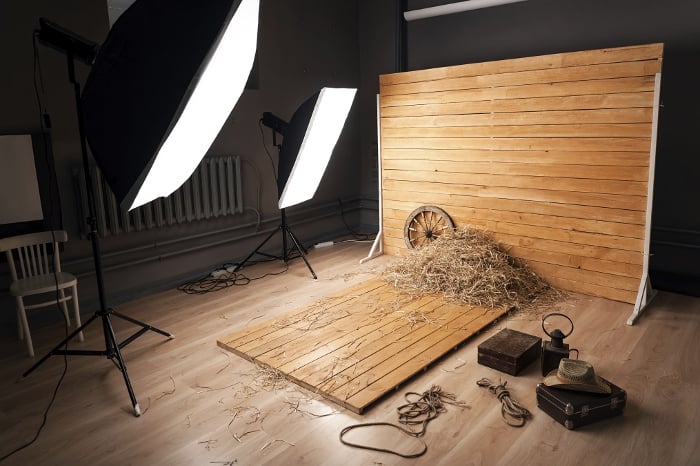
The most obvious place to start is with a dedicated softbox lighting kit. You could also go for an umbrella diffuser — they work great but aren’t quite as adaptable as soft boxes.
Then again, those options deal with video production on a set. But if you’re shooting outdoors or in a space with natural lighting, a softbox or an umbrella might not be enough for that job. Or maybe you can’t afford a new lighting kit, but you still want to create diffused light on your next project. What options do you have?
The fun thing about using a diffuser is that you can pair it with a reflective material to bounce light, which gives you control over the direction of the light, the intensity of the light, and the level of detail that the light reveals.
You are encouraged to not write complex statements like this until much later in your learning. The GLSL compiler will optimize your code, so write your code as clearly as possible for humans! Use descriptive variable names and multiple, distinct statements for clarity.
And while you’ve probably seen (or maybe even used) a bedsheet as a light diffuser, you can also use a shower liner. The frosted plastic holds its shape better than a sheet, but you’ll want to make sure you don’t get a clear one because that plastic surface could reflect light.
What is diffused light for plants
One answer for all of these questions is “diffused lighting.” Regardless of your lighting situation, light diffusion gives you a way to get the most out of the lighting on a set.
That’s not to say it’s the only obstacle, or even the most annoying. But it is ever present. We could easily lay out a half-dozen reasons why lighting is the nemesis of filmmakers.
Diffuselight vs direct light
There is no new math to discuss. The ambient, diffuse, and specular light calculations are performed as we discussed in the previous lessons and then the resulting colors are added together to get the final color.
Want to know how to deal with direct sunlight? How to add extra light sources but not cast harsh shadows? Or how to get the most out of your kit with a bounce light?
You can get soft lighting. Think of it as getting the benefits of a directional light, but also enjoying the aesthetics of indirect lighting.
Diffusedlightinginterior design
You really can’t take advantage of that idea without using a light diffuser. The control it gives you doesn’t just make your footage look better — it allows you to turn any light source into something that adds depth, interest, or emotion to a shot. And that’s exactly the sort of trick a visual storyteller wants to have on any video shoot.
Let’s pretend you’re filming outdoors, and the noonday sun is creating harsh shadows on your subject. Setting up a sheet overhead doesn’t really make sense, but waiting for a passing cloud would provide a natural diffuser that creates even light distribution.
Either one offers a relatively affordable option to diffuse light in your video projects. (And if you already have some lighting equipment, you could look for an individual piece — it just won’t be as good of a bargain as if you bought a bundle.)
Every filmmaker has their own ideas for DIY solutions. And chances are that as you spend more time creating content, you’ll discover a few unique techniques we might not have heard of.
There have never been more tutorials about DIY filmmaking, so in a way you have as many options as you can think of…so long as your diffuser is the right material. You could use a bedsheet, or a thin set of curtains, or even a lampshade.
Diffused light architecture
But obviously you won’t always have access to an agreeable cloud. Your most realistic option is to find a good lighting kit, something that includes at least one type of diffuser.
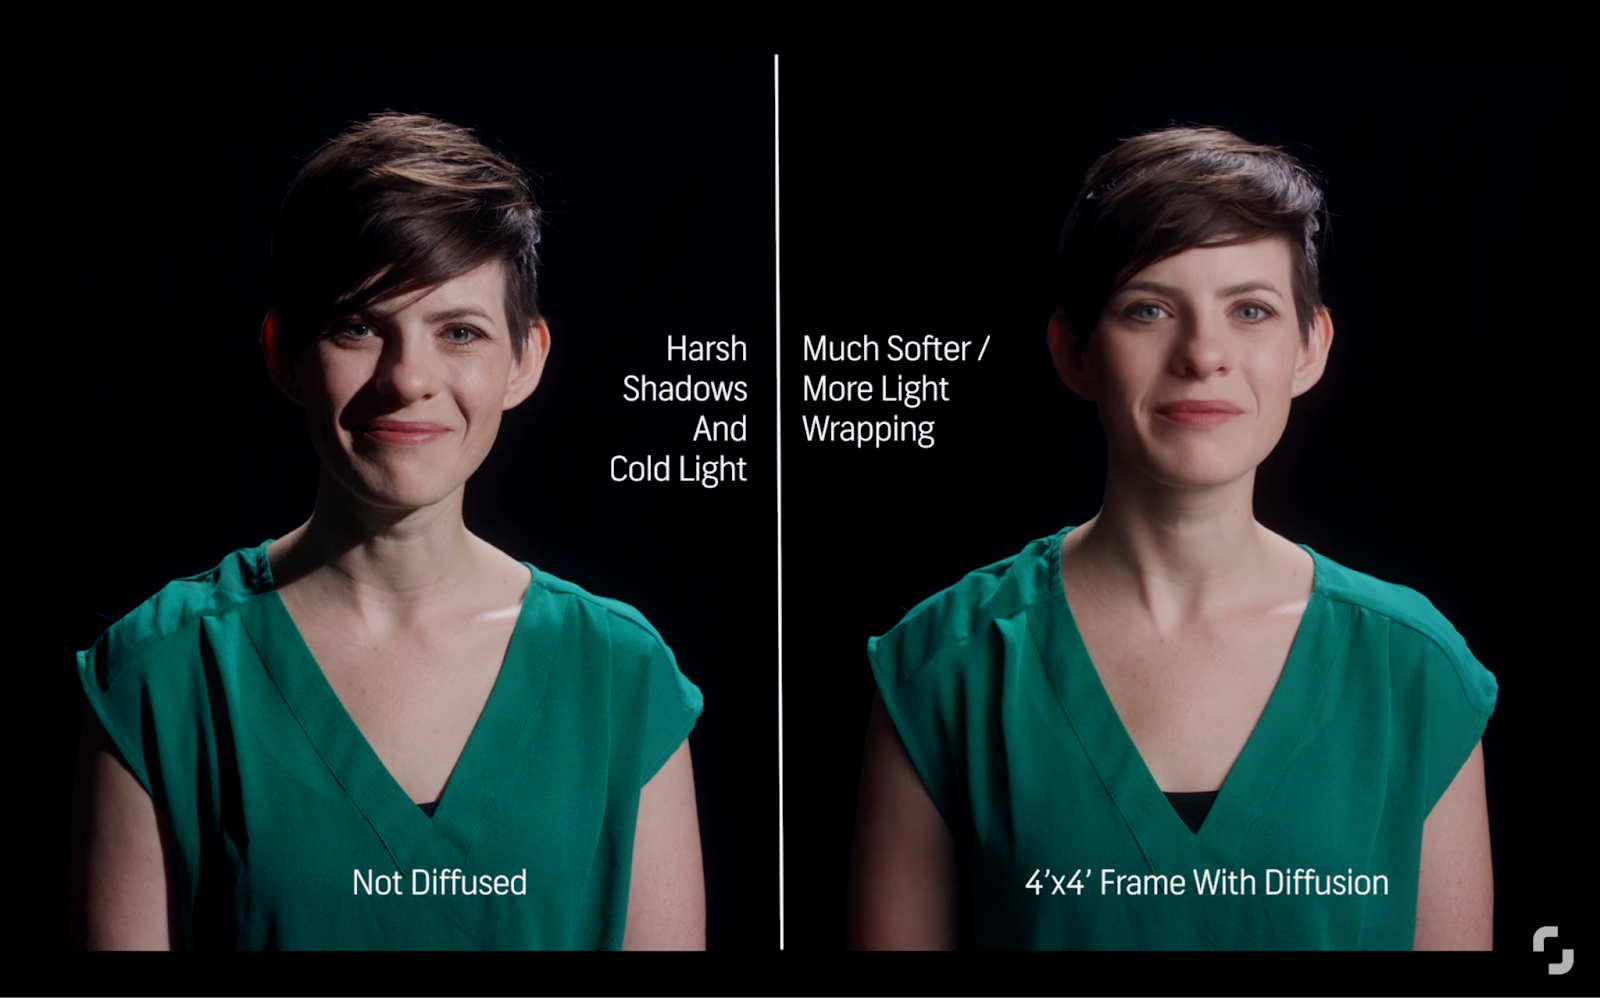
Even with nothing but the image above, you can see a pretty big difference. Diffused light is a more natural, healthy look, and — in a weird way — can actually help you balance your color temperature if you use the same light diffuser (or DIY material) on different lights.
Light will bounce off most solid objects, which is why any good lighting kit comes with reflectors. But a light diffuser does the opposite — it blocks or reflects part of the light, but still allows enough to properly light a subject or scene.
Diffused light Ceiling
Experiment with the following WebGL program. There are many values to experiment with, so take your time and figure out how the settings interact with each other.
Diffuselight bulb
The example WebGL program above was based on a point light source. If you had a different type of light source, such as a sun light source, the shader programs would have to be changed because the definition of your light source would change, but the fundamental math would be the same.
Using a DIY technique can help you create diffused light on the cheap. More importantly, it can also help you address some of the many light-related problems that filmmakers have to solve.
Motivated lighting is a fancy name for any light source that is out-of-frame and also enhances, spreads, or somehow affects the practical light in the scene.
A pillowcase is an ingenious and inexpensive way to make a DIY softbox, catching and diffusing all of the light from a source. It works for a stand light, a lamp across the room, or — if you tape it up — even to help soften the light from a small window.
The specular_color is combined with a percentage of the surface’s diffuse color. This is the same idea we used in lesson 9.3, but this time we take a percentage of the diffuse color instead of the face’s color.
That wasn’t exactly a textbook definition, but it gets across enough of the basics that you should have an idea of why diffused light matters. Now, we get to the fun part — what it looks like in practice, and what you need to start improving the quality of your lighting gear.
Diffused light can actually get you the best of both worlds. It’s the process of using a diffuser (which could be a DIY piece or something you bought in a lighting kit) to reduce harsh shadows or the glare of a light source you can’t get rid of on the set.
Other options include a white trash bag, a thin T-shirt, or even parchment paper. The different thickness and texture of each item means the quality of your diffused lighting could be hard to predict. But if you’ve already got these things around your house, it’s a cheap way to experiment and see if any of them work with the light sources you want to work with.
Now that you understand the three basic light models: ambient, diffuse, and specular, we can combine the three models into a general model for realistic light modeling. When we combine the light models the only question is how the three separate colors can be combined into a single color. The answer turns out to be very simple. Since colors from light are additive, all we have to do is add the three colors together. Besides the addition of the colors, there is no new math in this lesson.
Diffused light photography examples
When you are lighting a shoot, the quality of the light can be just as influential as the color temperature or the placement. And the better the quality — whether from proximity, brightness, etc. — the more detail you’ll get out of the subject you’re trying to light.
The specular reflection WebGL program in lesson 9.3 used a uniform variable to store the “shininess” value, but it is really a property of the model’s surfaces, not of the light source. Why wasn’t the shininess stored as an attribute variable of the model? Well, it could have been. If every triangle of the model had a different shininess, you would store an array of shininess values, one for each vertex. For a typical model, all of its surfaces have the same shininess and we store the value once in a uniform variable.


 Ms.Cici
 8618319014500