
Road Sign – Pedestrians Crossing Ahead - pedestrian signs australia
It is also very easy to just use rechargeable batteries, like those found here on amazon. If there are four then you can just recharge the two old ones using the battery charger after replacing them with two new batteries. This means you don’t have to constantly buy new AA batteries and throw out old ones. It’s also good to reduce your environmental impact, and is just an overall win-win.
When the battery level of your Oculus Quest 2 controllers gets low you’ll need to change the batteries. If you want to know the best way to change your Oculus Quest 2 controller batteries and replace them, then here’s how. After all, you can’t enjoy Virtual Reality with no Oculus Controller battery power.
Flashingbeacon traffic Light
The data disclosed on this site (“Disclosed Data”) and Downloaded Data may be used only for the following purposes:
First you’ll want to grab a couple of single AA batteries. The Meta Quest 2 controllers take alkaline batteries, disposable or rechargeable. Luckily the alkaline battery is the kind most commonly used in all sorts of appliances, and is what you’d call a typical AA battery.
MagneticFlashingBeacon
Safety Precautions for the use of PATLITE products are included in Product Specification Data or described in a separate hard-copy attachment contained in the product box or carton. Products Specification Data available on this site, however, only contains product specification data, and no information printed on such separate attachment is available on this site. Safety Precautions” contained in Product Specification Data are subject to change to reflect changes in legal requirements, but the Safety Precautions contained in the Product Specification Data are those issued in conformance with the legal requirements that prevailed at the time of initial release of the product and may not be the most current. Inquiries regarding Safety precautions” should be directed to PATLITE’s customer service desk.
PATLITE may terminate the utilizing agreement available under the Terms with User, in the event PATLITE finds that the User has violated any provision of the Terms when he or she uses the service offered on this site, or has committed any act that constitutes a breach of public order/morals or other laws, or has defamed PATLITE or has committed any act which are likely to cause damage to PATLITE in connection with the use of the services available on this site. In such case, the User shall immediately stop using all of the Downloaded Data. This provision also applies in the case when User loses his or her status as a PATLITE Web member.
LEDFlashing beacons
At the top of the battery compartment cover you’ll also see a little downwards arrow indented into the plastic, right below the ring at the top of the controller. This small eject icon shows you the direction to push to unlatch the battery cover. It can be hard to see, but easier to feel with one of your fingers.
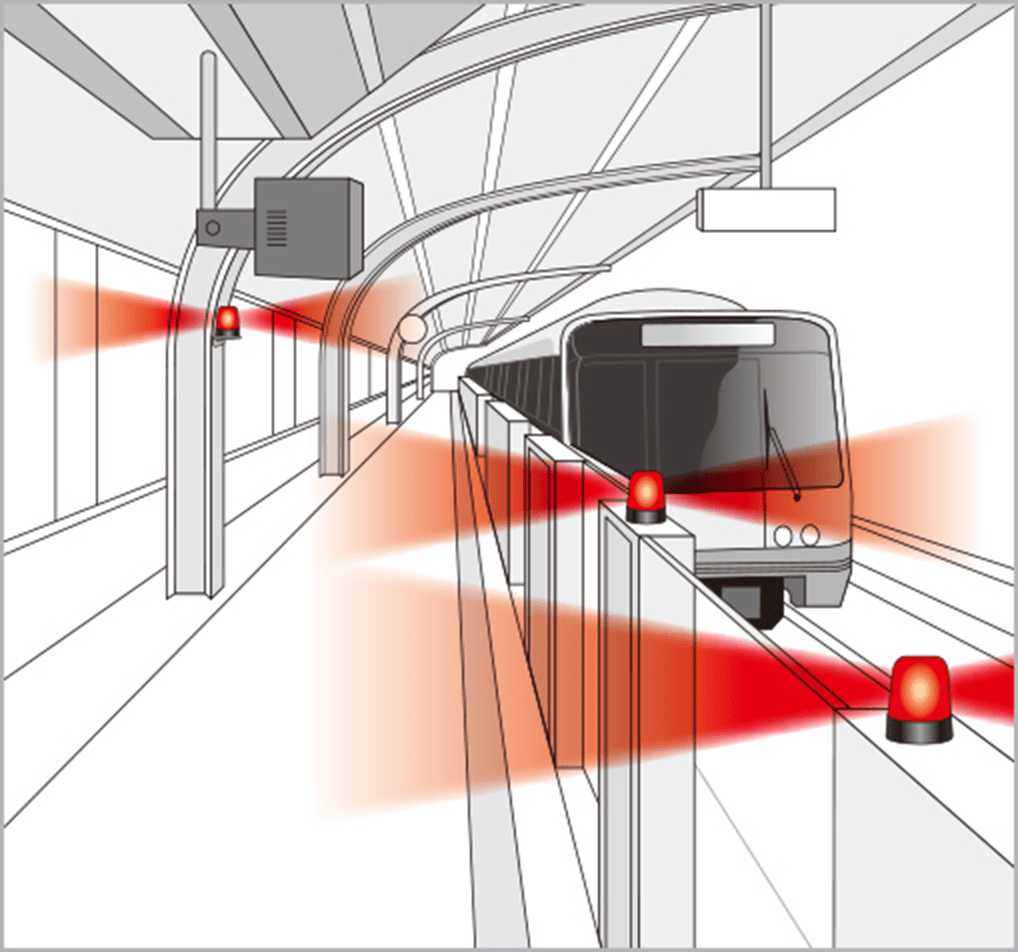
At this train station, a combination of flashing light and sound from the SL warns people at the platform of approaching trains.
If you’re still experiencing power issues with your Oculus Quest controllers like the battery percentage not updating, or the controllers still showing as being low power even with new batteries, then you should contact the Meta support team and possibly get replacement controllers.
User of this site, who also is a registered member of PATLITE Web Member, (“User”) may use the data downloaded from this site (“Downloaded Data”) at no charge and on a non-exclusive basis, only in accordance this Terms and Conditions for Data Download (“Terms”).
Services available on this site are subject to withdrawal, and the content and conditions of such services are subject to change without notice. PATLITE further reserves the right to revise the Terms without notice. Revised Terms, if any, will take effect and apply to all use of downloading services immediately upon PATLITE’s announcement of such revised Terms on this site.
Flashing beaconson vehicles
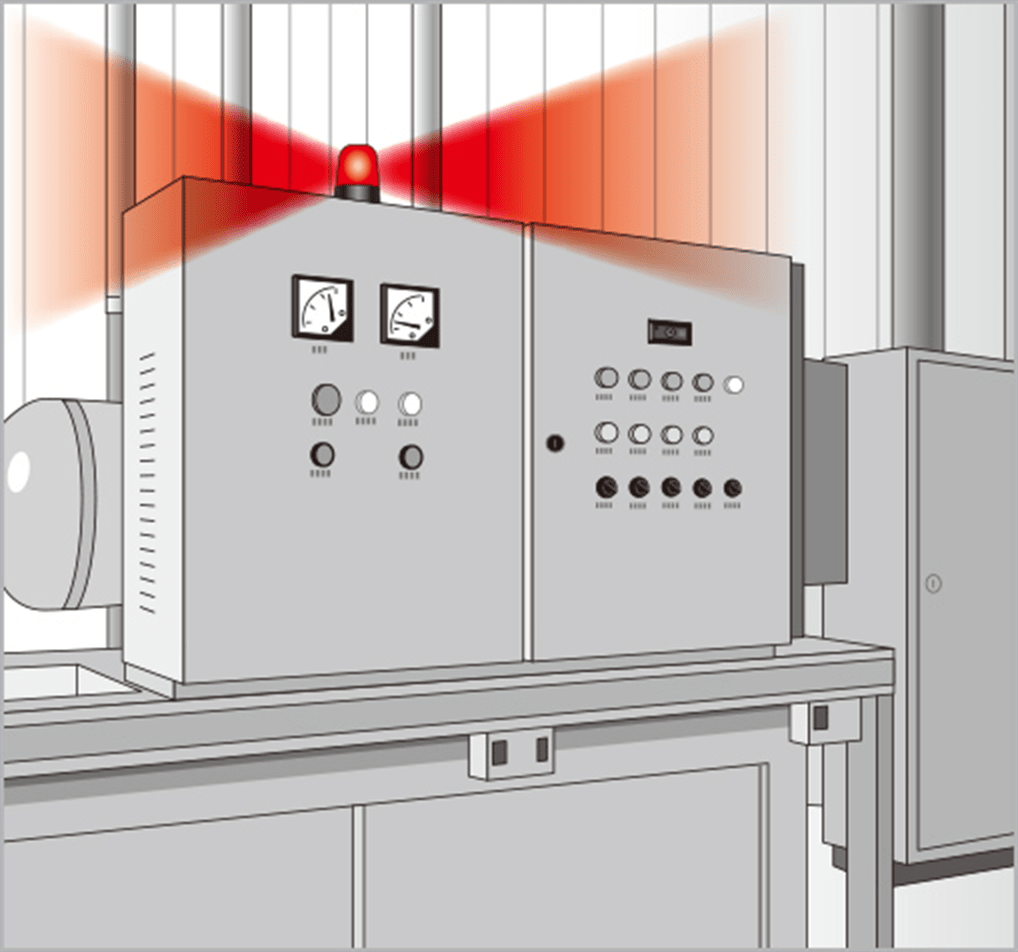
The SL on this control panel alternates between continuous, blinking, and triple flashing lights to indicate normal, warning, and critical conditions respectively.
Once the covers are removed make sure to dispose of the old batteries. Googling “nearby battery recycling” can show you some potential locations to dispose of old AA batteries.
Once you’ve located the cover, hold the controller in both hands and gently press your thumbs down in the center of the compartment. Then push the cover out towards the bottom of the controller. The goal here is to push the cover slightly inwards and outwards, unlatching it and also moving it away so that you can place in your new AA battery. This can be a little tricky your first few times doing it, and new quest controllers can be a little more stiff and difficult, but keep at it and you’ll get it.
First locate where the cover is. That will be on the outer side of the grip of the controller, the side that does not have the grip button and is completely smooth. If you haven’t removed the stickers indicating which hand to hold the controller in, that will be the side with the “L” or “R” sticker.
There are a ton of fantastic weapons to find and use in Metro Awakening: VR, and they’re pretty unique as far as Virtual Reality shooter weapons go. Despite Metro VR having about a fifth as many weapon options as any flatscreen Metro title, there are still some very fun guns and other gadgets to use in the game.
If you want to know more about the story in Metro Awakening: VR then here I’ll give you a quick spoiler free intro here at the start, and then delve into the full explanation of the Metro Awakening story afterwards.
If you use your Oculus Quest 2 a lot then you might want to consider getting some rechargeable AA batteries that come with battery chargers, so that you won’t have to throw away old disposable batteries and constantly have to buy more. It’s a good idea to keep your controller battery life from ruining your best Quest 2 experience.
Hey VR gamers and Metro lovers. Here's a few ways you can increase your success and enjoyment of Metro Awakening aka Metro VR aka finally another quality Virtual Reality shooter that isn't another sandbox or procedurally generated roguelike.
Now that the battery compartment is empty get your new battery and determine the positive and negative ends. The positive end will have a little nub on top, there should also be + and - signs on each side that show which end is positive and negative.
Grab a single AA battery, making sure the positive end is up, and slip the negative end into the bottom of the compartment (when the grip is pointed upwards as in these pictures). You can push down on the battery so that you have room to slip in the positive end facing upwards. If you’re still confused on which way the ends should go, there is a little diagram inside of the battery compartment which shows which way the positive end of the battery should go.
Copyright and other intellectual property rights in the data downloadable from this site belong to PATLITE Corporation (“PATLITE”) or the right holders from whom PATLITE has obtained necessary licenses for the use thereof.
The SL on this control panel alternates between continuous, blinking, and triple flashing lights to indicate normal, warning, and critical conditions respectively.
Once the new battery is inside, push the battery cover back down over the compartment. When you start up your Meta Quest 2 again, you will see the battery life percentage of your controllers update to reflect the charge of the new battery. It is recommended that you change the batteries of both controllers at the same time.
Once you’ve got your batteries it’s time to open the battery covers on the Quest 2 controllers so that you can remove the old AA batteries and replace them with new ones. Since there’s no latch or indentation in the controller it’s not immediately obvious how to do this, so we’ll go through it step by step.
Amber beacon light vehicles
Flashingbeacon light meaning
To remove the battery wedge one of your nails between the top of the battery on the positive end (or a thin tool that can fit in the gap). Then press down on the battery so that the top part of it comes away from the inside of the compartment. This will give you room to pull the battery towards you and out of the controller.
Unlike the Quest 2 headset itself or the Meta Quest Pro controllers, the Quest 2 touch controllers don’t have an internal battery or integrated battery that can be charged with a usb-c cable. Hopefully a built-in rechargeable battery will be included in future Quest models.
Here I’ll show you all of the Metro Awakening weapons including the order you find them in, how they function, and what each is good at.
PATLITE shall not be liable to Users for any direct or indirect damages resulting from the use or loss of use of the services available on this site (including, but not limited to damages caused by damaged data, suspended operation and loss of business information), even in circumstances that the likelihood of damage or third party claims for compensation are known in advance.
If you have fragile nails or simply don’t want to use them to remove the battery, get a thin tool like a pair of tweezers or thin spatula. You’ll either need to use that or one of your fingernails to remove the battery from the compartment.
This SL is mounted on the ceiling of a store, indicating emergencies by flashing light, which is visible from a distance.
At this train station, a combination of flashing light and sound from the SL warns people at the platform of approaching trains.
Leave the cover somewhere you won’t lose it for now. It’s time to remove the old battery and replace it. This can also be a little tricky and stiff the first couple of times, but once you get used to this it will be easy. As you can see in the little battery diagram inside the battery compartment, the positive end of the battery is the end that is pointing to the bottom of the controller grip. The negative end is pointed towards the ring.
This SL is mounted on the ceiling of a store, indicating emergencies by flashing light, which is visible from a distance.
The short version of how to replace your Oculus Quest 2 controller batteries is this: Remove the battery cover on your Quest controller. It’s on the grip of it on the side that doesn’t have the grip button. Then take out the old battery, dispose of it or recharge it, and replace it with a replacement battery before slipping the battery compartment cover back on. For a longer explanation with details and pictures, keep reading this article.


 Ms.Cici
 8618319014500